PyQt5 QListWidget – 获取选择矩形可见属性
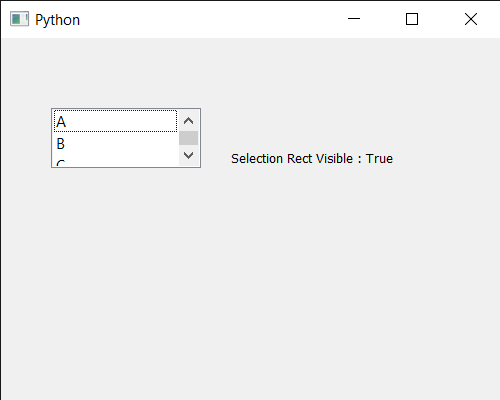
在本文中,我们将了解如何获取 QListWidget 的选择矩形可见属性。 QListWidget 是一个方便的类,它提供了一个带有经典的基于项目的界面的列表视图,用于添加和删除项目。 QListWidget 使用内部模型来管理列表中的每个 QListWidgetItem。如果此属性为 true,则选择矩形是可见的;否则它将被隐藏。可以借助setSelectionRectVisible方法进行设置。
Note: The selection rectangle will only be visible if the selection mode is in a mode where more than one item can be selected;即,如果选择模式是QAbstractItemView.SingleSelection,它不会绘制选择矩形。
In order to do this we will use isSelectionRectVisible method with the list widget object.
Syntax : list_widget.isSelectionRectVisible()
Argument : It takes no argument
Return : It returns bool
下面是实现
# importing libraries
from PyQt5.QtWidgets import *
from PyQt5 import QtCore, QtGui
from PyQt5.QtGui import *
from PyQt5.QtCore import *
import sys


class Window(QMainWindow):

    def __init__(self):
        super().__init__()

        # setting title
        self.setWindowTitle("Python ")

        # setting geometry
        self.setGeometry(100, 100, 500, 400)

        # calling method
        self.UiComponents()

        # showing all the widgets
        self.show()


    # method for components
    def UiComponents(self):

        # creating a QListWidget
        list_widget = QListWidget(self)

        # setting geometry to it
        list_widget.setGeometry(50, 70, 150, 60)

        # list widget items
        item1 = QListWidgetItem("A")
        item2 = QListWidgetItem("B")
        item3 = QListWidgetItem("C")

        # adding items to the list widget
        list_widget.addItem(item1)
        list_widget.addItem(item2)
        list_widget.addItem(item3)

        # setting selection mode property
        list_widget.setSelectionMode(QAbstractItemView.MultiSelection)

        # making selection rectangle visible
        list_widget.setSelectionRectVisible(True)

        # creating a label
        label = QLabel("GeesforGeeks", self)

        # setting geometry to the label
        label.setGeometry(230, 80, 280, 80)

        # making label multi line
        label.setWordWrap(True)

        # checking if selection rectangle is visible
        value = list_widget.isSelectionRectVisible()

        # setting text to the label
        label.setText("Selection Rect Visible : " + str(value))


# create pyqt5 app
App = QApplication(sys.argv)

# create the instance of our Window
window = Window()

# start the app
sys.exit(App.exec())
输出 : 