Python OpenCV – 仿射变换
OpenCV是用于计算机视觉、机器学习和图像处理的庞大开源库,现在它在实时操作中发挥着重要作用,这在当今的系统中非常重要。通过使用它,人们可以处理图像和视频以识别物体、面部,甚至是人类的笔迹。当它与 Numpuy 等各种库集成时, Python能够处理 OpenCV 数组结构以进行分析。
注意:更多信息请参考 OpenCV Python教程
仿射变换
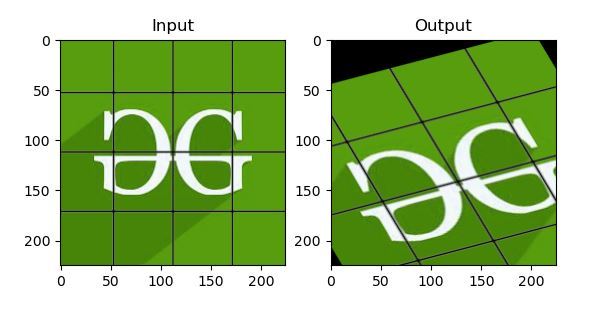
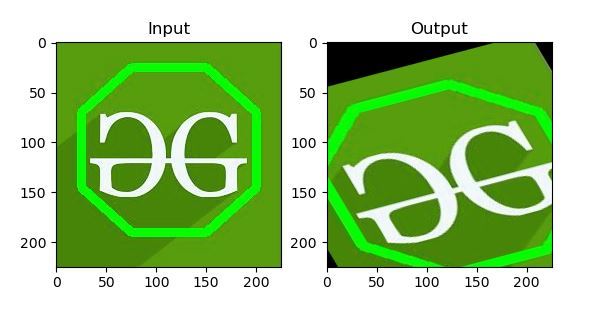
在仿射变换中,原始图像中的所有平行线在输出图像中仍然是平行的。为了找到变换矩阵,我们需要输入图像中的三个点及其在输出图像中的对应位置。然后cv2.getAffineTransform将创建一个 2×3 矩阵,该矩阵将传递给cv2.warpAffine 。
cv2.getAffineTransform 方法:
Syntax: cv2.getPerspectiveTransform(src, dst)
Parameters:
src: Coordinates of quadrangle vertices in the source image.
dst: Coordinates of the corresponding quadrangle vertices in the destination image.
cv2.warpAffine 方法:
Syntax: cv2.warpAffine(src, M, dsize, dst, flags, borderMode, borderValue)
Parameters:
src: input image.
dst: output image that has the size dsize and the same type as src.
M: transformation matrix.
dsize: size of the output image.
flags: combination of interpolation methods (see resize() ) and the optional flag
WARP_INVERSE_MAP that means that M is the inverse transformation (dst->src).
borderMode: pixel extrapolation method; when borderMode=BORDER_TRANSPARENT, it means that the pixels in the destination image corresponding to the “outliers” in the source image are not modified by the function.
borderValue: value used in case of a constant border; by default, it is 0.
示例 1:
import cv2
import numpy as np
from matplotlib import pyplot as plt


img = cv2.imread('food.jpeg')
rows, cols, ch = img.shape

pts1 = np.float32([[50, 50],
                   [200, 50],
                   [50, 200]])

pts2 = np.float32([[10, 100],
                   [200, 50],
                   [100, 250]])

M = cv2.getAffineTransform(pts1, pts2)
dst = cv2.warpAffine(img, M, (cols, rows))

plt.subplot(121)
plt.imshow(img)
plt.title('Input')

plt.subplot(122)
plt.imshow(dst)
plt.title('Output')

plt.show()

# Displaying the image
while(1):

    cv2.imshow('image', img)
    if cv2.waitKey(20) & 0xFF == 27:
        break

cv2.destroyAllWindows()
输出: 
示例 2:
import cv2
import numpy as np
from matplotlib import pyplot as plt


img = cv2.imread('food.jpeg')
rows, cols, ch = img.shape

pts1 = np.float32([[50, 50],
                   [200, 50],
                   [50, 200]])

pts2 = np.float32([[10, 100],
                   [200, 50],
                   [100, 250]])

M = cv2.getAffineTransform(pts1, pts2)
dst = cv2.warpAffine(img, M, (cols, rows))

plt.subplot(121)
plt.imshow(img)
plt.title('Input')

plt.subplot(122)
plt.imshow(dst)
plt.title('Output')
plt.show()

# Displaying the image
while(1):

    cv2.imshow('image', img)
    if cv2.waitKey(20) & 0xFF == 27:
        break

cv2.destroyAllWindows()
输出: 