使用 Web3js 与以太坊智能合约交互
以太坊是市场上的加密货币平台,就像比特币一样。它是一个开源和去中心化的区块链,以处理智能合约为特色。它有自己的加密货币,称为以太。以太坊中的智能合约是写实的。
TestRPC以太坊 TestRPC 就像区块链的手动模拟器。它提供区块链交互,而无需在实际的以太坊节点上运行。它还提供了测试区块链所需的所有功能。它基于 Node.js。
Web3.js Web3.js 是一个基于以太坊的 JavaScript API,它允许我们使用不同的服务器(如 HTTP)与本地或远程以太坊节点进行交互。它与以太坊区块链交互,并可以根据开发人员的要求从区块链中检索数据。
本文介绍了如何使用 Web3.js 和 TestRPC 与您的以太坊智能合约进行交互。建议您先阅读如何在 Remix-IDE 上工作,然后再继续。
在我们继续这些步骤之前,请按如下方式安装 TestRPC 和 Web3JS –
1. 测试RPC
第一步:打开控制台或命令行,运行以下命令查看node和npm是否安装。
$ node -v
$ npm -v
如果上述命令无法识别,请从 Nodejs.org 下载它们以用于 windows 或使用以下命令(对于 macOS)。 npm 包与节点一起安装。
$ brew install node
要更新这些软件包,请使用以下命令-
$ brew upgrade node
第 2 步:现在使用以下命令安装 ethereumjs-testrpc-
$ npm install -g etherumjs-testrpc
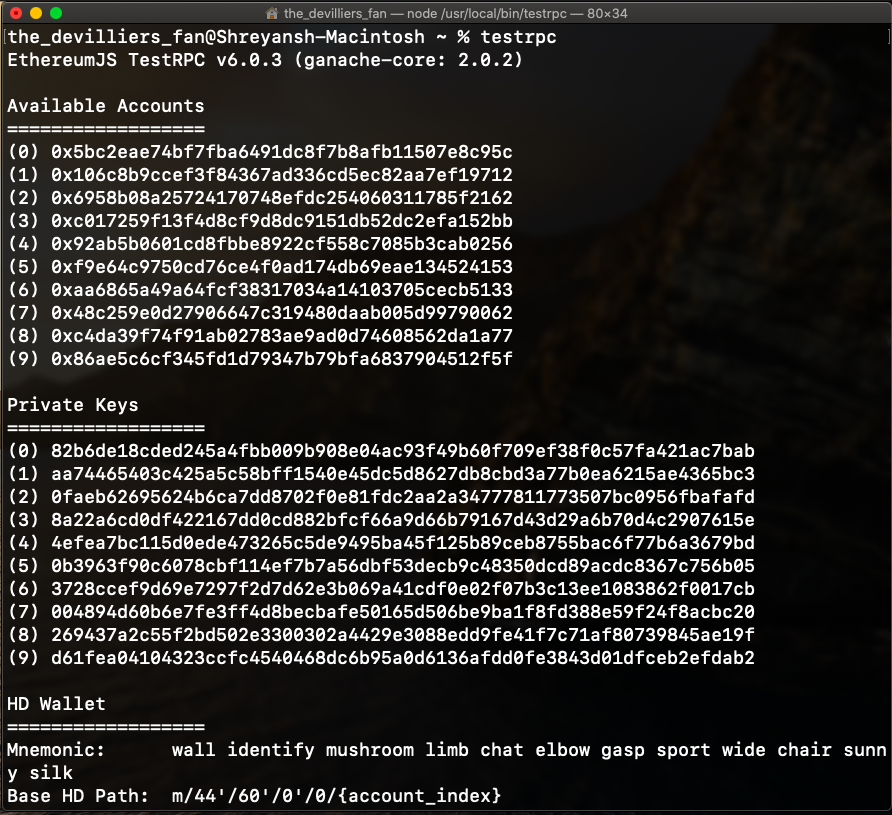
第 3 步:现在您可以使用以下命令启动服务器
$ testrpc
2. Web3.js
第 1 步:打开控制台或命令行并移动到包含页面 JavaScript 的文件夹,如下所示 -
$ cd desktop/myproject
第 2 步:现在,运行 npm init 命令创建一个 package.json 文件,该文件将存储项目依赖项:
$ npm init
第三步:完成上述安装后,运行以下命令安装web3.js-
$ npm install ethereum/web3.js0.20.0 –save
安装 TestRPC 和 Web3.js 后,创建一个要与 Web3.js 连接的智能合约。
第 1 步:打开 Remix-IDE。
第 2 步:创建如下所示的示例智能合约或创建任何其他智能合约。
Solidity
pragma solidity ^0.4.26;

// Creating a contract
contract GFG{

// Defining a function to
// print a message
function get_output() public pure returns (string)
{
  return ("Hi, your contract ran successfully");
}
}
Javascript
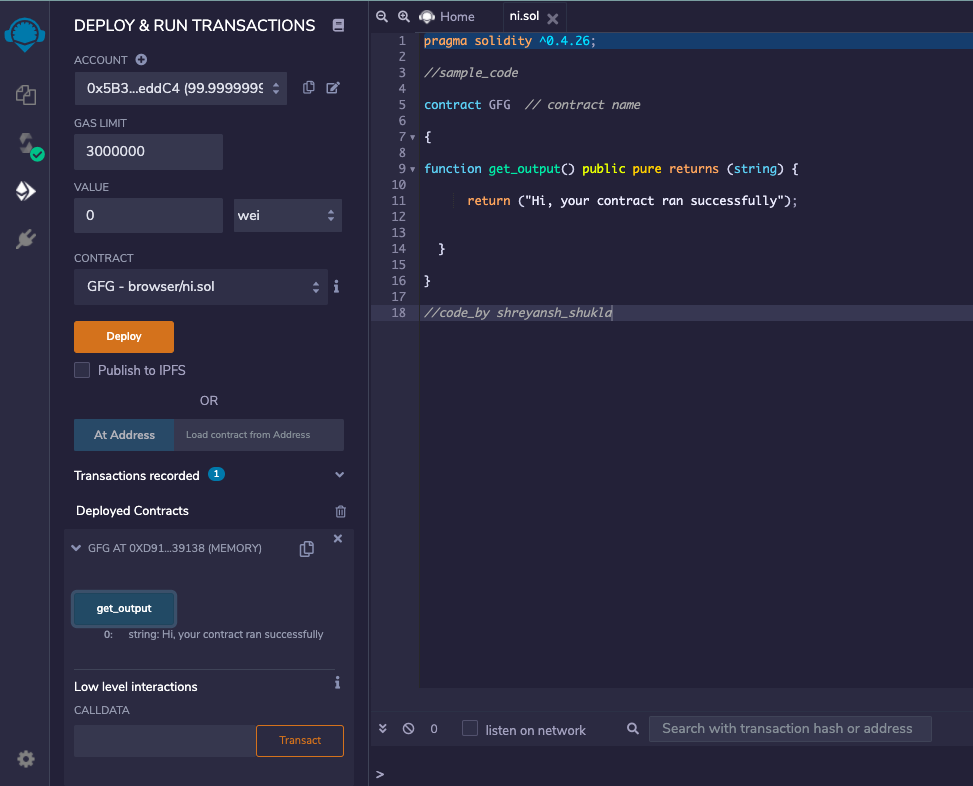
第 3 步:编译您的代码并转到 Deploy 部分。
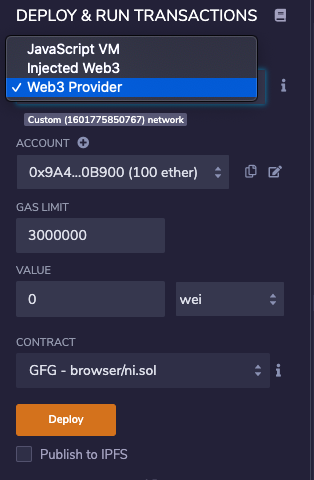
第 4 步:选择环境为 Web3 Provider 并输入 TestRPC 服务器http://localhost:8545 ,确保 TestRPC 在您的系统上运行。
第 5 步:现在使用以下代码,将您的网页代码连接到您的智能合约。
Javascript
此代码直接来自 Web3.js Github 页面。
NOTE:

  1. Variable names can be changes according to requirements.
  2. You need to paste contract address and ABI as asked above in the code.
  3. You will get the contract address when you deploy your smart contract.
  4. You will get ABI when you compile your smart contract in compilation details.
  5. You can use all your contract functions from here onwards.
  6. The TestRPC command which we ran provides us 10 accounts, here we are using the first one.

输出:可以自定义输出,如您想在网页上显示,但在 Remix-IDE 中,部署智能合约后输出将如下所示

这就是使用 web3.js 与您的智能合约进行交互的方式。继续探索有关以太坊区块链的更多信息 🙂