Spring Boot 执行器
Spring Framework 是最常用的平台,于 2002 年 10 月发布,用于构建有效和高效的基于 Web 的应用程序。最重要的是,Spring Boot 框架于 2014 年 4 月发布,以克服手动配置的繁琐工作。 Spring Boot 的主要目的是实现自动配置功能。借助此功能和其他功能,我们能够创建一个独立的 Spring Web 应用程序。开发和管理应用程序是应用程序生命周期中最重要的两个方面。了解应用程序下面发生了什么非常重要。此外,当我们将应用程序推向生产时,管理它逐渐变得至关重要。因此,始终建议在开发阶段和生产阶段监控应用程序。
监控/管理应用程序的优势
- 它提高了客户满意度。
- 它减少了停机时间。
- 它提高了生产力。
- 它改善了网络安全管理。
- 它提高了转化率。
Spring Boot – 执行器
- 借助 Spring Boot,我们可以实现上述目标。
- Spring Boot 的“Actuator”依赖项用于监视和管理 Spring Web 应用程序。
- 我们可以在 HTTP 端点或 JMX 的帮助下使用它来监控和管理应用程序。
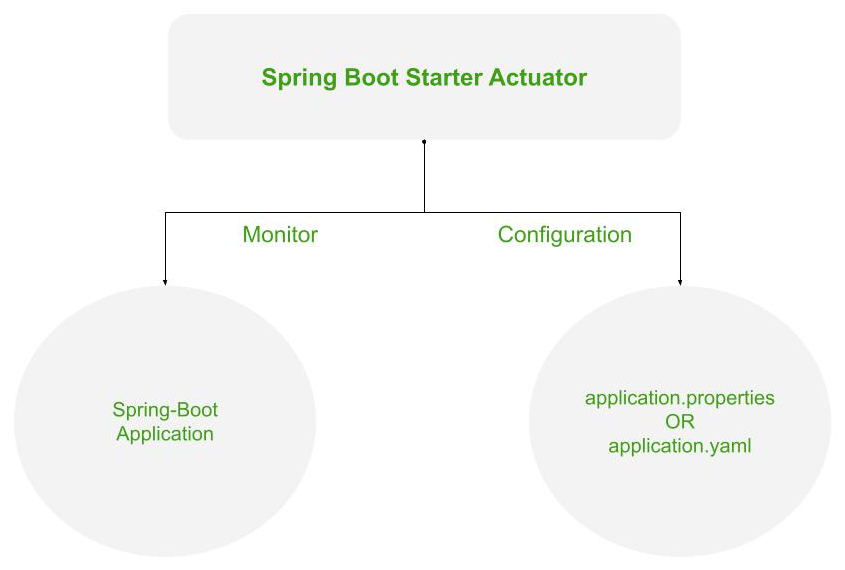
弹簧执行器的工作
要使用“执行器”,请在应用程序的项目构建中添加以下依赖项。
Maven -> pom.xml


        org.springframework.boot
        spring-boot-starter-actuator
Gradle -> build.gradle

dependencies {
    implementation 'org.springframework.boot:spring-boot-starter-actuator'
}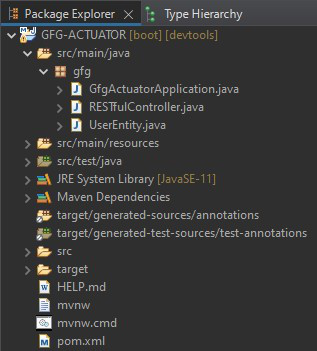
项目结构——Maven
pom.xml (Web 应用程序的配置)
XML
    4.0.0

        org.springframework.boot
        spring-boot-starter-parent
        2.6.4


    sia
    GFG-ACTUATOR
    0.0.1-SNAPSHOT
    GFG-ACTUATOR
    Spring Boot Starter Actuator

        11


            org.springframework.boot
            spring-boot-starter-actuator


            org.springframework.boot
            spring-boot-starter-web


            org.springframework.boot
            spring-boot-devtools
            runtime
            true


            org.projectlombok
            lombok
            true


            org.springframework.boot
            spring-boot-starter-test
            test


                org.springframework.boot
                spring-boot-maven-plugin


                            org.projectlombok
                            lombok
Java
package gfg;

import org.springframework.boot.SpringApplication;
import org.springframework.boot.autoconfigure.SpringBootApplication;

@SpringBootApplication
public class GfgActuatorApplication {

    public static void main(String[] args)
    {
        SpringApplication.run(GfgActuatorApplication.class,
                              args);
    }
}
Java
package gfg;

import lombok.Data;
import lombok.RequiredArgsConstructor;
import org.springframework.stereotype.Component;

@Component
@Data
@RequiredArgsConstructor
public class UserEntity {
    String id = "1";
    String name = "Darshan.G.Pawar";
    String userName = "@drash";
    String email = "drash@geek";
    String pincode = "422-009";
}
Java
package gfg;

import org.springframework.beans.factory.annotation.Autowired;
import org.springframework.web.bind.annotation.GetMapping;
import org.springframework.web.bind.annotation.RequestMapping;
import org.springframework.web.bind.annotation.RestController;

@RestController
@RequestMapping("/get")
public class RESTfulController {

    @Autowired
    UserEntity entity;

    @GetMapping("/data") public UserEntity getEntity()
    {
        return entity;
    }
}
GfgActuatorApplication。 Java (应用程序的引导)
Java
package gfg;

import org.springframework.boot.SpringApplication;
import org.springframework.boot.autoconfigure.SpringBootApplication;

@SpringBootApplication
public class GfgActuatorApplication {

    public static void main(String[] args)
    {
        SpringApplication.run(GfgActuatorApplication.class,
                              args);
    }
}
用户实体。 Java (表示模型数据的实体类)
- 此类充当简单的Java bean,其属性由 REST API 的 get() 方法作为 JSON 响应返回。
- “Lombok”库用于在运行时使用“ @Data ”注释自动生成 GETTER/SETTER 方法。
- ' @RequiredArgsConstructor ' 注释用于生成零参数构造函数,如果存在 final 或 ' @NonNull'字段,则创建相应的参数构造函数。
- 要在应用程序中添加“Lombok”库,请在应用程序的项目构建中添加以下依赖项。
Maven -> pom.xml


    org.projectlombok
    lombok
    true
使用'@Component' 注释,以便此 bean 自动在 Spring 的应用程序上下文中注册。
Java
package gfg;

import lombok.Data;
import lombok.RequiredArgsConstructor;
import org.springframework.stereotype.Component;

@Component
@Data
@RequiredArgsConstructor
public class UserEntity {
    String id = "1";
    String name = "Darshan.G.Pawar";
    String userName = "@drash";
    String email = "drash@geek";
    String pincode = "422-009";
}
RESTful 控制器。 Java (一个 REST API 控制器)
此控制器的 get() 方法使用 UserEntity bean 返回 JSON 响应。 UserEntiy bean 是通过在 Spring 的应用程序上下文中注册的“ @Autowired ”注释外包的。
Java
package gfg;

import org.springframework.beans.factory.annotation.Autowired;
import org.springframework.web.bind.annotation.GetMapping;
import org.springframework.web.bind.annotation.RequestMapping;
import org.springframework.web.bind.annotation.RestController;

@RestController
@RequestMapping("/get")
public class RESTfulController {

    @Autowired
    UserEntity entity;

    @GetMapping("/data") public UserEntity getEntity()
    {
        return entity;
    }
}
输出:
在这里,JSON Formatter Chrome 扩展用于自动解析 JSON 正文。此外,还需要与“执行器”一起使用。
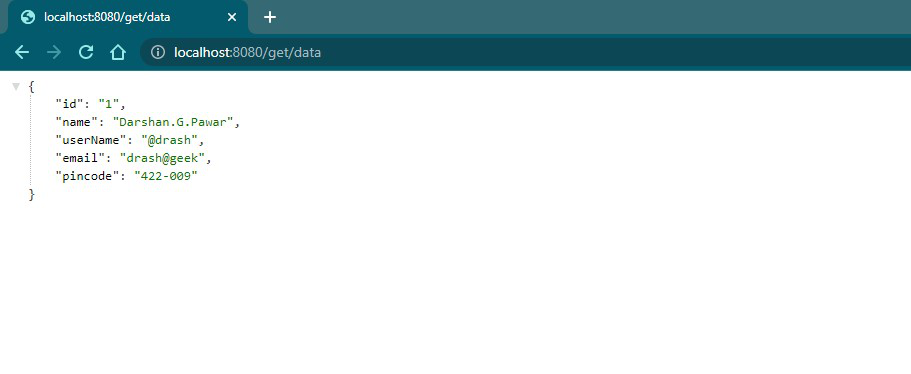
REST API 返回的 JSON 响应
使用 Spring Boot 执行器
要访问“Actuator”服务,您必须使用 HTTP 端点,因为它可以可靠地使用。默认端点是'/actuator'。
例子:
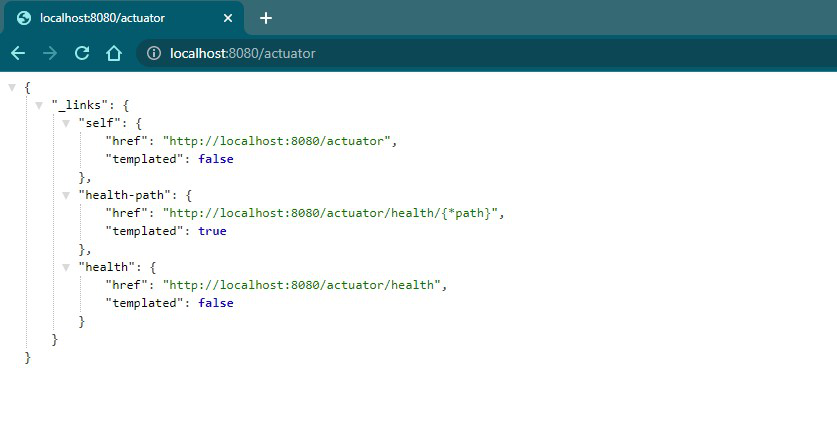
您还可以通过在 application.properties 文件中添加以下内容来更改默认端点。
management.endpoints.web.base-path=/details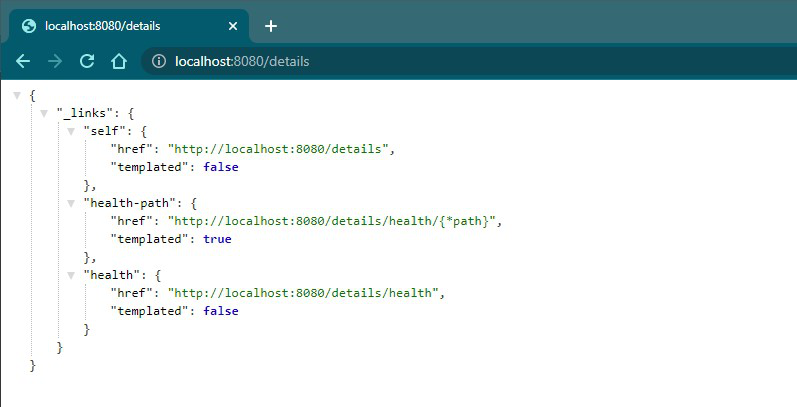
您可以单击上述这些链接并查看相应的信息。此外,您可以激活其他执行器 ID 并在“/执行器”之后使用它们以查看更多信息。例如,默认情况下会激活“健康”ID。因此,您可以单击图像中的链接或直接使用“http://localhost:8080/actuator/health”。
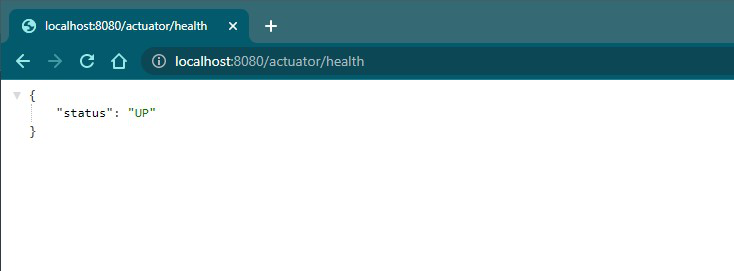
应用程序的运行状况
“UP”表示应用程序的运行状况良好。共有 25 个 ID,其中常用的在这里列出 - ID Description beans Displays a complete list of all the Spring beans in your application. caches Exposes available caches. conditions Shows the conditions that were evaluated on configuration and auto-configuration classes and the reasons why they did or did not match. health Shows application health information. httptrace Displays HTTP trace information (by default, the last 100 HTTP request-response exchanges). Requires an HttpTraceRepository bean. loggers Shows and modifies the configuration of loggers in the application. mappings Displays a collated list of all @RequestMapping paths. sessions Allows retrieval and deletion of user sessions from a Spring Session-backed session store. Requires a servlet-based web application that uses Spring Session. threaddump Performs a thread dump.

访问上述项目的 'bean' ID
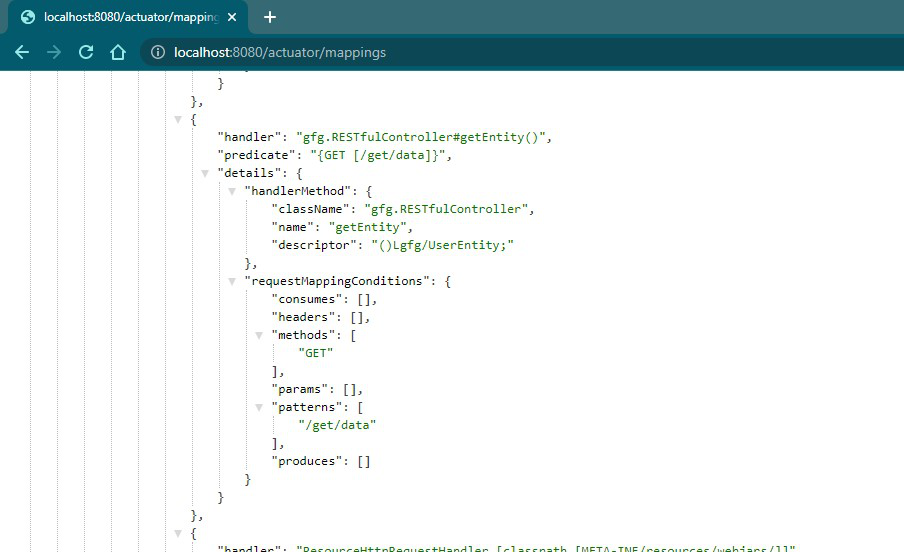
访问上述项目的“映射”ID
包括 ID/端点
默认情况下,所有 ID 都设置为 false,“health”除外。要包含 ID,请在 application.properties 文件中使用以下属性。
management.endpoint..enabled

Example -> management.endpoint.metrics.enabled=true
或者,您可以列出所有要包含的 ID,并用逗号分隔。
management.endpoints.web.exposure.include=metrics,info这将仅包括指标和信息 ID,并将排除所有其他(“健康”)。要添加/包含有关您的应用程序的所有 ID 信息,您可以在 application.properties 文件中执行此操作,只需添加以下内容 -
management.endpoints.web.exposure.include=*输出:
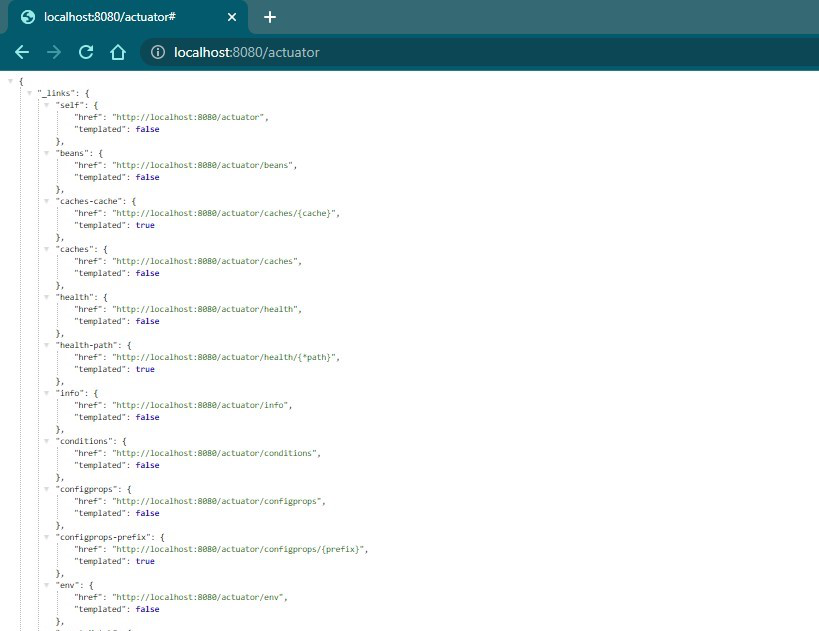
现在启用所有 ID 或端点
排除 ID/端点
要排除 ID 或端点,请使用以下属性并在 application.properties 文件中列出以逗号分隔的各个 ID。
management.endpoints.web.exposure.exclude

Example -> management.endpoints.web.exposure.exclude=info
使用“*”代替属性中的 ID 以排除所有 ID 或端点。
Notes:
- Before setting the management.endpoints.web.exposure.include, ensure that the exposed actuators do not contain sensitive information.
- They should be secured by placing them behind a firewall or are secured by something like Spring Security.