- 电话 - C# (1)
- 电话 - C# 代码示例
- 找到我的电话 (1)
- 电话模式 (1)
- Android 拨打电话
- Android 拨打电话(1)
- 是的电话验证 (1)
- 电话正则表达式 (1)
- django 电话字段 - Python (1)
- 输入电话 html (1)
- 电话标签 - Html (1)
- django 电话字段 - Python 代码示例
- 输入电话 html 代码示例
- 找到我的电话 - 任何代码示例
- 电话标签 - Html 代码示例
- 电话模式 - 任何代码示例
- 电话:href (1)
- 是的电话验证 - 任何代码示例
- 电话正则表达式 - 任何代码示例
- 如何从您的 Android 应用程序拨打电话?
- 如何从您的 Android 应用程序拨打电话?(1)
- 模式电话 js - Javascript (1)
- 从锚标签打开电话 (1)
- html 电话 - Html (1)
- html 电话 - Html (1)
- 电话上的代码 grepper (1)
- vue 电话输入 (1)
- 模式电话 js - Javascript 代码示例
- 如何将您的网站设置为电话 (1)
📅 最后修改于: 2021-01-05 05:03:29 🧑 作者: Mango
Android提供了内置的电话应用程序,在某些情况下,我们可能需要通过我们的应用程序拨打电话。通过将隐式Intent与适当的操作配合使用,可以轻松完成此操作。另外,我们可以使用PhoneStateListener和TelephonyManager类,以便监视设备上某些电话状态的变化。
本章列出了创建可用于拨打电话的应用程序的所有简单步骤。您可以通过调用Android的内置“电话呼叫”功能来使用Android Intent拨打电话。下一节将说明进行调用所需的Intent对象的不同部分。
意图对象-拨打电话的动作
您将使用ACTION_CALL操作来触发Android设备中可用的内置电话功能。以下是使用ACTION_CALL动作创建意图的简单语法
Intent phoneIntent = new Intent(Intent.ACTION_CALL);
您可以使用ACTION_DIAL操作而不是ACTION_CALL,在这种情况下,您可以选择在拨打电话之前修改硬编码的电话号码,而不是直接拨打电话。
意图对象-拨打电话的数据/类型
要拨打给定号码91-000-000-0000的电话,您需要使用setData()方法将tel:指定为URI,如下所示:
phoneIntent.setData(Uri.parse("tel:91-000-000-0000"));
有趣的一点是,要拨打电话,您无需指定任何其他数据或数据类型。
例
以下示例向您实际展示了如何使用Android Intent拨打给定手机号码的电话。
要试验此示例,您将需要配备最新的Android OS的实际移动设备,否则,您将不得不使用可能无法正常工作的仿真器。
| Step | Description |
|---|---|
| 1 | You will use Android studio IDE to create an Android application and name it as My Application under a package com.example.saira_000.myapplication. |
| 2 | Modify src/MainActivity.java file and add required code to take care of making a call. |
| 3 | Modify layout XML file res/layout/activity_main.xml add any GUI component if required. I’m adding a simple button to Call 91-000-000-0000 number |
| 4 | No need to define default string constants.Android studio takes care of default constants. |
| 5 | Modify AndroidManifest.xml as shown below |
| 6 | Run the application to launch Android emulator and verify the result of the changes done in the application. |
以下是修改后的主要活动文件src / MainActivity.java的内容。
package com.example.saira_000.myapplication;

import android.Manifest;
import android.content.Intent;
import android.content.pm.PackageManager;
import android.net.Uri;
import android.os.Bundle;
import android.support.v4.app.ActivityCompat;
import android.support.v7.app.AppCompatActivity;
import android.view.View;
import android.widget.Button;

public class MainActivity extends AppCompatActivity {
   private Button button;

   @Override
   protected void onCreate(Bundle savedInstanceState) {
      super.onCreate(savedInstanceState);
      setContentView(R.layout.activity_main);
      button = (Button) findViewById(R.id.buttonCall);

      button.setOnClickListener(new View.OnClickListener() {
         public void onClick(View arg0) {
            Intent callIntent = new Intent(Intent.ACTION_CALL);
            callIntent.setData(Uri.parse("tel:0377778888"));

            if (ActivityCompat.checkSelfPermission(MainActivity.this,
               Manifest.permission.CALL_PHONE) != PackageManager.PERMISSION_GRANTED) {
                  return;
               }
               startActivity(callIntent);
         }
      });

   }
}
以下是res / layout / activity_main.xml文件的内容-
下面将RES /值的内容/字符串.XML定义两个新常量-
My Application
以下是AndroidManifest.xml的默认内容-
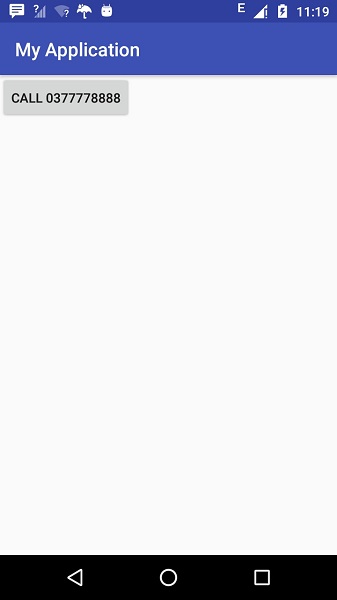
让我们尝试运行您的“我的应用程序”应用程序。我假设您已将实际的Android Mobile设备与计算机连接。要从Android Studio运行该应用,请打开您项目的活动文件之一,然后点击运行 工具栏上的图标。选择您的移动设备作为选项,然后检查将显示以下屏幕的移动设备-

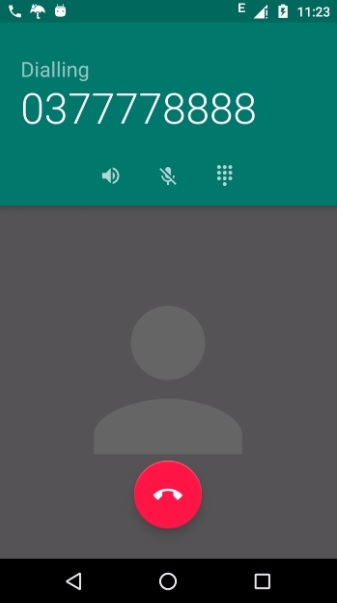
现在使用“呼叫”按钮拨打电话,如下所示:
