- 禁用多点触控 kivy (1)
- 禁用多点触控 kivy - 任何代码示例
- Android 中的触控和事件
- Android 中的触控和事件(1)
- 阅读更多点 css (1)
- 阅读更多点 css 代码示例
- 电容式触控技术
- 电容式触控技术(1)
- 电容式触控技术(1)
- 电容式触控技术
- 电容式触控技术
- 电容式触控技术(1)
- 在 R 编程中向绘图中添加更多点 – points()函数
- Android 5(1)
- android (1)
- Android 5
- Android 1.0 和 Android 2.3.7 的区别
- Android 1.0 和 Android 2.3.3 的区别
- Android 1.0 和 Android 2.3.6 的区别
- Android 1.0 和 Android 1.5 的区别
- Android 1.0 和 Android 3.2.2 的区别
- Android 1.0 和 Android 4.1.2 的区别
- Android 1.0 和 Android 4.1.2 的区别(1)
- Android 1.0 和 Android 8.1 的区别(1)
- Android 1.0 和 Android 6 的区别(1)
- Android 1.0 和 Android 2.3.7 的区别(1)
- Android 1.0 和 Android 4.3 的区别
- Android 1.0 和 Android 3.0 的区别(1)
- Android 1.0 和 Android 3.2.2 的区别(1)
📅 最后修改于: 2021-01-05 05:23:23 🧑 作者: Mango
多于一个手指同时触摸屏幕时,就会发生多点触摸手势。 Android允许我们检测这些手势。
每当多个手指同时触摸屏幕时,Android系统都会生成以下触摸事件。
| Sr.No | Event & description |
|---|---|
| 1 |
ACTION_DOWN For the first pointer that touches the screen. This starts the gesture. |
| 2 |
ACTION_POINTER_DOWN For extra pointers that enter the screen beyond the first. |
| 3 |
ACTION_MOVE A change has happened during a press gesture. |
| 4 |
ACTION_POINTER_UP Sent when a non-primary pointer goes up. |
| 5 |
ACTION_UP Sent when the last pointer leaves the screen. |
因此,为了检测上述任何事件,您需要重写onTouchEvent()方法并手动检查这些事件。其语法如下-
public boolean onTouchEvent(MotionEvent ev){
   final int actionPeformed = ev.getAction();

   switch(actionPeformed){
      case MotionEvent.ACTION_DOWN:{
         break;
      }

      case MotionEvent.ACTION_MOVE:{
         break;
      }
      return true;
   }
}
在这些情况下,您可以执行任何喜欢的计算。例如缩放,缩小等为了获得X和Y轴的坐标,可以调用getX()和getY()方法。其语法如下-
final float x = ev.getX();
final float y = ev.getY();
除了这些方法之外,MotionEvent类还提供了其他方法,可以更好地处理多点触摸。这些方法在下面列出-
| Sr.No | Method & description |
|---|---|
| 1 |
getAction() This method returns the kind of action being performed |
| 2 |
getPressure() This method returns the current pressure of this event for the first index |
| 3 |
getRawX() This method returns the original raw X coordinate of this event |
| 4 |
getRawY() This method returns the original raw Y coordinate of this event |
| 5 |
getSize() This method returns the size for the first pointer index |
| 6 |
getSource() This method gets the source of the event |
| 7 |
getXPrecision() This method return the precision of the X coordinates being reported |
| 8 |
getYPrecision() This method return the precision of the Y coordinates being reported |
例
这是演示使用多点触控的示例。它创建了一个基本的Multitouch手势应用程序,该应用程序使您可以在执行多点触摸时查看坐标。
要尝试使用此示例,您需要在实际设备上运行它。
| Steps | Description |
|---|---|
| 1 | You will use android studio to create an Android application under a package com.example.sairamkrishna.myapplication. |
| 2 | Modify src/MainActivity.java file to add multitouch code. |
| 3 | Modify the res/layout/activity_main to add respective XML components. |
| 4 | Run the application and choose a running android device and install the application on it and verify the results. |
以下是修改后的主要活动文件src / MainActivity.java的内容。
package com.example.sairamkrishna.myapplication;

import android.app.Activity;
import android.os.Bundle;
import android.view.MotionEvent;
import android.view.View;
import android.widget.EditText;
import android.widget.TextView;

public class MainActivity extends Activity {
   float xAxis = 0f;
   float yAxis = 0f;

   float lastXAxis = 0f;
   float lastYAxis = 0f;

   EditText ed1, ed2, ed3, ed4;
   TextView tv1;

   @Override
   protected void onCreate(Bundle savedInstanceState) {
      super.onCreate(savedInstanceState);
      setContentView(R.layout.activity_main);

      ed1 = (EditText) findViewById(R.id.editText);
      ed2 = (EditText) findViewById(R.id.editText2);
      ed3 = (EditText) findViewById(R.id.editText3);
      ed4 = (EditText) findViewById(R.id.editText4);

      tv1=(TextView)findViewById(R.id.textView2);

      tv1.setOnTouchListener(new View.OnTouchListener() {
         @Override
         public boolean onTouch(View v, MotionEvent event) {
            final int actionPeformed = event.getAction();

            switch(actionPeformed){
               case MotionEvent.ACTION_DOWN:{
                  final float x = event.getX();
                  final float y = event.getY();

                  lastXAxis = x;
                  lastYAxis = y;

                  ed1.setText(Float.toString(lastXAxis));
                  ed2.setText(Float.toString(lastYAxis));
                  break;
               }

               case MotionEvent.ACTION_MOVE:{
                  final float x = event.getX();
                  final float y = event.getY();

                  final float dx = x - lastXAxis;
                  final float dy = y - lastYAxis;

                  xAxis += dx;
                  yAxis += dy;

                  ed3.setText(Float.toString(xAxis));
                  ed4.setText(Float.toString(yAxis));
                  break;
               }
            }
            return true;
         }
      });
   }
}
以下是xml res / layout / activity_main.xml的修改内容。
在下面的代码中abc表示tutorialspoint.com的徽标
以下是res / values /字符串.xml的内容。
My Application
以下是AndroidManifest.xml文件的内容。
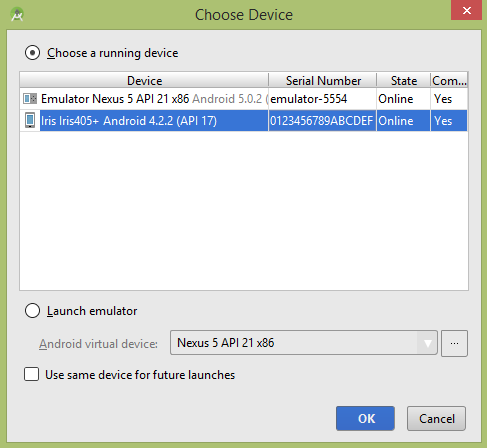
让我们尝试运行您的应用程序。我假设您已将实际的Android Mobile设备与计算机连接。要从android studio运行该应用,请打开您项目的活动文件之一,然后点击运行 工具栏中的图标。在启动应用程序之前,Android Studio将显示以下窗口,以选择要在其中运行Android应用程序的选项。

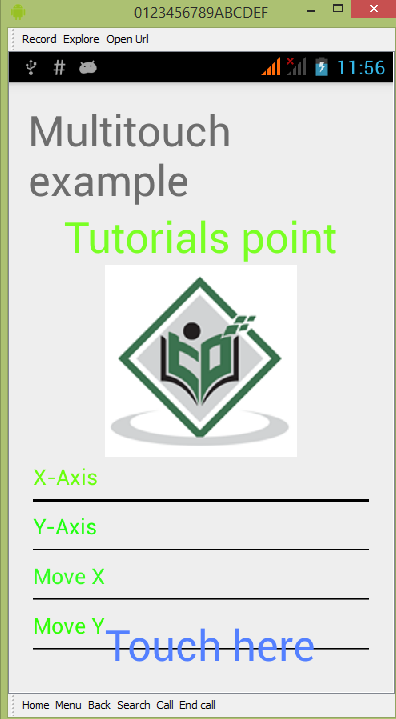
选择您的移动设备作为选项,然后检查将显示默认屏幕的移动设备-

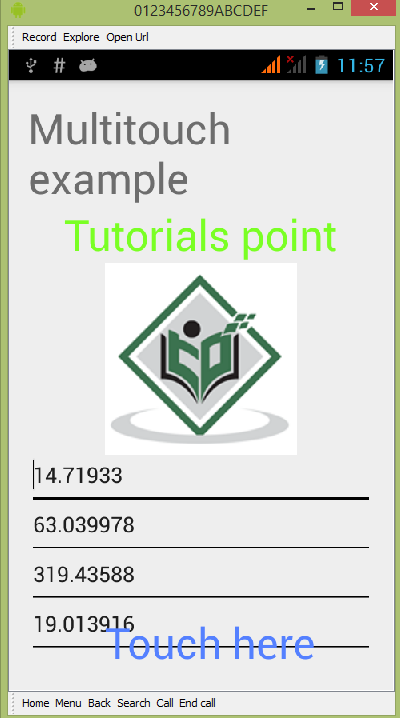
默认情况下,您不会在任何字段中看到任何内容。现在,只需点击“触摸此处”区域,然后在字段中查看一些数据。它显示如下-

您将看到“移动”字段中的数据为0,因为仅执行了一次触摸手势。现在点击屏幕并开始拖动手指。您将在移动字段的数据中看到更改。它显示如下-
