- Spring Boot – 抛出建议后的 AOP
- Spring Boot – 抛出建议后的 AOP(1)
- Spring Boot AOP围绕建议(1)
- Spring Boot AOP围绕建议
- Spring Boot AOP(1)
- Spring Boot AOP
- Spring AOP-返回建议后基于XML
- Spring AOP-返回建议后基于XML(1)
- Spring AOP-返回建议后基于注释
- Spring AOP-返回建议后基于注释(1)
- Spring Boot – 返回通知后的 AOP
- Spring Boot – 返回通知后的 AOP(1)
- Spring AOP-基于建议的XML
- Spring AOP-基于XML的建议(1)
- Spring AOP-基于建议的XML(1)
- Spring AOP-基于XML的建议
- Spring AOP-建议后基于注释(1)
- Spring AOP-基于建议的注释(1)
- Spring AOP-基于建议的注释
- Spring AOP-建议后基于注释
- 建议之前的Spring Boot
- Spring AOP示例
- Spring AOP示例(1)
- Spring AOP-在建议之前基于注释
- 咨询后的Spring Boot AOP
- 咨询后的Spring Boot AOP(1)
- Spring Boot – AOP 和 OOP 的区别
- Spring Boot – AOP 和 OOP 的区别(1)
- Spring AOP-投掷建议后基于XML的(1)
📅 最后修改于: 2021-01-11 05:20:37 🧑 作者: Mango
返回建议后的Spring Boot AOP
返回后是Spring AOP中的一个建议,该建议通常在完成连接点完成(执行)之后调用。如果引发异常,则不会调用。我们可以使用@AfterReturning批注在应用程序中返回建议后实现。注释将函数标记为要在PointCut覆盖的方法之前执行的建议。
返回建议后,当匹配的方法执行正常返回值时运行。我们在return属性中定义的名称必须与advice方法中的参数名称相对应。当一个方法返回一个值时,该值将作为相应的参数值传递给通知方法。
让我们在应用程序中返回建议后实现。
返回建议示例后的Spring Boot
步骤1:打开Spring Initializr http://start.spring.io 。
步骤2:提供群组名称。我们提供了组名com.javatpoint。
第3步:提供工件ID。我们提供了Artifact ID返回操作后aop示例。
步骤4:添加Spring Web依赖项。
步骤5:点击Generate(生成)按钮。当我们单击Generate按钮时,它将所有规范包装在jar文件中,并将其下载到本地系统。
步骤6:解压缩下载的jar文件。
步骤7:使用以下步骤导入文件夹:
文件->导入->现有Maven项目->下一步->浏览文件夹aop-returning-advice-example- >完成。
步骤8:打开pom.xml文件并添加以下AOP依赖项。它是使用Spring AOP和AspectJ进行面向方面的编程的入门。
org.springframework.boot
spring-boot-starter-aop


pom.xml


4.0.0
com.javatpoint
aop-after-returning-advice-example
0.0.1-SNAPSHOT
jar
aop-after-returning-advice-example
Demo project for Spring Boot

org.springframework.boot
spring-boot-starter-parent
2.2.2.RELEASE


UTF-8
UTF-8
1.8


org.springframework.boot
spring-boot-starter-aop


org.springframework.boot
spring-boot-starter-test
test


org.springframework.boot
spring-boot-maven-plugin
步骤9:在src / main / java文件夹中创建一个名为com.javatpoint.model的包。
步骤10:在包com.javatpoint.model中创建一个名称为Account的类。
在“帐户”类中,执行以下操作:
- 定义了两个类型为String的变量accountNumber和accountType。
- 右键单击文件->源->使用字段生成构造函数
- 生成吸气剂。右键单击文件->源->生成Getter和Setters->选择Getters->生成
- 生成toString()右键单击文件->源->生成toString()…
Account.java
package com.javatpoint.model;
public class Account
{
private String accountNumber;
private String accountType;
public Account(String accountNumber, String accountType)
{
super();
this.accountNumber = accountNumber;
this.accountType = accountType;
}
public String getAccountType()
{
return accountType;
}
public String getAccountNumber()
{
return accountNumber;
}
@Override
public String toString()
{
return "Account [accountNumber=" + accountNumber+ ", accountType=" + accountType + "]";
}
}
步骤11:创建另一个名为com.javatpoint.service.impl的包。
步骤12:在这个包中,创建一个名称为AccountServiceImple的类。
在此类中,我们定义了帐户服务。
AccountServiceImpl.java
package com.javatpoint.service.impl;
import java.util.HashMap;
import java.util.Map;
import java.util.Map.Entry;
import java.util.Set;
import org.springframework.stereotype.Service;
import com.javatpoint.model.Account;
@Service
public class AccountServiceImpl implements AccountService
{
//storing account detail in the HashMap
private static Map map = null;
static
{
map = new HashMap<>();
//adding account detail in the map
map.put("M4546779", new Account("10441117000", "Saving Account"));
map.put("K2434567", new Account("10863554577", "Current Account"));
}
@Override
public Account getAccountByCustomerId(String customerId) throws Exception
{
if(customerId ==null)
{
throw new Exception("Invalid! Customer Id");
}
Account account= null;
Set> entrySet = map.entrySet();
for (Entry entry : entrySet)
{
if(entry.getKey().equals(customerId))
{
account= entry.getValue();
}
}
return account;
}
}
步骤13:在包com.javatpoint.service.impl中创建一个名称为AccountService的接口。
AccountService.java
package com.javatpoint.service.impl;
import com.javatpoint.model.Account;
//creating interface that throws exception if the customer id not found
public interface AccountService
{
public abstract Account getAccountByCustomerId(String customerId)
throws Exception;
}
步骤14:创建一个名称为com.javatpoint.aspect的包。
步骤15:在包com.javatpoint.aspect中创建一个名称为AccountAspect的类。
在此类中,我们通过使用@AfterReturning批注实现了after after return建议。我们还定义了afterReturningAdvice()方法的方法。
注意:我们在返回属性中定义的名称(帐户)必须与advice方法中的参数名称相对应。
AccountAspect.java
package com.javatpoint.aspect;
import org.aspectj.lang.JoinPoint;
import org.aspectj.lang.annotation.AfterReturning;
import org.aspectj.lang.annotation.Aspect;
import org.springframework.stereotype.Component;
import com.javatpoint.model.Account;
@Aspect
@Component
public class AccountAspect
{
//implementing after returning advice
@AfterReturning(value="execution(* com.javatpoint.service.impl.AccountServiceImpl.*(..))",returning="account")
public void afterReturningAdvice(JoinPoint joinPoint, Account account)
{
System.out.println("After Returing method:"+joinPoint.getSignature());
System.out.println(account);
}
}
步骤16:打开AopAfterReturningAdviceExampleApplication.java文件,并添加一个注释@EnableAspectJAutoProxy。
该注释支持处理标有AspectJ的@Aspect注释的组件。它与@Configuration批注一起使用。
我们使用了@EnableAspectJAutoProxy批注的proxyTargetClass属性。属性proxyTargetClass = true允许我们使用CGLIB (代码生成库)代理代替默认的基于接口的JDK代理方法。
ConfigurableApplicationContext是一个接口,除了ApplicationContext中的应用程序上下文客户端方法外,它还提供了用于配置应用程序上下文的工具。
AopAfterReturningAdviceExampleApplication.java
package com.javatpoint;
import org.springframework.boot.SpringApplication;
import org.springframework.boot.autoconfigure.SpringBootApplication;
import org.springframework.context.ConfigurableApplicationContext;
import org.springframework.context.annotation.EnableAspectJAutoProxy;
import com.javatpoint.model.Account;
import com.javatpoint.service.impl.AccountService;
import com.javatpoint.service.impl.AccountServiceImpl;
@SpringBootApplication
//@EnableAspectJAutoProxy annotation enables support for handling the components marked with @Aspect annotation. It is similar to tag in the xml configuration.
@EnableAspectJAutoProxy(proxyTargetClass=true)
public class AopAfterReturningAdviceExampleApplication
{
public static void main(String[] args)
{
ConfigurableApplicationContext ac = SpringApplication.run(AopAfterReturningAdviceExampleApplication.class, args);
//Fetching the account object from the application context
AccountService accountService = ac.getBean("accountServiceImpl", AccountServiceImpl.class);
Account account;
try
{
account = accountService.getAccountByCustomerId("K2434567");
if(account != null)
System.out.println(account.getAccountNumber()+"\t"+account.getAccountType());
}
catch (Exception e)
{
System.out.println(e.getMessage());
}
}
}
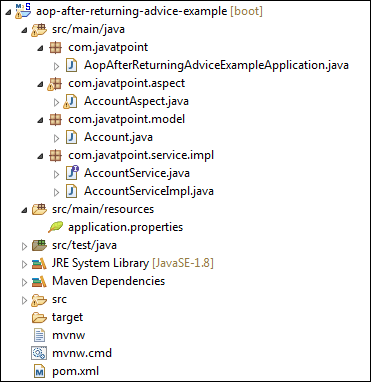
创建所有类和包之后,项目目录如下所示:
步骤17:打开AopAfterReturningAdviceExampleApplication.java文件并将其作为Java应用程序运行。它显示输出,如下所示:

在下一节中,我们将在提出建议后进行理解。