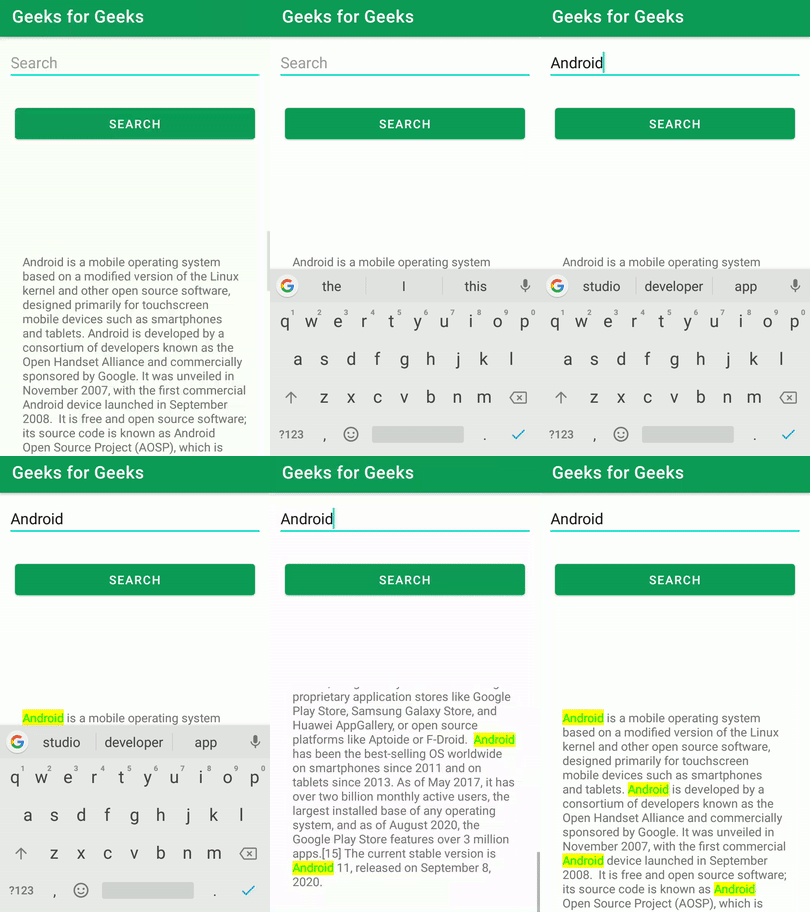
文本荧光笔是大多数应用程序中流行的功能之一。您可以在Notes保持应用程序或任何教育性应用程序中查看此函数。此功能的主要函数是突出显示任何文档中搜索到的单词。在本文中,我们将了解如何在Android App中实现Text Highlighter。下面给出了一个示例GIF,以了解我们将在本文中做些什么。注意,我们将使用Java语言实现该项目。

文字萤光笔的应用
- 使用此文本荧光笔的主要功能是突出显示应用程序中搜索到的单词。
- 它告诉您搜索的单词重复多少时间并突出显示。
- 它用于在应用程序中进行关键字研究。
重要属性
|
Attributes |
Description |
|---|---|
| .setBackgroundColor() | Use to set Background Color. |
| .setForegroundColor() | Use to set Text Color. |
| .addTarget() | Use to search a word from certain document. |
| .highlight() | Use to highlight the searched text. |
分步实施
步骤1:创建一个新项目
要在Android Studio中创建新项目,请参阅如何在Android Studio中创建/启动新项目。请注意,选择Java作为编程语言。
步骤2:在build.gradle文件中添加Text Highlighter库的依赖项
然后导航到gradle脚本,然后到build.gradle(Module)级别。在依赖性部分的build.gradle文件中添加以下行。
implementation ‘com.xeoh.android:text-highlighter:1.0.3’
现在单击立即同步,它将同步build.gradle()中的所有文件。
步骤3:在您的activity_main.xml文件中创建一个新的Text Highlighter
转到activity_main.xml文件,并参考以下代码。以下是activity_main.xml文件的代码。
XML
Java
import android.graphics.Color;
import android.os.Bundle;
import android.view.View;
import android.widget.Button;
import android.widget.EditText;
import android.widget.TextView;

import androidx.appcompat.app.AppCompatActivity;

import com.xeoh.android.texthighlighter.TextHighlighter;

public class MainActivity extends AppCompatActivity {

    // Variable for button,
    // edit text and text view given
    Button button;
    EditText editText;
    TextView textView;

    @Override
    protected void onCreate(Bundle savedInstanceState) {
        super.onCreate(savedInstanceState);
        setContentView(R.layout.activity_main);

        // Accepted through Id's
        button = (Button) findViewById(R.id.button);
        editText = (EditText) findViewById(R.id.search);
        textView = (TextView) findViewById(R.id.textView);

        button.setOnClickListener(new View.OnClickListener() {
            @Override
            public void onClick(View view) {
                new TextHighlighter()
                        .setBackgroundColor(Color.parseColor("#FFFF00"))
                        .setForegroundColor(Color.GREEN)
                        .addTarget(textView)
                        .highlight(editText.getText().toString(), TextHighlighter.BASE_MATCHER);
            }
        });
    }
}
XML
步骤4:使用MainActivity。 Java文件
转到MainActivity。 Java文件并参考以下代码。下面是MainActivity的代码。 Java文件。在代码内部添加了注释,以更详细地了解代码。
Java
import android.graphics.Color;
import android.os.Bundle;
import android.view.View;
import android.widget.Button;
import android.widget.EditText;
import android.widget.TextView;

import androidx.appcompat.app.AppCompatActivity;

import com.xeoh.android.texthighlighter.TextHighlighter;

public class MainActivity extends AppCompatActivity {

    // Variable for button,
    // edit text and text view given
    Button button;
    EditText editText;
    TextView textView;

    @Override
    protected void onCreate(Bundle savedInstanceState) {
        super.onCreate(savedInstanceState);
        setContentView(R.layout.activity_main);

        // Accepted through Id's
        button = (Button) findViewById(R.id.button);
        editText = (EditText) findViewById(R.id.search);
        textView = (TextView) findViewById(R.id.textView);

        button.setOnClickListener(new View.OnClickListener() {
            @Override
            public void onClick(View view) {
                new TextHighlighter()
                        .setBackgroundColor(Color.parseColor("#FFFF00"))
                        .setForegroundColor(Color.GREEN)
                        .addTarget(textView)
                        .highlight(editText.getText().toString(), TextHighlighter.BASE_MATCHER);
            }
        });
    }
}
步骤5:使用AndroidManifest.xml文件
将以下行添加到
android:windowSoftInputMode=”adjustNothing|stateHidden”>
以下是AndroidManifest.xml文件的完整代码。
XML格式