MultiAutoCompleteTextView是可编辑的TextView,它扩展了AutoCompleteTextView。在文本视图中,当用户开始键入文本时,MultiAutoCompleteTextView将显示文本子字符串的完成建议,这对于用户选择该选项而不是键入很有用。此功能在各种应用程序(如教育/商业/娱乐应用程序等)中非常有用。此功能是允许用户选择正确术语的一种方式,并且由于允许多个建议,因此使用户的生活变得非常简单。下面给出了一个示例GIF,以了解我们将在本文中做些什么。注意,我们将使用Java语言实现该项目。
AutoCompleteTextView和MultiAutoCompleteTextView之间的区别
An AutoCompleteTextView only offers suggestion about the whole text. But MultiAutoCompleteTextView offers multiple suggestions for the substring of the text.
重要方法
1. setTokenizer():
令牌生成器在方法setTokenizer()中设置。默认情况下,我们有CommaTokenizer。在此示例中,我们使用了两个MultiAutoCompleteTextView实例。一个(multiAutoCompleteTextViewDefault)与默认的CommaTokenizer。
multiAutoCompleteTextViewDefault.setTokenizer(new MultiAutoCompleteTextView.CommaTokenizer());
在此,当用户完成键入或选择子字符串时,在子字符串的末尾会附加一个逗号。对于第二个实例(multiAutoCompleteTextViewCustom),我们正在使用SpaceTokenizer。它只不过是一个Java类,我们需要在3种方法(即findTokenStart,findTokenEnd和TerminateToken)内编写代码。
multiAutoCompleteTextViewCustom.setTokenizer(new SpaceTokenizer());
在此,当用户完成键入或选择子字符串时,在该子字符串的末尾将添加空格。
2. setThreshold():
setThreshold()用于指定字符数,之后将显示带有自动完成建议列表的下拉列表。它可以是1或2,或者取决于您的要求。在这个例子中
// For multiAutoCompleteTextViewDefault, after user types a character,
// the dropdown is shown
multiAutoCompleteTextViewDefault.setThreshold(1);
// For multiAutoCompleteTextViewCustom, after user types 2 characters,
// the dropdown is shown
multiAutoCompleteTextViewCustom.setThreshold(2);
3. setAdapter():
为了在下拉列表中显示子字符串项,我们需要在“ ArrayAdapter”中填充字符串数组。
// First instance
ArrayAdapter
multiAutoCompleteTextViewDefault.setAdapter(randomArrayAdapter);
// second instance
ArrayAdapter
multiAutoCompleteTextViewCustom.setAdapter(tagArrayAdapter);
例子
步骤1:创建一个新项目
要在Android Studio中创建新项目,请参阅如何在Android Studio中创建/启动新项目。请注意,选择Java作为编程语言。
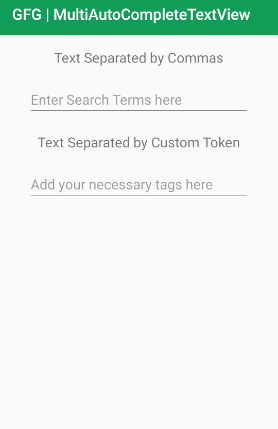
步骤2:使用activity_main.xml文件
对于本示例,在activity_main.xml文件中添加两个TextView和两个MultiAutoCompleteTextView。以下是activity_main.xml文件的完整代码。在代码内部添加了注释,以更详细地了解代码。
XML
Java
import android.os.Bundle;
import android.widget.ArrayAdapter;
import android.widget.MultiAutoCompleteTextView;
import androidx.appcompat.app.AppCompatActivity;

public class MainActivity extends AppCompatActivity {

    // Defining two MultiAutoCompleteTextView
    // This is to recognize comma separated.
    MultiAutoCompleteTextView multiAutoCompleteTextViewDefault;

    // This is the second one and required for custom features
    MultiAutoCompleteTextView multiAutoCompleteTextViewCustom;

    // As a sample, few text are given below which can be populated in dropdown, when user starts typing
    // For example, when user types "a", text whichever starting with "a" will be displayed in dropdown
    // As we are using two MultiAutoCompleteTextView components, using two string array separately
    String[] fewRandomSuggestedText = {"a", "ant", "apple", "asp", "android", "animation", "adobe",
            "chrome", "chromium", "firefox", "freeware", "fedora"};
    String[] fewTags = {"Java", "JavaScript", "Spring", "Java EE", "Java 8", "Java 9", "Java 10",
            "MongoDB", "MarshMallow", "NoSQL", "NativeApp", "SQL", "SQLite"};

    @Override
    protected void onCreate(Bundle savedInstanceState) {
        super.onCreate(savedInstanceState);
        setContentView(R.layout.activity_main);

        multiAutoCompleteTextViewDefault = findViewById(R.id.multiAutoCompleteTextViewDefault);
        multiAutoCompleteTextViewCustom = findViewById(R.id.multiAutoCompleteTextViewCustom);

        // In order to show the substring options in a dropdown, we need ArrayAdapter
        // and here it is using simple_list_item_1
        ArrayAdapter randomArrayAdapter = new ArrayAdapter<>(this, android.R.layout.simple_list_item_1, fewRandomSuggestedText);
        multiAutoCompleteTextViewDefault.setAdapter(randomArrayAdapter);

        // setThreshold() is used to specify the number of characters after which
        // the dropdown with the autocomplete suggestions list would be displayed.
        // For multiAutoCompleteTextViewDefault, after 1 character, the dropdown shows substring
        multiAutoCompleteTextViewDefault.setThreshold(1);

        // Default CommaTokenizer is used here
        multiAutoCompleteTextViewDefault.setTokenizer(new MultiAutoCompleteTextView.CommaTokenizer());
        ArrayAdapter tagArrayAdapter = new ArrayAdapter<>(this, android.R.layout.simple_list_item_1, fewTags);
        multiAutoCompleteTextViewCustom.setAdapter(tagArrayAdapter);

        // For multiAutoCompleteTextViewCustom, after 2 characters, the dropdown shows substring
        multiAutoCompleteTextViewCustom.setThreshold(2);

        // As multiAutoCompleteTextViewCustom is customized , we are using SpaceTokenizer
        // which is written as a separate java class to handle space
        // SpaceTokenizer can be customized as per our needs, here for this example,
        // after user types 2 character
        // the substring of the text is shown in the dropdown and once selected,
        // a space is appended at the
        // end of the substring. So for customized MultiAutoCompleteTextView,
        // we need to write code like SpaceTokenizer
        // It has 3 methods namely findTokenStart,findTokenEnd and terminateToken
        multiAutoCompleteTextViewCustom.setTokenizer(new SpaceTokenizer());
    }
}
Java
import android.text.SpannableString;
import android.text.Spanned;
import android.text.TextUtils;
import android.widget.MultiAutoCompleteTextView;
// As this java class implements MultiAutoCompleteTextView.Tokenizer,
// we should write 3 methods i.e. findTokenStart,findTokenEnd and terminateToken
public class SpaceTokenizer implements MultiAutoCompleteTextView.Tokenizer {
private int i;
// Returns the start of the token that ends at offset cursor within text.
public int findTokenStart(CharSequence inputText, int cursor) {
int idx = cursor;
while (idx > 0 && inputText.charAt(idx - 1) != ' ') {
idx--;
}
while (idx < cursor && inputText.charAt(idx) == ' ') {
idx++;
}
return idx;
}
// Returns the end of the token (minus trailing punctuation) that
// begins at offset cursor within text.
public int findTokenEnd(CharSequence inputText, int cursor) {
int idx = cursor;
int length = inputText.length();
while (idx < length) {
if (inputText.charAt(i) == ' ') {
return idx;
} else {
idx++;
}
}
return length;
}
// Returns text, modified, if necessary, to ensure that it ends with a token terminator
// (for example a space or comma).
public CharSequence terminateToken(CharSequence inputText) {
int idx = inputText.length();
while (idx > 0 && inputText.charAt(idx - 1) == ' ') {
idx--;
}
if (idx > 0 && inputText.charAt(idx - 1) == ' ') {
return inputText;
} else {
if (inputText instanceof Spanned) {
SpannableString sp = new SpannableString(inputText + " ");
TextUtils.copySpansFrom((Spanned) inputText, 0, inputText.length(),
Object.class, sp, 0);
return sp;
} else {
return inputText + " ";
}
}
}
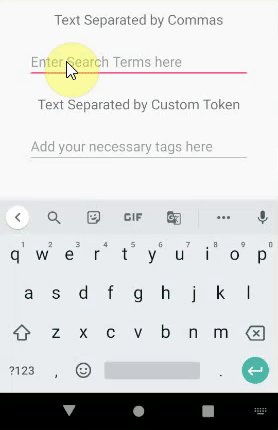
}UI如下所示:
步骤3:使用Java文件
- 以下是MainActivity的完整代码。 Java文件。在代码内部添加了注释,以更详细地了解代码。
Java
import android.os.Bundle;
import android.widget.ArrayAdapter;
import android.widget.MultiAutoCompleteTextView;
import androidx.appcompat.app.AppCompatActivity;

public class MainActivity extends AppCompatActivity {

    // Defining two MultiAutoCompleteTextView
    // This is to recognize comma separated.
    MultiAutoCompleteTextView multiAutoCompleteTextViewDefault;

    // This is the second one and required for custom features
    MultiAutoCompleteTextView multiAutoCompleteTextViewCustom;

    // As a sample, few text are given below which can be populated in dropdown, when user starts typing
    // For example, when user types "a", text whichever starting with "a" will be displayed in dropdown
    // As we are using two MultiAutoCompleteTextView components, using two string array separately
    String[] fewRandomSuggestedText = {"a", "ant", "apple", "asp", "android", "animation", "adobe",
            "chrome", "chromium", "firefox", "freeware", "fedora"};
    String[] fewTags = {"Java", "JavaScript", "Spring", "Java EE", "Java 8", "Java 9", "Java 10",
            "MongoDB", "MarshMallow", "NoSQL", "NativeApp", "SQL", "SQLite"};

    @Override
    protected void onCreate(Bundle savedInstanceState) {
        super.onCreate(savedInstanceState);
        setContentView(R.layout.activity_main);

        multiAutoCompleteTextViewDefault = findViewById(R.id.multiAutoCompleteTextViewDefault);
        multiAutoCompleteTextViewCustom = findViewById(R.id.multiAutoCompleteTextViewCustom);

        // In order to show the substring options in a dropdown, we need ArrayAdapter
        // and here it is using simple_list_item_1
        ArrayAdapter randomArrayAdapter = new ArrayAdapter<>(this, android.R.layout.simple_list_item_1, fewRandomSuggestedText);
        multiAutoCompleteTextViewDefault.setAdapter(randomArrayAdapter);

        // setThreshold() is used to specify the number of characters after which
        // the dropdown with the autocomplete suggestions list would be displayed.
        // For multiAutoCompleteTextViewDefault, after 1 character, the dropdown shows substring
        multiAutoCompleteTextViewDefault.setThreshold(1);

        // Default CommaTokenizer is used here
        multiAutoCompleteTextViewDefault.setTokenizer(new MultiAutoCompleteTextView.CommaTokenizer());
        ArrayAdapter tagArrayAdapter = new ArrayAdapter<>(this, android.R.layout.simple_list_item_1, fewTags);
        multiAutoCompleteTextViewCustom.setAdapter(tagArrayAdapter);

        // For multiAutoCompleteTextViewCustom, after 2 characters, the dropdown shows substring
        multiAutoCompleteTextViewCustom.setThreshold(2);

        // As multiAutoCompleteTextViewCustom is customized , we are using SpaceTokenizer
        // which is written as a separate java class to handle space
        // SpaceTokenizer can be customized as per our needs, here for this example,
        // after user types 2 character
        // the substring of the text is shown in the dropdown and once selected,
        // a space is appended at the
        // end of the substring. So for customized MultiAutoCompleteTextView,
        // we need to write code like SpaceTokenizer
        // It has 3 methods namely findTokenStart,findTokenEnd and terminateToken
        multiAutoCompleteTextViewCustom.setTokenizer(new SpaceTokenizer());
    }
}
- 对于MultiAutoCompleteTextViewActivity的第二个实例,此处使用了空间令牌生成器,并且默认情况下仅使用逗号令牌生成器;如果我们使用其他令牌生成器,则需要用Java编写代码,并且应该实现3种方法,即findTokenStart,findTokenEnd和TerminateToken。
- 现在创建另一个Java文件( app> Java >您的包名称> New> Java类) ,并将其命名为SpaceTokenizer 。以下是SpaceTokenizer的完整代码。 Java文件。在代码内部添加了注释,以更详细地了解代码。
Java
import android.text.SpannableString;
import android.text.Spanned;
import android.text.TextUtils;
import android.widget.MultiAutoCompleteTextView;

// As this java class implements MultiAutoCompleteTextView.Tokenizer,
// we should write 3 methods i.e. findTokenStart,findTokenEnd and terminateToken
public class SpaceTokenizer implements MultiAutoCompleteTextView.Tokenizer {
    private int i;

    // Returns the start of the token that ends at offset cursor within text.
    public int findTokenStart(CharSequence inputText, int cursor) {
        int idx = cursor;

        while (idx > 0 && inputText.charAt(idx - 1) != ' ') {
            idx--;
        }
        while (idx < cursor && inputText.charAt(idx) == ' ') {
            idx++;
        }
        return idx;
    }

    // Returns the end of the token (minus trailing punctuation) that
    // begins at offset cursor within text.
    public int findTokenEnd(CharSequence inputText, int cursor) {
        int idx = cursor;
        int length = inputText.length();

        while (idx < length) {
            if (inputText.charAt(i) == ' ') {
                return idx;
            } else {
                idx++;
            }
        }
        return length;
    }

    // Returns text, modified, if necessary, to ensure that it ends with a token terminator
    // (for example a space or comma).
    public CharSequence terminateToken(CharSequence inputText) {
        int idx = inputText.length();

        while (idx > 0 && inputText.charAt(idx - 1) == ' ') {
            idx--;
        }

        if (idx > 0 && inputText.charAt(idx - 1) == ' ') {
            return inputText;
        } else {
            if (inputText instanceof Spanned) {
                SpannableString sp = new SpannableString(inputText + " ");
                TextUtils.copySpansFrom((Spanned) inputText, 0, inputText.length(),
                        Object.class, sp, 0);
                return sp;
            } else {
                return inputText + " ";
            }
        }
    }
}
在模拟器上运行
结论
在许多应用程序中,必须具有MultiAutoCompleteTextView,它可以帮助提供有价值的信息,并使用户的生活更加轻松,从而避免选择不相关的信息。在收集需求时,用户必须在Java文件中键入所有必要的文本,以便在下拉菜单中可以显示必要的建议文本。