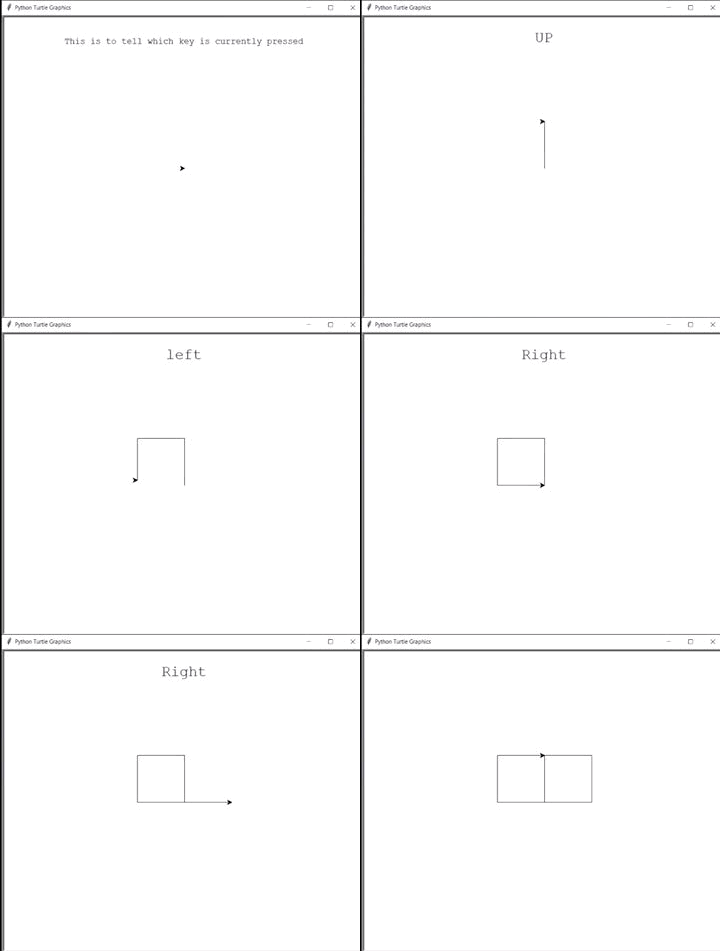
海龟 - 使用箭头键画线
在本文中,我们将学习如何在海龟图形中使用键盘(箭头键)绘制线条。我们先讨论下面实现中用到的一些方法:
- wn.listen():使用这个然后我们可以给键盘输入
- wn.onkeypress(func, “key”):该函数用于将 fun 绑定到按键的 key-release 事件。为了能够注册按键事件,TurtleScreen 必须具有焦点。
- setx(position):该方法用于将海龟的第二个坐标设置为 x,保持第一个坐标不变 这里,无论海龟的位置是什么,它将 x 坐标设置为给定的输入,保持 y 坐标不变。
- sety(position):该方法用于将海龟的第二个坐标设置为 y,第一个坐标保持不变 这里,无论海龟的位置是什么,它将 y 坐标设置为给定的输入,保持 x 坐标不变。
- ycor():该函数用于返回海龟当前位置的y坐标。它不需要任何论证。
- xcor():该函数用于返回海龟当前位置的x坐标。它不需要任何参数
- head.penup:拿起笔,这样海龟在移动时就不会画线
- head.hideturtle:该方法用于使海龟不可见。在进行复杂绘图时执行此操作是个好主意,因为隐藏海龟可以明显加快绘图速度。此方法不需要任何参数。
- head.clear:该函数用于从屏幕上删除海龟的图画
- head.write:该函数用于在当前海龟位置写入文本。
方法
- 导入海龟模块。
- 得到一个屏幕来画画
- 为海龟定义两个实例,一个是笔,另一个是头部。
- Head 用于判断当前按下的是哪个键
- 定义乌龟向上、向下、向左、向右移动的函数。
- 在各自的上、左、右、下功能中,通过更改 x 和 y 坐标,将箭头设置为分别向上、向左、向右和向下移动 100 个单位。
- 使用函数listen() 提供键盘输入。
- 使用 onkeypress 来注册按键事件。
以下是上述方法的Python实现:
Python3
# import for turtle module
import turtle

# making a workScreen
wn = turtle.Screen()

# defining 2 turtle instance
head = turtle.Turtle()
pen = turtle.Turtle()

# head is for telling which key is pressed
head.penup()
head.hideturtle()

# head is at 0,260 coordinate
head.goto(0, 260)
head.write("This is to tell which key is currently pressed",
           align="center", font=("courier", 14, "normal"))


def f():
    y = pen.ycor()
    pen.sety(y+100)
    head.clear()
    head.write("UP", align="center", font=("courier", 24, "normal"))


def b():
    y = pen.ycor()
    pen.sety(y-100)
    head.clear()
    head.write("Down", align="center", font=("courier", 24, "normal"))


def l():
    x = pen.xcor()
    pen.setx(x-100)
    head.clear()
    head.write("left", align="center", font=("courier", 24, "normal"))


def r():
    x = pen.xcor()
    pen.setx(x+100)
    head.clear()
    head.write("Right", align="center", font=("courier", 24, "normal"))


wn.listen()
wn.onkeypress(f, "Up")  # when up is pressed pen will go up
wn.onkeypress(b, "Down")  # when down is pressed pen will go down
wn.onkeypress(l, "Left")  # when left is pressed pen will go left
wn.onkeypress(r, "Right")  # when right is pressed pen will go right
输出
