PYGLET——画线
在本文中,我们将看到如何在Python的 PYGLET 模块中的窗口上画线。 Pyglet 是一个易于使用但功能强大的库,用于开发视觉丰富的 GUI 应用程序,如游戏、多媒体等。窗口是占用操作系统资源的“重量级”对象。 Windows 可能显示为浮动区域,也可以设置为填充整个屏幕(全屏)。光谱线形状描述了在光谱中观察到的特征形式,对应于原子、分子或离子的能量变化。理想的线条形状包括 Lorentzian、Gaussian 和 Voigt 函数,其参数是线条位置、最大高度和半宽。线条是在 pyglet 中的形状模块的帮助下绘制的。
我们可以在下面给出的命令的帮助下创建一个窗口
# creating a window
window = pyglet.window.Window(width, height, title)
In order to create window we use Line method with pyglet.shapes
Syntax : shapes.Line(co_x1, co_y1, co_x2, co_y2, width, color = (50, 225, 30), batch=batch)
Argument : It takes starting and end position in form of pair of two integers, width of line, color of line and last is batch object
Return : It returns Line object
下面是实现
Python3
# importing pyglet module
import pyglet
# importing shapes from the pyglet
from pyglet import shapes
# width of window
width = 500
# height of window
height = 500
# caption i.e title of the window
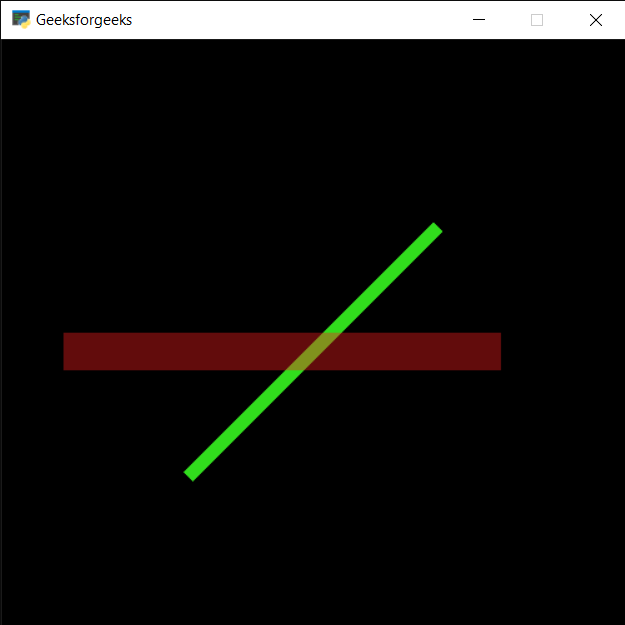
title = "Geeksforgeeks"
# creating a window
window = pyglet.window.Window(width, height, title)
# creating a batch object
batch = pyglet.graphics.Batch()
# properties of line
# first co-ordinates of line
co_x1 = 150
co_y1 = 150
# second co-ordinates of line
co_x2 = 350
co_y2 = 350
# width of line
width = 10
# color = green
color = (50, 225, 30)
# creating a line
line1 = shapes.Line(co_x1, co_y1, co_x2, co_y2, width, color = (50, 225, 30), batch = batch)
# changing opacity of the line1
# opacity is visibility (0 = invisible, 255 means visible)
line1.opacity = 250
# creating another line with properties
# x1, y1 = 50, 250
# x2, y2 = 400, 250
# color = red
line2 = shapes.Line(50, 250, 400, 250, 30, color = (250, 30, 30), batch = batch)
# changing opacity of the line2
# opacity is visibility (0 = invisible, 255 means visible)
line2.opacity = 100
# window draw event
@window.event
def on_draw():
# clear the window
window.clear()
# draw the batch
batch.draw()
# run the pyglet application
pyglet.app.run()输出 :