如果有人想跨平台快速构建美观、可扩展的应用程序?那么材料设计是要走的路。
什么是材料设计?
Material 是一种适应性强的设计系统,以开源代码为后盾,可帮助开发人员轻松构建高质量的数字体验。从设计指南到开发人员组件,Material 可以帮助开发人员更快地构建产品。材料设计指南提供了最佳实践和用户界面设计。可用性和平台指南,以帮助确保我们的应用程序适用于所有用户,无论他们使用什么平台。在指南中,有一些组件是使产品可用和功能的构建块。每个组件页面都包含有关如何使用它们、交互模式和设计规范的指南,为您提供开发人员所需的信息,以确保您正确使用。
好消息是flutter也支持材料设计。有各类在flutter材质设计的小部件是它的按钮,扩展板,动画等等。在本文中,我们将介绍如何使用 Flutters Material Design 小部件来帮助开发人员快速分解设计并将其转换为可在 iOS 和 Android 上运行的真实代码。
材料设计色彩系统
Material 中的颜色主题是指定义界面的一组受限制的颜色。默认材质主题包含生动的颜色,如主要和次要颜色,以及用于背景、表面、错误等的颜色槽。定义颜色主题。这种方式很有帮助,因为它有助于制作一个一致且合理的色彩故事,可以在整个应用程序中全局和一致地使用。这有助于用户感知内容并更轻松地了解应用程序的工作原理。
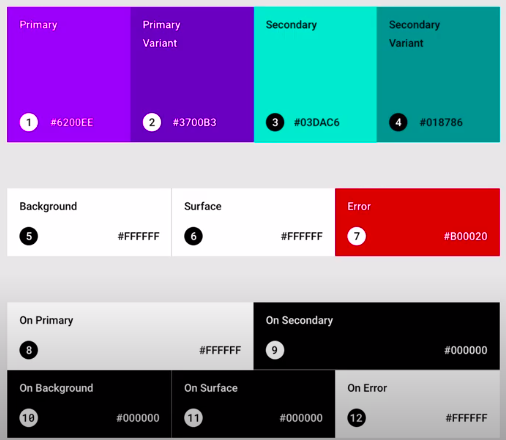
颜色主题的一种改进是。在颜色上。颜色之所以如此命名是因为它们出现在其他元素上。例如,下面应用程序的背景颜色是黑色,因为出现在背景上的文本以及图标等其他元素都是黑色的。这也出现在背景上。颜色很有用,因为它们可以帮助确保在整个应用程序中出现在各种上下文中的内容保持一致和可读。

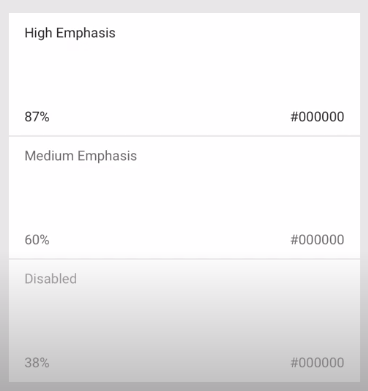
它们还为您提供了对颜色对比度等事物的稳定全局控制,因此您无需微调每个表面上的文本,只要这些表面的相应颜色满足对比度要求即可使用相同的颜色。这些颜色也可以有不同的强调级别,这有助于在状态丰富的情况下或创建深色主题时传递信息。
材料排版
材料设计中的排版基于字体比例。文字比例是文字样式的层次结构,可用于整个布局中的各种情况。 Material type scale 是 13 种可重用样式的混合体,每种样式都有预期的应用和意义,从大标题样式到正文文本标题和按钮。为您的应用制定一个好的字体比例可以保持字体的一致性和对用户的重要性,同时提供足够的风格选项来创建引人注目的外观和字符。
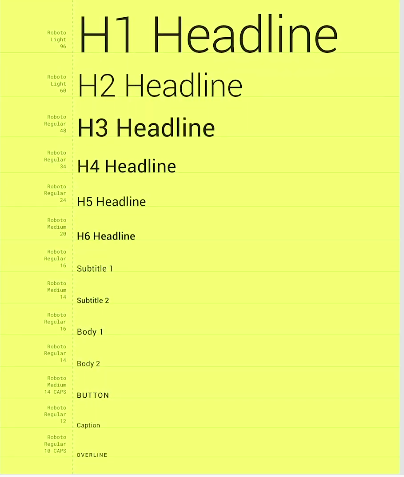
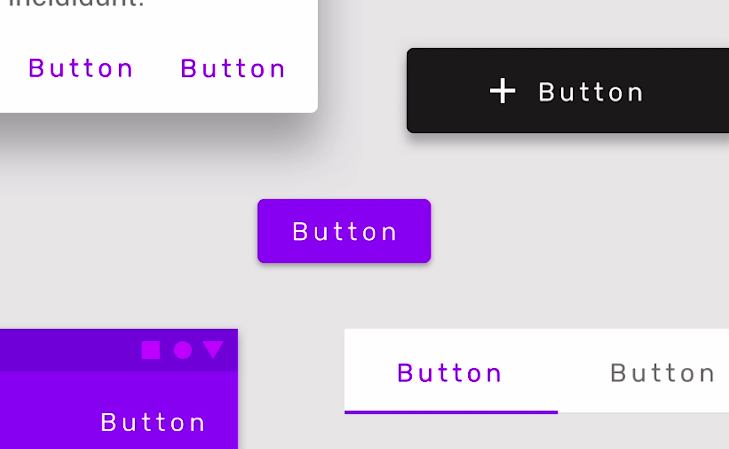
Type 是子系统之一,它允许您对 Material 组件进行主题化,自定义它们以创建独特的东西。每个组件的排版都属于一个类别。例如,按钮上的文本属于按钮类别,由对话框中的按钮和选项卡标签共享。因此,改变字体样式、大小和间距等属性会导致涟漪效应。它自定义属于该类别的所有排版。
以下是flutter中所有主要 Material Design 小部件的列表。
1. 应用结构和导航

- 应用栏
- 底部导航栏
- 抽屉
- 材料应用
- 脚手架
- SliverAppBar
- 标签栏
- 标签栏视图
- 小工具应用程序
2. 按钮

- 按钮栏
- 下拉按钮
- 扁平按钮
- 浮动操作按钮
- 图标按钮
- 大纲按钮
- 弹出菜单按钮
- 凸起按钮
3. 输入与选择
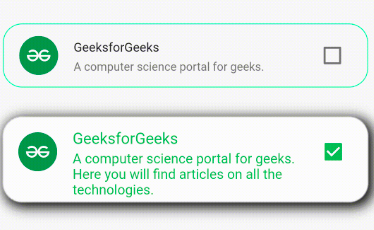
- 复选框
- 日期和时间选择器
- 收音机
- 滑块
- 转变
- 文本域
4. 对话框、警报和面板

- 警报对话框
- 底片
- 扩展面板
- 简单对话框
小吃店
5. 信息显示

- 卡片
- 芯片
- 循环进度指示器
- 数据表
- 网格视图
- 图标
- 图像
- 线性进度指示器
- 工具提示
6. 布局
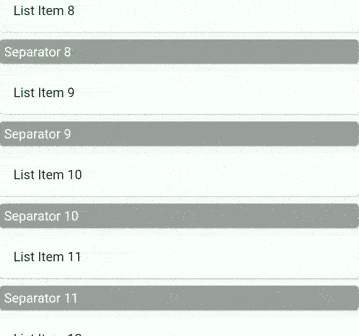
- 分隔线
- 列表图块
- 步进器
还有更多可用的材料设计小部件,然后您可以访问官方网站。现在我们将看到两个 Material Design 小部件的实现,第一个是 Appbar 小部件,第二个是 Card 小部件。
示例 1:应用栏
主要的。dart文件
Dart
import "package:flutter/material.dart";

// importing flutter material design liberary
void main() {
  runApp(MaterialApp(
    home: Scaffold(
      appBar: AppBar(
        title: Text("GeeksforGeeks"),
        leading: IconButton(
          icon: Icon(Icons.menu),
          tooltip: 'Menu Icon',
          onPressed: () {},
        ),
        actions: [
          IconButton(
            icon: Icon(Icons.note),
            tooltip: 'Comment Icon',
            onPressed: () {},
          ),
          SizedBox(
            width: 30,
          ) //IconButton
          //IconButton
        ], //[]
        backgroundColor: Colors.green,
        elevation: 20.0,
        //IconButton
        shape: RoundedRectangleBorder(
          borderRadius: BorderRadius.only(
              bottomLeft: Radius.circular(20),
              bottomRight: Radius.circular(20)),
          //BorderRadius.only
        ), //RoundedRextangleBorder
        brightness: Brightness.light,
      ), //AppBar
      body: Center(
          //Text
          ), //Center
    ), //Scaffold
  )); //MaterialApp
}
Dart
import 'package:flutter/material.dart';

//imported google's material design library
void main() {
  runApp(

      /**Our App Widget Tree Starts Here**/
      MaterialApp(
    home: Scaffold(
      appBar: AppBar(
        title: Text("GeeksforGeeks"),
        leading: IconButton(
          icon: Icon(Icons.menu),
          tooltip: 'Menu Icon',
          onPressed: () {},
        ),
        actions: [
          IconButton(
            icon: Icon(Icons.note),
            tooltip: 'Comment Icon',
            onPressed: () {},
          ),
          SizedBox(
            width: 30,
          ) //IconButton
          //IconButton
        ], //[]
        backgroundColor: Colors.green,
        elevation: 20.0,
        //IconButton
        shape: RoundedRectangleBorder(
          borderRadius: BorderRadius.only(
              bottomLeft: Radius.circular(20),
              bottomRight: Radius.circular(20)),
           //BorderRadius.only
        ), //RoundedRextangleBorder
        brightness: Brightness.light,
      ), //AppBar
      body: Center(

        /** Card Widget **/
        child: Card(
          elevation: 60,
          shadowColor: Colors.black,
          color: Colors.greenAccent[100],
          child: SizedBox(
            width: 300,
            height: 450,
            child: Padding(
              padding: const EdgeInsets.all(20.0),
              child: Column(
                children: [
                  CircleAvatar(
                    backgroundColor: Colors.green[300],
                    radius: 108,
                    child: Text(
                      "C++",
                      style: TextStyle(
                          fontSize: 100,
                          fontWeight: FontWeight.bold,
                          color: Colors.green[900]),
                    ),
                  ), //CirclAvatar
                  SizedBox(
                    height: 10,
                  ), //SizedBox
                  Text(
                    'C++ Programming Language',
                    style: TextStyle(
                      fontSize: 20,
                      color: Colors.green[900],
                      fontWeight: FontWeight.w500,
                    ), //Textstyle
                  ), //Text
                  SizedBox(
                    height: 10,
                  ), //SizedBox
                  Text(
                    'C++ is a general purpose programing language and
                    widely used now a days for competitive programming.
                    It has imperative, object-oriented and generic
                    programming features.',
                    style: TextStyle(
                      fontSize: 15,
                      color: Colors.green[900],
                    ), //Textstyle
                  ), //Text
                  SizedBox(
                    height: 10,
                  ), //SizedBox
                  SizedBox(
                    width: 120,
                    child: RaisedButton(
                      onPressed: () => null,
                      color: Colors.green,
                      child: Padding(
                        padding: const EdgeInsets.all(4.0),
                        child: Row(
                          children: [
                            Icon(Icons.touch_app),
                            Text('Buy Now'),
                          ],
                        ), //Row
                      ), //Padding
                    ), //RaisedButton
                  ) //SizedBox
                ],
              ), //Column
            ), //Padding
          ), //SizedBox
        ), //Card
      ), //Center
    ), //Scaffold
  ) //MaterialApp
      );
}
输出:
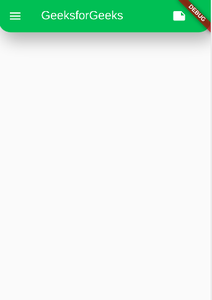
解释:主要。 dart文件我们做的第一件事是我们导入了材料设计库,这将让我们使用材料设计小部件,在这种情况下是MaterialApp、 Scaffod和Appbar 。初始化应用程序后,我们有MaterialApp类,它将保存应用程序的整个小部件树。在MaterialApp类的 home 参数中,我们有一个Scaffold小部件,它基本上提供了设备的整个屏幕来渲染应用小部件。然后在Scaffold小部件中,我们有AppBar小部件,它占用了appBar参数。 appbar 中的绿色由 be backgroundColor属性提供,菜单图标由leading属性提供,文本“GeeksforGeeks”由title属性提供,并且在右上角的动作参数是持有注释图标和一个Si zedBox (提供与调试横幅的差距)。并且应用程序的主体目前是空白的。
要了解有关 AppBar 小部件的更多信息,请单击此处。
示例 2:卡片
主要的。dart文件
Dart
import 'package:flutter/material.dart';

//imported google's material design library
void main() {
  runApp(

      /**Our App Widget Tree Starts Here**/
      MaterialApp(
    home: Scaffold(
      appBar: AppBar(
        title: Text("GeeksforGeeks"),
        leading: IconButton(
          icon: Icon(Icons.menu),
          tooltip: 'Menu Icon',
          onPressed: () {},
        ),
        actions: [
          IconButton(
            icon: Icon(Icons.note),
            tooltip: 'Comment Icon',
            onPressed: () {},
          ),
          SizedBox(
            width: 30,
          ) //IconButton
          //IconButton
        ], //[]
        backgroundColor: Colors.green,
        elevation: 20.0,
        //IconButton
        shape: RoundedRectangleBorder(
          borderRadius: BorderRadius.only(
              bottomLeft: Radius.circular(20),
              bottomRight: Radius.circular(20)),
           //BorderRadius.only
        ), //RoundedRextangleBorder
        brightness: Brightness.light,
      ), //AppBar
      body: Center(

        /** Card Widget **/
        child: Card(
          elevation: 60,
          shadowColor: Colors.black,
          color: Colors.greenAccent[100],
          child: SizedBox(
            width: 300,
            height: 450,
            child: Padding(
              padding: const EdgeInsets.all(20.0),
              child: Column(
                children: [
                  CircleAvatar(
                    backgroundColor: Colors.green[300],
                    radius: 108,
                    child: Text(
                      "C++",
                      style: TextStyle(
                          fontSize: 100,
                          fontWeight: FontWeight.bold,
                          color: Colors.green[900]),
                    ),
                  ), //CirclAvatar
                  SizedBox(
                    height: 10,
                  ), //SizedBox
                  Text(
                    'C++ Programming Language',
                    style: TextStyle(
                      fontSize: 20,
                      color: Colors.green[900],
                      fontWeight: FontWeight.w500,
                    ), //Textstyle
                  ), //Text
                  SizedBox(
                    height: 10,
                  ), //SizedBox
                  Text(
                    'C++ is a general purpose programing language and
                    widely used now a days for competitive programming.
                    It has imperative, object-oriented and generic
                    programming features.',
                    style: TextStyle(
                      fontSize: 15,
                      color: Colors.green[900],
                    ), //Textstyle
                  ), //Text
                  SizedBox(
                    height: 10,
                  ), //SizedBox
                  SizedBox(
                    width: 120,
                    child: RaisedButton(
                      onPressed: () => null,
                      color: Colors.green,
                      child: Padding(
                        padding: const EdgeInsets.all(4.0),
                        child: Row(
                          children: [
                            Icon(Icons.touch_app),
                            Text('Buy Now'),
                          ],
                        ), //Row
                      ), //Padding
                    ), //RaisedButton
                  ) //SizedBox
                ],
              ), //Column
            ), //Padding
          ), //SizedBox
        ), //Card
      ), //Center
    ), //Scaffold
  ) //MaterialApp
      );
}
输出:
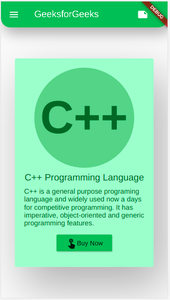
说明:这个应用程序是上一个应用程序的进一步延续,在这个例子中,我们将在应用程序的主体中添加一个卡片小部件,之前是空白的。在MaterialApp的 body 参数中,父小部件是Center ,它包含Card小部件。卡片小部件总共使用了四个参数,它们是:
- 海拔:它通过提供一点黑色阴影将卡片从背景中抬高。这里是60。
- shadowColor :它为阴影提供颜色。上面的属性也使用了这个参数提供的颜色。这里的阴影颜色是黑色。
- color :顾名思义,它为卡片提供背景颜色。在这种情况下,卡片的颜色是greenAccent[100 ]。
- child :此属性将保存应用程序的所有内容。这里尺寸为 300X450 的 SizedBox 小部件将保存由 Column 小部件排列的应用程序的所有内容。在 Column 小部件内,有 CirularAvatar、两个 Text 小部件和一个RaisedButton ,它们都由高度为 10 的SizedBox分隔。
这些只是flutter材料设计小部件的两个示例,要查看更多示例,您可以单击上面列表中提供的链接。