PyQtGraph - 获取图像视图的背景角色
在本文中,我们将看到如何在 PyQTGaph 中获取图像视图对象的背景角色。 PyQtGraph 是一个用于Python的图形和用户界面库,它提供了设计和科学应用程序中通常需要的功能。它的主要目标是提供用于显示数据(绘图、视频等)的快速交互式图形。用于显示和分析图像数据的小部件。实现许多功能,例如显示 2D 和 3D 图像数据。对于 3D 数据,会显示一个 z 轴滑块,允许用户选择要显示的帧。显示具有定义暗/亮级别的可移动区域的图像数据直方图,可编辑渐变提供颜色查找表。背景角色定义了用于渲染背景的图像视图调色板中的画笔。
我们可以在下面给出的命令的帮助下创建一个图像视图
# creating a pyqtgraph image view object
imv = pg.ImageView()
Syntax: ImageView(parent=None, name=’ImageView’, view=None, imageItem=None, levelMode=’mono’, *args)
Parameters:
- parent (QWidget): Specifies the parent widget to which this ImageView will belong. If None, then the ImageView is created with no parent.
- name (str): The name used to register both the internal ViewBox and the PlotItem used to display ROI data.
- view (ViewBox or PlotItem): If specified, this will be used as the display area that contains the displayed image.
- imageItem (ImageItem): If specified, this object will be used to display the image. Must be an instance of ImageItem or other compatible object.
- levelMode: specifies the *levelMode* argument
Returns: Object of class ImageView
为了做到这一点,我们对图像视图对象使用backgroundRole()方法
Syntax : imv.backgroundRole()
Argument : It takes no argument
Return : It returns QPalette Object, but when printed it shows value associated with it
下面是实现
Python3
# importing Qt widgets
from PyQt5.QtWidgets import *
# importing system
import sys
# importing numpy as np
import numpy as np
# importing pyqtgraph as pg
import pyqtgraph as pg
from PyQt5.QtGui import *
from PyQt5.QtCore import *
# Image View class
class ImageView(pg.ImageView):
# constructor which inherit original
# ImageView
def __init__(self, *args, **kwargs):
pg.ImageView.__init__(self, *args, **kwargs)
class Window(QMainWindow):
def __init__(self):
super().__init__()
# setting title
self.setWindowTitle("PyQtGraph")
# setting geometry
self.setGeometry(100, 100, 600, 500)
# icon
icon = QIcon("skin.png")
# setting icon to the window
self.setWindowIcon(icon)
# calling method
self.UiComponents()
# showing all the widgets
self.show()
# method for components
def UiComponents(self):
# creating a widget object
widget = QWidget()
# creating a label
label = QLabel("Geeksforgeeks Image View")
# setting minimum width
label.setMinimumWidth(130)
# making label do word wrap
label.setWordWrap(True)
# setting configuration options
pg.setConfigOptions(antialias = True)
# creating image view view object
imv = ImageView()
# Create random 3D data set with noisy signals
img = pg.gaussianFilter(np.random.normal(size=(200, 200)),
(5, 5)) * 20 + 100
# setting new axis to image
img = img[np.newaxis, :, :]
# decay data
decay = np.exp(-np.linspace(0, 0.3, 100))[:, np.newaxis, np.newaxis]
# random data
data = np.random.normal(size=(100, 200, 200))
data += img * decay
data += 2
# adding time-varying signal
sig = np.zeros(data.shape[0])
sig[30:] += np.exp(-np.linspace(1, 10, 70))
sig[40:] += np.exp(-np.linspace(1, 10, 60))
sig[70:] += np.exp(-np.linspace(1, 10, 30))
sig = sig[:, np.newaxis, np.newaxis] * 3
data[:, 50:60, 30:40] += sig
# setting image to image view
# Displaying the data and assign each frame a time value from 1.0 to 3.0
imv.setImage(data, xvals=np.linspace(1., 3., data.shape[0]))
# Set a custom color map
colors = [
(0, 0, 0),
(4, 5, 61),
(84, 42, 55),
(15, 87, 60),
(208, 17, 141),
(255, 255, 255)
]
# color map
cmap = pg.ColorMap(pos=np.linspace(0.0, 1.0, 6), color = colors)
# setting color map to the image view
imv.setColorMap(cmap)
# Creating a grid layout
layout = QGridLayout()
# minimum width value of the label
label.setFixedWidth(130)
# setting this layout to the widget
widget.setLayout(layout)
# adding label in the layout
layout.addWidget(label, 1, 0)
# plot window goes on right side, spanning 3 rows
layout.addWidget(imv, 0, 1, 3, 1)
# setting this widget as central widget of the main widow
self.setCentralWidget(widget)
# getting background role of image view
value = imv.backgroundRole()
# setting text to the label
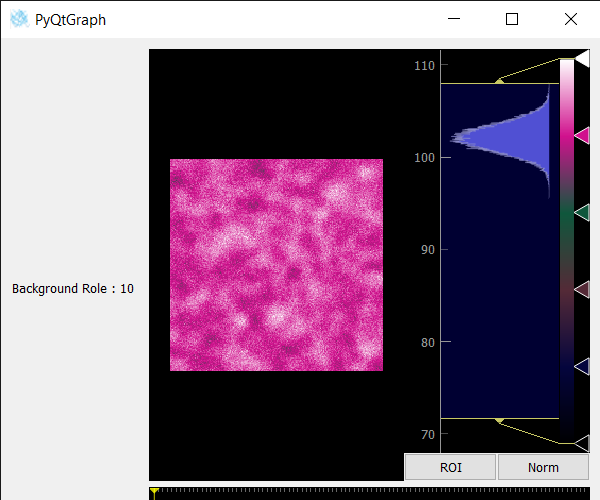
label.setText("Background Role : " + str(value))
# create pyqt5 app
App = QApplication(sys.argv)
# create the instance of our Window
window = Window()
# start the app
sys.exit(App.exec())输出 :