Kivy – 用于移动应用程序开发的Python框架
Kivy 是一个免费的开源Python库,用于开发具有自然用户界面的移动应用程序和其他多点触控应用程序软件。
安装
我们可以从这里下载最新版本的 Kivy。打开链接后,您可以选择您的平台并按照特定于您平台的说明进行操作。
使用 PyCharm 安装
- 我们将打开 PyCharm 并创建一个新项目并将其命名为“Tutorial”(项目名称),我们可以随意命名。
- 我们将右键单击“Tutorial”(项目名称)并创建一个名为 FirstApp 的新目录。
- 在这个 FirstApp 中,我们将创建一个名为 Main 的Python文件。
- 转到文件->设置->项目:教程(项目名称)。
- 在项目:教程(项目名称)下,单击项目解释器。
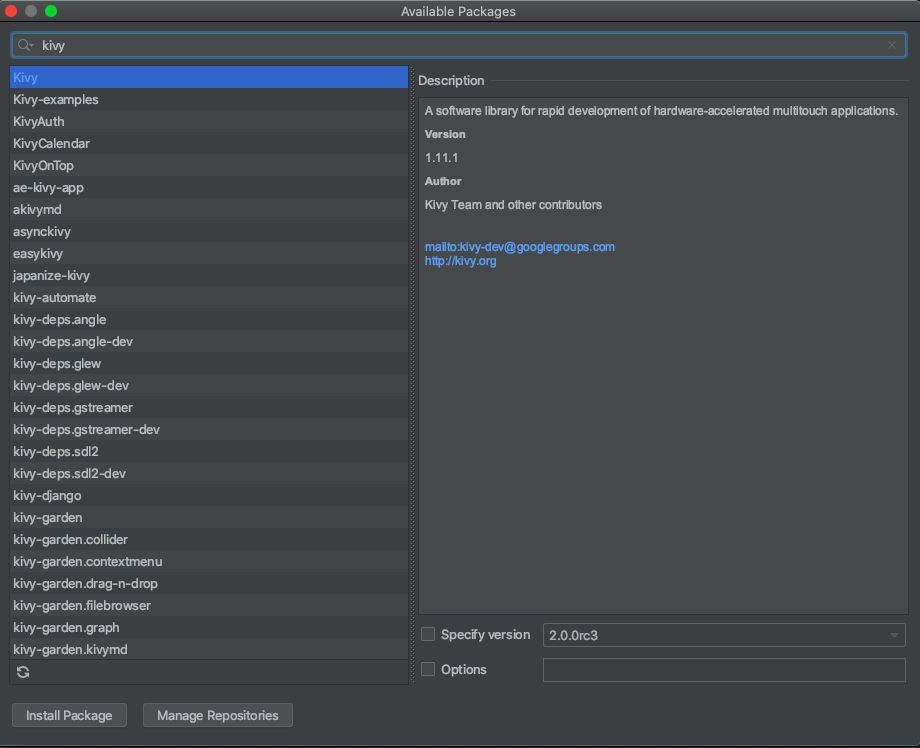
- 然后单击右上角的“+”号并搜索 Kivy,您将看到以下屏幕:

要安装 Kivy,请遵循:
安装 Kivy 依赖项
同样单击以下依赖项进行安装:
- kivy-deps.angle
- kivy-deps.glew
- kivy-deps.gstreamer
- kivy-deps.sdl2
示例 1:在 Kivy App 上打印欢迎信息
# import the modules
from kivy.app import App
from kivy.uix.label import Label

# defining the Base Class of our first Kivy App
class MyApp(App):

    def build(self):

        # initializing a Label with text ‘Hello World’
        and return its instance
        return Label(text = 'welcome to GeeksforGeeks')


if __name__ == '__main__':
    # MyApp is initialized and its run() method called
    MyApp().run()
输出 :

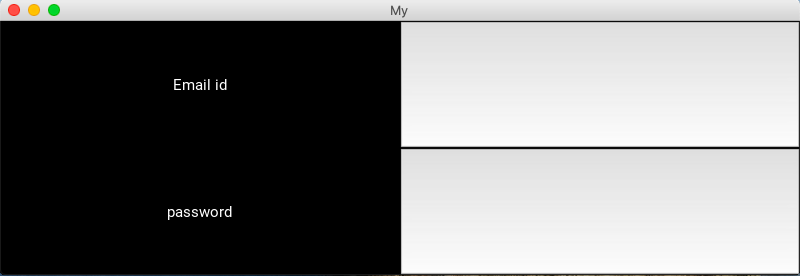
示例 2:创建登录屏幕
# importing the modules
from kivy.app import App
from kivy.uix.gridlayout import GridLayout
from kivy.uix.label import Label
from kivy.uix.textinput import TextInput

# this class is used as a Base for our
# Root Widget which is LoginScreen
class LoginScreen(GridLayout):

    # overriding the method __init__() so as to
    # add widgets and to define their behavior
    def __init__(self, **kwargs):
        super(LoginScreen, self).__init__(**kwargs)

        # GridLayout managing its children in two columns
        # and add a Label and a TextInput for the Email id and password
        self.cols = 2
        self.add_widget(Label(text = 'Email id'))
        self.username = TextInput(multiline = False)
        self.add_widget(self.username)
        self.add_widget(Label(text = 'password'))
        self.password = TextInput(password = True, multiline = False)
        self.add_widget(self.password)

class MyApp(App):
    def build(self):
        return LoginScreen()


if __name__ == '__main__':

    # MyApp is initialized and
    # its run() method called
    MyApp().run()
输出 :

在评论中写代码?请使用 ide.geeksforgeeks.org,生成链接并在此处分享链接。