使用Python 的文件共享应用程序
计算机网络是一个重要的主题,要理解这些概念,需要对这些概念进行实际应用。在这篇特别的文章中,我们将看到如何使用Python制作一个简单的文件共享应用程序。一个 HTTP Web Server是理解URL (网址)和HTTP (用于查看网页的协议)的软件。 Python有几个包,它们是模块的集合。它有几个内置的服务器。本项目使用的模块有:
- HTTPServer是一个socketserver ,它创建并监听 HTTP 套接字。
- socketserver模块简化了编写网络服务器的任务。
- webbrowser模块为我们提供了一个高级界面来允许和显示基于 Web 的文档,只需调用 open()函数。
- pyqrcode模块用于仅用两行代码生成二维码。
- OS 模块有助于与操作系统交互。用于在命令行上打开文件、操作路径和读取所有文件中的所有行。
- PyPNG允许使用纯Python读取和写入 PNG 图像文件
循序渐进的方法:
- 安装第三方模块:
pip install pyqrcode
pip install pypng- 在命令行中使用 pip install 安装依赖项。
- 导入必要的模块:
- http.server 和 socketserver:在浏览器中托管。
- pyqrcode : 生成二维码。
- png:将二维码转换为 png 文件。
- OS:与操作系统交互。
- 分配用户的端口和名称。
- 找到PC的IP地址并将其转换为二维码。
- 创建 HTTP 请求。
- 在浏览器中显示二维码。
上述方法的实现:
Python3
# import necessary modules

# for implementing the HTTP Web servers
import http.server

# provides access to the BSD socket interface
import socket

# a framework for network servers
import socketserver

# to display a Web-based documents to users
import webbrowser

# to generate qrcode
import pyqrcode
from pyqrcode import QRCode

# convert into png format
import png

# to access operating system control
import os


# assigning the appropriate port value
PORT = 8010
# this finds the name of the computer user
os.environ['USERPROFILE']


# changing the directory to access the files desktop
# with the help of os module
desktop = os.path.join(os.path.join(os.environ['USERPROFILE']),
                       'OneDrive')
os.chdir(desktop)


# creating a http request
Handler = http.server.SimpleHTTPRequestHandler
# returns, host name of the system under
# which Python interpreter is executed
hostname = socket.gethostname()


# finding the IP address of the PC
s = socket.socket(socket.AF_INET, socket.SOCK_DGRAM)
s.connect(("8.8.8.8", 80))
IP = "http://" + s.getsockname()[0] + ":" + str(PORT)
link = IP


# converting the IP address into the form of a QRcode
# with the help of pyqrcode module

# converts the IP address into a Qrcode
url = pyqrcode.create(link)
# saves the Qrcode inform of svg
url.svg("myqr.svg", scale=8)
# opens the Qrcode image in the web browser
webbrowser.open('myqr.svg')


# Creating the HTTP request and  serving the
# folder in the PORT 8010,and the pyqrcode is generated

# continuous stream of data between client and server
with socketserver.TCPServer(("", PORT), Handler) as httpd:
    print("serving at port", PORT)
    print("Type this in your Browser", IP)
    print("or Use the QRCode")
    httpd.serve_forever()
输出:
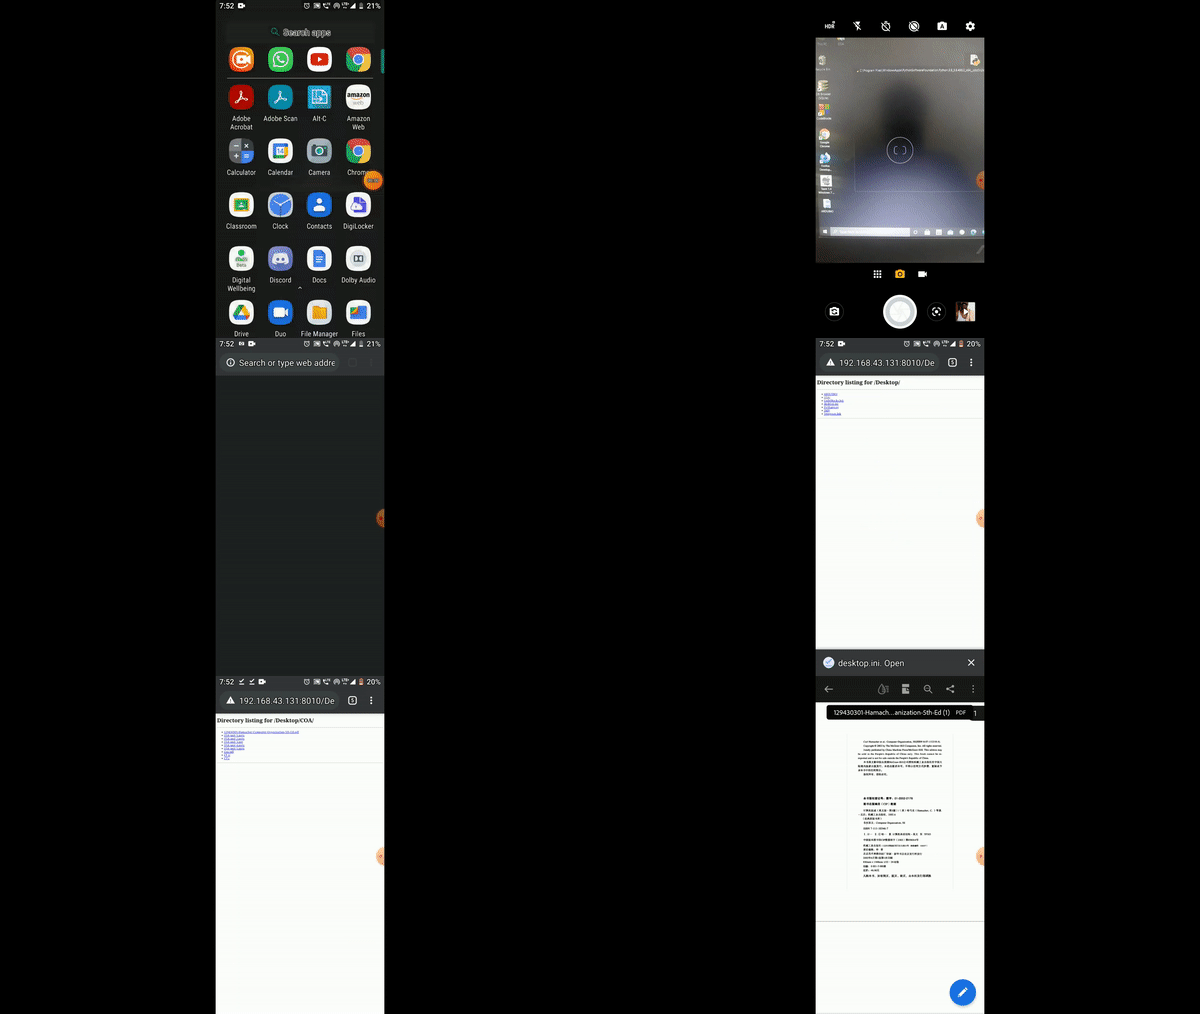
- 在PC上打开有上述代码的Python文件。
- 这将生成一个二维码。

- 扫描二维码或在您的移动浏览器中输入Python shell 中显示的 IP 地址。

- 通过扫描生成的二维码轻松共享文件,并从移动浏览器访问 PC 中的文件。
示范:

为什么是 8010 端口?
TCP 端口 8010 使用定义的协议进行通信,具体取决于应用程序。协议是一组正式的规则,用于解释数据如何通过网络进行通信。这是安全的,不会被病毒/木马感染。
解释:
- 该代码通过OS 模块查找 USERPROFILE 的名称。并更改目录以访问桌面上的文件。
- 查找主机名以在特定端口中提供文件以进行安全共享。
- 然后找到系统的 IP 地址,以便我们可以连接特定设备。
- 使用pyqrcode模块将IP地址转换为二维码形式,方便使用。
- 生成的图像托管在 Web 浏览器中。
- 一旦设备连接到同一网络,扫描二维码或输入 IP 地址即可访问系统文件。