- Flask Mail
- flask_mail (1)
- flask_mail - 任何代码示例
- 在 Flask-Mail 中使用 API 发送电子邮件(1)
- 在 Flask-Mail 中使用 API 发送电子邮件
- mail() 语法 (1)
- wp_mail (1)
- sendgrid\mail\mail 类的对象无法转换为字符串 - SQL (1)
- sendgrid\mail\mail 类的对象无法转换为字符串 - SQL 代码示例
- mail() 语法 - 任何代码示例
- flask 扩展了两个 base.html - Python (1)
- wp_mail - 任何代码示例
- php 中的 mail() 函数不起作用 (1)
- flask 扩展了两个 base.html - Python 代码示例
- PHP Mail邮件
- PHP Mail邮件(1)
- 扩展 (1)
- 扩展 C++ (1)
- c# 扩展 - C# (1)
- Spring Java Mail教程
- Spring Java Mail教程(1)
- mail_Validator - Javascript (1)
- Flask - Shell-Bash (1)
- 如何在Python Flask 中使用 Flask-Session?
- mail_Validator - Javascript 代码示例
- php 中的 mail() 函数不起作用 - 无论代码示例
- swal mail (1)
- Flask Mail(1)
- Flask¢¢€“应用程序(1)
📅 最后修改于: 2021-01-02 04:34:07 🧑 作者: Mango
烧瓶邮件扩展
考虑到Flask是一个微型框架,因此在为开发人员提供设施方面存在局限性。虽然,对烧瓶有一些扩展,例如Mail,WTF,SQLite,SQLAlchemy等,这使开发人员可以为用户提供一些基本功能。
在本教程的这一部分中,我们将研究烧瓶的最常见扩展之一,即Flask-Mail。
Web应用程序必须能够向用户发送电子邮件。 flask-mail扩展为开发人员和电子邮件服务器提供了简单的界面,以通过Web应用程序发送电子邮件。
为此,我们必须使用pip安装程序安装flask-mail扩展。
点安装Flask-Mail
应用程序必须为以下参数配置flask-mail。
| SN | Parameter | Description |
|---|---|---|
| 1 | MAIL_SERVER | It represents the name or IP address of the email server. The default is localhost. |
| 2 | MAIL_PORT | It represents the port number of the server. Default port number is 25. |
| 3 | MAIL_USE_TLS | It is used to enable or disable the transport security layer description. The default is false. |
| 4 | MAIL_USE_SSL | It is used to enable or disable the secure socket layer description. The default value is false. |
| 5 | MAIL_DEBUG | It is used to provide the debug support to the mail application. The default value is None. |
| 6 | MAIL_USERNAME | It represents the user name of the sender. The default value is None. |
| 7 | MAIL_PASSWORD | It represents the password of the server email id. The default value is None. |
| 8 | MAIL_DEFAULT_SENDER | It is used to set the default sender id for the multiple emails. The default value is None. |
| 9 | MAIL_MAX_EMAILS | It is used to set the maximum number of email to be sent. The default value is None. |
| 10 | MAIL_SUPPRESS_SEND | Sending the mail is suppressed if the app.testing is set to the true. |
| 11 | MAIL_ASCII_ATTACHMENTS | If it is set to true, attached file names are converted to ASCII. The default is False. |
烧瓶邮件模块类
有几个类对于使用Python flask Web应用程序发送电子邮件很重要。
讯息类别
Message类将电子邮件消息绑定到一个简单的Message类实例中,以便可以在此实例上调用诸如attach()之类的重要方法。下面给出了实例化Message类的语法。
Flask-mail.Message(subject, recipients, body, html, sender, cc, bcc, reply-to, date, charset, extra-headers, mail-options, rcpt_options)
在Message类对象上可以调用以下方法。
- attach(filename,content_type,data,disposition):此方法用于发送带有消息的附件。此方法接受文件的名称,文件的MIME类型,原始文件数据和内容处置。
- add_recipient():用于将收件人添加到邮件中。
邮件类别
邮件类对象用于发送电子邮件。通过将应用程序对象传递给Mail类构造函数来实例化Mail类,如下所示。
Flask-mail.Mail(app=None)
Mail类包含以下方法。
- send():将消息对象的内容发送给收件人。
- connect():用于打开与邮件主机的连接。
- send_message():用于发送消息对象。
使用Flask Web应用程序发送电子邮件的过程
使用flask网络应用程序发送电子邮件涉及以下步骤。
步骤1:使用from-import语句导入所需的模块,例如flask-mail,flask。
from flask import *
from flask-mail import *
步骤2:配置Flask Mail。
app.config['MAIL_SERVER']='smtp.gmail.com'
app.config['MAIL_PORT']=465
app.config['MAIL_USERNAME'] = 'admin@gmail.com'
app.config['MAIL_PASSWORD'] = '******'
app.config['MAIL_USE_TLS'] = False
app.config['MAIL_USE_SSL'] = True
步骤3:实例化Mail类。
mail = Mail(app)
步骤4:在某些URL规则映射的函数,使用所需的属性实例化Message类。
@app.route('/')
def index():
    msg = Message('subject', sender = 'admin@gmail.com', recipients=['username@gmail.com'])
    msg.body = 'hi, this is the mail sent by using the flask web application'
    return "Mail Sent, Please check the mail id"
例
以下示例包含一个Python脚本,我们将电子邮件发送到给定的电子邮件ID。
Mailer.py
from flask import *
from flask-mail import *

app = Flask(__name__)

#Flask mail configuration
app.config['MAIL_SERVER']='smtp.gmail.com'
app.config['MAIL_PORT']=465
app.config['MAIL_USERNAME'] = 'admin@gmail.com'
app.config['MAIL_PASSWORD'] = '******'
app.config['MAIL_USE_TLS'] = False
app.config['MAIL_USE_SSL'] = True

#instantiate the Mail class
mail = Mail(app)

#configure the Message class object and send the mail from a URL
@app.route('/')
def index():
    msg = Message('subject', sender = 'admin@gmail.com', recipients=['username@gmail.com'])
    msg.body = 'hi, this is the mail sent by using the flask web application'
    return "Mail Sent, Please check the mail id"

if __name__ == '__main__':
    app.run(debug = True)
我们的Python Web应用程序尝试登录到脚本中提到的email_id。如果您不允许您的Google帐户访问不太安全的应用程序,则可以阻止此尝试。在这种情况下,请访问链接https://www.google.com/settings/security/lesssecureapps并允许访问安全性较低的应用程序。
使用OTP在烧瓶中进行电子邮件验证
在现代的Web应用程序中,有时会使用程序随机生成的一次性密码来验证电子邮件。在此示例中,我们将创建一个Python脚本,该脚本接受用户的电子邮件ID作为来自用户的输入,并发送包含自动(随机)生成的(4位)一次性密码的电子邮件。
为了成功验证电子邮件ID,要求用户输入发送到上述电子邮件ID的otp。如果用户输入的OTP与随机生成的OTP相匹配,则将成功验证email-id,并向用户显示成功消息,否则验证失败,并向用户显示失败消息。
在下面的示例中,烧瓶脚本Mailer.py充当控制器,其功能分别与URL / verify和/ validate关联的verify()和validate()。这些功能还呈现HTML模板,以接受来自用户的输入并根据电子邮件验证显示结果。
Mailer.py
from flask import *
from flask_mail import *
from random import *
app = Flask(__name__)
mail = Mail(app)
app.config["MAIL_SERVER"]='smtp.gmail.com'
app.config["MAIL_PORT"] = 465
app.config["MAIL_USERNAME"] = 'username@gmail.com'
app.config['MAIL_PASSWORD'] = '*************'
app.config['MAIL_USE_TLS'] = False
app.config['MAIL_USE_SSL'] = True
mail = Mail(app)
otp = randint(000000,999999)
@app.route('/')
def index():
return render_template("index.html")
@app.route('/verify',methods = ["POST"])
def verify():
email = request.form["email"]
msg = Message('OTP',sender = 'username@gmail.com', recipients = [email])
msg.body = str(otp)
mail.send(msg)
return render_template('verify.html')
@app.route('/validate',methods=["POST"])
def validate():
user_otp = request.form['otp']
if otp == int(user_otp):
return "Email verified successfully
"
return "failure
"
if __name__ == '__main__':
app.run(debug = True)
index.html
index
verify.html
OTP Verification
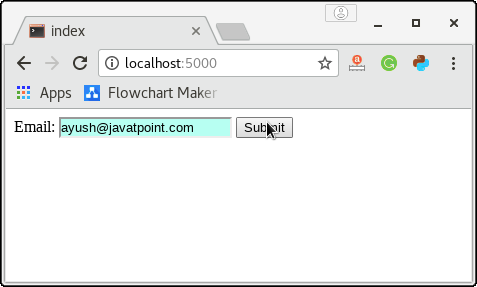
以下模板提示用户输入email_id和密码。脚本Mailer.py将向用户输入的电子邮件ID发送包含一次性密码的电子邮件。
现在,提示用户输入发送到指定电子邮件的OTP。

函数validate()将用户输入的OTP与随机生成并邮寄到用户的电子邮件ID的OTP相匹配。在这种情况下,OTP是匹配的;因此用户将获得成功消息,如下图所示。

大量电子邮件
在上面的示例中,脚本仅向用户发送一封电子邮件以进行电子邮件验证。在Web应用程序中,有时需要在单个连接中发送多封电子邮件或大量电子邮件。
在这种情况下,我们可以在语句中使用Python ,一旦所有电子邮件发送完毕,该语句就会自动关闭连接对象。
例
from flask import *
from flask_mail import *

app = Flask(__name__)

app.config["MAIL_SERVER"]='smtp.gmail.com'
app.config["MAIL_PORT"] = 465
app.config["MAIL_USERNAME"] = 'admin@gmail.com'
app.config['MAIL_PASSWORD'] = '******'
app.config['MAIL_USE_TLS'] = False
app.config['MAIL_USE_SSL'] = True

users = [{'name':'john','email':'john@gmail.com'},{'name':'Ayush','email':'ayush@javatpoint.com'},{'name':'david','email':'david@gmail.com'}]

mail = Mail(app)

@app.route("/")
def index():
    with mail.connect() as con:
        for user in users:
            message = "hello %s" %user['name']
            msgs = Message(recipients=[user['email']],body = message, subject = 'hello', sender = 'david@gmail.com')
            con.send(msgs)
    return "Sent"
if __name__ == "__main__":
    app.run(debug = True)
在邮件中添加附件
Flask使我们可以随邮件一起发送附件。为此,我们需要使用Flask类的open_resource()方法打开资源。然后,我们可以使用python-with语句将资源与消息一起附加。工作完成后,with语句自动关闭资源。
以下语法用于将附件与邮件一起发送。
with app.open_resource("image.png") as fp:
    msg.attach("image.png", "image/png", fp.read())
下面给出了随邮件一起发送附件的flask脚本。
mailer_attach.py
from flask import *
from flask_mail import *

app = Flask(__name__)

app.config["MAIL_SERVER"]='smtp.gmail.com'
app.config["MAIL_PORT"] = 465
app.config["MAIL_USERNAME"] = 'admin@gmail.com'
app.config['MAIL_PASSWORD'] = '********'
app.config['MAIL_USE_TLS'] = False
app.config['MAIL_USE_SSL'] = True

mail = Mail(app)

@app.route("/")
def index():
    msg = Message(subject = "hello", body = "hello", sender = "admin@gmail.com", recipients = ["ayush@javatpoint.com"])
    with app.open_resource("/home/javatpoint/Desktop/galexy.jpg") as fp:
        msg.attach("galexy.jpg","image/png",fp.read())
        mail.send(msg)
    return "sent"

if __name__ == "__main__":
    app.run(debug = True)