- flask_mail - 任何代码示例
- Flask-Mail扩展
- Flask-Mail扩展(1)
- 在 Flask-Mail 中使用 API 发送电子邮件
- 在 Flask-Mail 中使用 API 发送电子邮件(1)
- mail() 语法 (1)
- wp_mail (1)
- sendgrid\mail\mail 类的对象无法转换为字符串 - SQL (1)
- sendgrid\mail\mail 类的对象无法转换为字符串 - SQL 代码示例
- mail() 语法 - 任何代码示例
- wp_mail - 任何代码示例
- php 中的 mail() 函数不起作用 (1)
- PHP Mail邮件(1)
- PHP Mail邮件
- Spring Java Mail教程
- Spring Java Mail教程(1)
- mail_Validator - Javascript (1)
- Flask - Shell-Bash (1)
- 如何在Python Flask 中使用 Flask-Session?
- mail_Validator - Javascript 代码示例
- php 中的 mail() 函数不起作用 - 无论代码示例
- swal mail (1)
- Flask Mail(1)
- Flask¢¢€“应用程序(1)
- Flask¢¢€“应用程序
- Flask - Shell-Bash 代码示例
- 使用 Flask-SQLAlchemy 将 Flask 连接到数据库(1)
- 使用 Flask-SQLAlchemy 将 Flask 连接到数据库
- Flask教程
📅 最后修改于: 2020-10-25 11:33:40 🧑 作者: Mango
通常需要基于Web的应用程序具有向用户/客户端发送邮件的功能。 Flask-Mail扩展使与任何电子邮件服务器的简单接口设置变得非常容易。
首先,应在pip实用程序的帮助下安装Flask-Mail扩展。
pip install Flask-Mail
然后,需要通过设置以下应用程序参数的值来配置Flask-Mail。
| Sr.No | Parameters & Description |
|---|---|
| 1 |
MAIL_SERVER Name/IP address of email server |
| 2 |
MAIL_PORT Port number of server used |
| 3 |
MAIL_USE_TLS Enable/disable Transport Security Layer encryption |
| 4 |
MAIL_USE_SSL Enable/disable Secure Sockets Layer encryption |
| 5 |
MAIL_DEBUG Debug support. Default is Flask application’s debug status |
| 6 |
MAIL_USERNAME User name of sender |
| 7 |
MAIL_PASSWORD password of sender |
| 8 |
MAIL_DEFAULT_SENDER sets default sender |
| 9 |
MAIL_MAX_EMAILS Sets maximum mails to be sent |
| 10 |
MAIL_SUPPRESS_SEND Sending suppressed if app.testing set to true |
| 11 |
MAIL_ASCII_ATTACHMENTS If set to true, attached filenames converted to ASCII |
flask-mail模块包含以下重要类的定义。
邮件类别
它管理电子邮件消息需求。类构造函数采用以下形式-
flask-mail.Mail(app = None)
构造函数将Flask应用程序对象作为参数。
邮件类的方法
| Sr.No | Methods & Description |
|---|---|
| 1 |
send() Sends contents of Message class object |
| 2 |
connect() Opens connection with mail host |
| 3 |
send_message() Sends message object |
讯息类别
它封装了一封电子邮件。消息类构造函数有几个参数-
flask-mail.Message(subject, recipients, body, html, sender, cc, bcc,
   reply-to, date, charset, extra_headers, mail_options, rcpt_options)
消息类方法
attach() -在邮件中添加附件。此方法采用以下参数-
-
filename-要附加的文件名
-
content_type-文件的MIME类型
-
数据-原始文件数据
-
处置-内容处置(如果有)。
add_recipient() -向消息添加另一个收件人
在下面的示例中,Google的gmail服务的SMTP服务器用作Flask-Mail配置的MAIL_SERVER。
步骤1-从代码中的flask-mail模块导入Mail和Message类。
from flask_mail import Mail, Message
步骤2-然后按照以下设置配置Flask-Mail。
app.config['MAIL_SERVER']='smtp.gmail.com'
app.config['MAIL_PORT'] = 465
app.config['MAIL_USERNAME'] = 'yourId@gmail.com'
app.config['MAIL_PASSWORD'] = '*****'
app.config['MAIL_USE_TLS'] = False
app.config['MAIL_USE_SSL'] = True
步骤3-创建Mail类的实例。
mail = Mail(app)
步骤4-在通过URL规则(?/?)映射的Python函数设置Message对象。
@app.route("/")
def index():
   msg = Message('Hello', sender = 'yourId@gmail.com', recipients = ['id1@gmail.com'])
   msg.body = "This is the email body"
   mail.send(msg)
   return "Sent"
步骤5-完整的代码如下。在Python Shell中运行以下脚本,然后访问http:// localhost:5000 /。
from flask import Flask
from flask_mail import Mail, Message

app =Flask(__name__)
mail=Mail(app)

app.config['MAIL_SERVER']='smtp.gmail.com'
app.config['MAIL_PORT'] = 465
app.config['MAIL_USERNAME'] = 'yourId@gmail.com'
app.config['MAIL_PASSWORD'] = '*****'
app.config['MAIL_USE_TLS'] = False
app.config['MAIL_USE_SSL'] = True
mail = Mail(app)

@app.route("/")
def index():
   msg = Message('Hello', sender = 'yourId@gmail.com', recipients = ['id1@gmail.com'])
   msg.body = "Hello Flask message sent from Flask-Mail"
   mail.send(msg)
   return "Sent"

if __name__ == '__main__':
   app.run(debug = True)
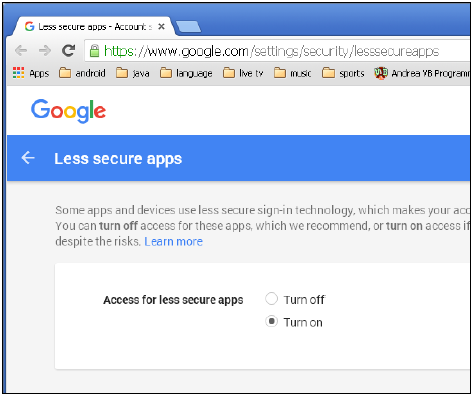
请注意,Gmail服务中的内置安全功能可能会阻止此登录尝试。您可能必须降低安全级别。请登录您的Gmail帐户,然后访问此链接以降低安全性。