使用 Node.js、Express 和 Postgres 创建 REST API 后端
可以使用 Node.js、Express 和 Postgres 开发 JavaScript 后端。该后端可以对 PostgreSQL 数据库进行查询操作,并在 REST API 上提供状态或数据。
安装要求:
- 节点.js:
- 在 Windows 上安装 Node.js
- 在 Linux 上安装 Node.js
- PostgreSQL:
- 在 Windows 上安装 Postgres
- 在 Linux 上安装 Postgres
- 在 Mac 上安装 Postgres
测试成功安装:
- 节点.js:
- 打开命令提示符或终端并输入:
node -v输出必须显示一些版本号示例:
v12.14.0注意:如果显示 command not found 则 node.js 没有安装成功。
- 打开命令提示符或终端并输入:
- Postgres:
- Windows : 搜索 SQL Shell,如果找到则安装成功。
- Linux 或 Mac:键入以下命令:
which psq注意:如果存在输出,则安装成功。
设置数据库的步骤:
- 打开 PostgresSQL 外壳
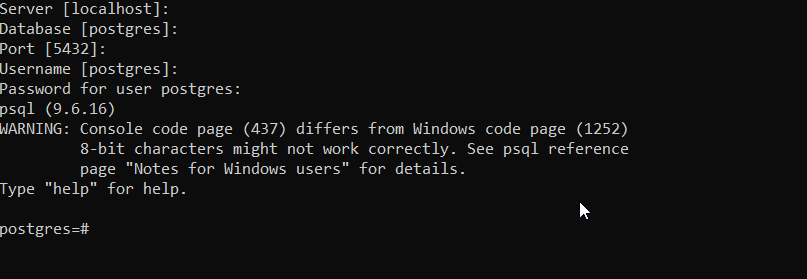
- 键入本地设置的数据库凭据或按回车键,以防您想使用默认值,如下所示:

- 使用以下命令创建数据库:
create database gfgbackend; - 使用以下命令切换到该数据库:
\c gfgbackend; - 使用以下命令创建测试表:
create table test(id int not null); - 使用以下命令将值插入测试表:
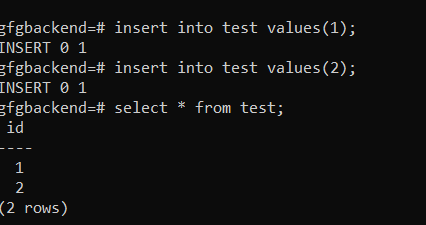
insert into test values(1); insert into test values(2); - 现在尝试使用以下方法验证数据是否插入到表中:
select * from test;
创建后端的步骤:
- 转到您要创建项目的目录
- 使用以下命令初始化节点项目:
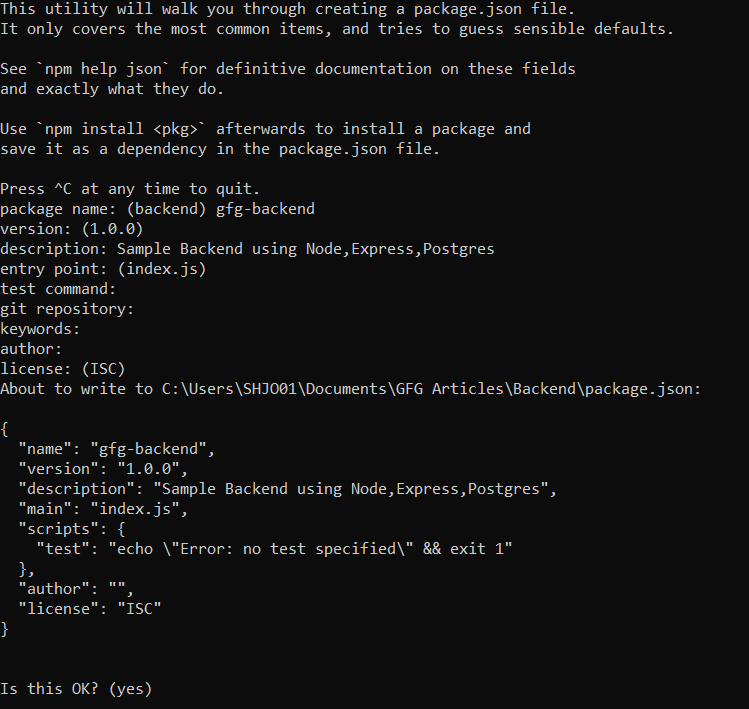
npm init - 输入项目名称和其他详细信息,如果要使用默认值,请按 Enter

- 使用 npm 安装 express
npm install --save express - 使用 npm 安装 node-postgres 客户端
npm install --save pg - 安装 postgres 模块,用于使用 npm 将 JSON 数据序列化和反序列化为 hstore 格式。
npm install --save pg-hstore - 创建一个文件 index.js 作为后端的入口点。
- 现在使用 npm 安装 body-parser
npm install --save body-parser - 现在将以下代码添加到 index.js 文件中,该文件启动 express 服务器,创建池连接并创建 REST API '/testdata'。在下面的代码中创建池时不要忘记添加您的密码。
// Entry Point of the API Server const express = require('express'); /* Creates an Express application. The express() function is a top-level function exported by the express module. */ const app = express(); const Pool = require('pg').Pool; const pool = new Pool({ user: 'postgres', host: 'localhost', database: 'gfgbackend', password: 'postgres', dialect: 'postgres', port: 5432 }); /* To handle the HTTP Methods Body Parser is used, Generally used to extract the entire body portion of an incoming request stream and exposes it on req.body */ const bodyParser = require('body-parser'); app.use(bodyParser.json()) app.use(bodyParser.urlencoded({ extended: false })); pool.connect((err, client, release) => { if (err) { return console.error( 'Error acquiring client', err.stack) } client.query('SELECT NOW()', (err, result) => { release() if (err) { return console.error( 'Error executing query', err.stack) } console.log("Connected to Database !") }) }) app.get('/testdata', (req, res, next) => { console.log("TEST DATA :"); pool.query('Select * from test') .then(testData => { console.log(testData); res.send(testData.rows); }) }) // Require the Routes API // Create a Server and run it on the port 3000 const server = app.listen(3000, function () { let host = server.address().address let port = server.address().port // Starting the Server at the port 3000 }) - 现在,使用以下命令启动后端服务器:
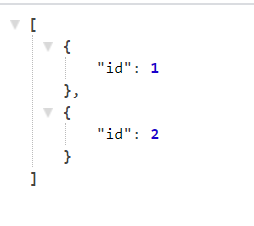
node index.js - 打开浏览器并尝试路由到:
http://localhost:3000/testdata现在,您可以看到测试表中的数据如下:
