- Android WebView示例(1)
- Android WebView示例
- 如何在Android中使用WebView
- 如何在Android中使用WebView(1)
- Kotlin 中的 Android WebView(1)
- Kotlin 中的 Android WebView
- Kotlin Android WebView
- 如何在 android 中返回 webview (1)
- webview 中的 android 搜索 - Java (1)
- webview 暗模式 android - Java (1)
- webview 中的 android 搜索 - Java 代码示例
- webview 暗模式 android - Java 代码示例
- 如何在 android 中返回 webview - 无论代码示例
- localStorage android webview - Java (1)
- localStorage android webview - Java 代码示例
- webview flutter (1)
- flutter webview (1)
- 如何在 webview android 中获取当前 url (1)
- 刷新方法()android studio webview (1)
- 在 android 中处理 webview 下载链接 (1)
- 如何在Android中将WebView转换为PDF?(1)
- 如何在Android中将WebView转换为PDF?
- 如何在 webview android 中获取当前 url - 任何代码示例
- JavaFX | WebView 类(1)
- JavaFX | WebView 类
- webview_flutter - Python 代码示例
- webview 发送到控制台 android - Java (1)
- 网页不可用 android webview - 无论代码示例
- 刷新方法()android studio webview - 任何代码示例
📅 最后修改于: 2021-01-05 05:39:45 🧑 作者: Mango
WebView是在应用程序内部显示网页的视图。您还可以指定HTML字符串,并可以使用WebView在应用程序内部显示它。 WebView使您的应用程序转变为Web应用程序。
为了将WebView添加到您的应用程序,必须将
为了使用它,您必须在Java文件中获得此视图的引用。要获取参考,请创建WebView类的对象。它的语法是-
WebView browser = (WebView) findViewById(R.id.webview);
为了将Web URL加载到WebView中,您需要调用WebView类的方法loadUrl(String url) ,并指定所需的URL。其语法为:
browser.loadUrl("http://www.tutorialspoint.com");
除了仅加载URL,还可以使用WebView类中定义的方法来更好地控制WebView。它们列出如下-
| Sr.No | Method & Description |
|---|---|
| 1 |
canGoBack() This method specifies the WebView has a back history item. |
| 2 |
canGoForward() This method specifies the WebView has a forward history item. |
| 3 |
clearHistory() This method will clear the WebView forward and backward history. |
| 4 |
destroy() This method destroy the internal state of WebView. |
| 5 |
findAllAsync(String find) This method find all instances of string and highlight them. |
| 6 |
getProgress() This method gets the progress of the current page. |
| 7 |
getTitle() This method return the title of the current page. |
| 8 |
getUrl() This method return the url of the current page. |
如果单击WebView网页内的任何链接,则该页面不会加载到WebView内。为此,您需要从WebViewClient扩展类并重写其方法。它的语法是-
private class MyBrowser extends WebViewClient {
   @Override
   public boolean shouldOverrideUrlLoading(WebView view, String url) {
      view.loadUrl(url);
      return true;
   }
}
例
这是一个演示WebView布局用法的示例。它创建一个基本的Web应用程序,该应用程序将要求您指定一个URL,并将此URL网站加载到WebView中。
要试验此示例,您需要在运行Internet的实际设备上运行此示例。
| Steps | Description |
|---|---|
| 1 | You will use Android studio to create an Android application under a package com.example.sairamkrishna.myapplication. |
| 2 | Modify src/MainActivity.java file to add WebView code. |
| 3 | Modify the res/layout/activity_main to add respective XML components |
| 4 | Modify the AndroidManifest.xml to add the necessary permissions |
| 5 | Run the application and choose a running android device and install the application on it and verify the results. |
以下是修改后的主要活动文件src / MainActivity.java的内容。
package com.example.sairamkrishna.myapplication;
import android.app.Activity;
import android.os.Bundle;

import android.view.View;
import android.webkit.WebView;
import android.webkit.WebViewClient;
import android.widget.Button;
import android.widget.EditText;


public class MainActivity extends Activity  {
   Button b1;
   EditText ed1;

   private WebView wv1;
   @Override
   protected void onCreate(Bundle savedInstanceState) {
      super.onCreate(savedInstanceState);
      setContentView(R.layout.activity_main);

      b1=(Button)findViewById(R.id.button);
      ed1=(EditText)findViewById(R.id.editText);

      wv1=(WebView)findViewById(R.id.webView);
      wv1.setWebViewClient(new MyBrowser());

      b1.setOnClickListener(new View.OnClickListener() {
         @Override
         public void onClick(View v) {
            String url = ed1.getText().toString();

            wv1.getSettings().setLoadsImagesAutomatically(true);
            wv1.getSettings().setJavaScriptEnabled(true);
            wv1.setScrollBarStyle(View.SCROLLBARS_INSIDE_OVERLAY);
            wv1.loadUrl(url);
         }
      });
   }

   private class MyBrowser extends WebViewClient {
      @Override
      public boolean shouldOverrideUrlLoading(WebView view, String url) {
         view.loadUrl(url);
         return true;
      }
   }
}
以下是xml res / layout / activity_main.xml的修改内容。
在下面的代码中, abc指示tutorialspoint.com的徽标
以下是res / values /字符串.xml的内容。
My Application
以下是AndroidManifest.xml文件的内容。
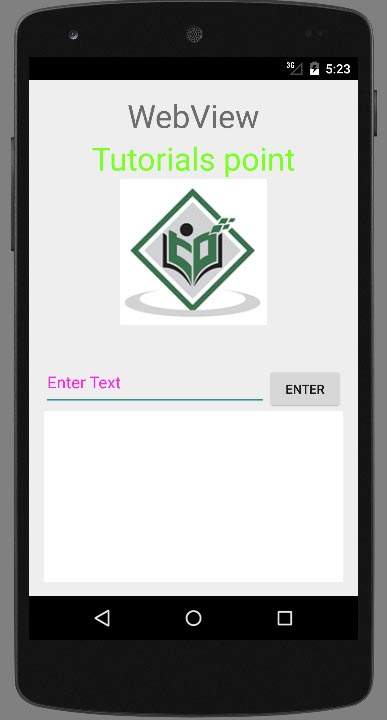
让我们尝试运行您的WebView应用程序。要从Android Studio运行该应用,请打开您项目的活动文件之一,然后点击运行 工具栏中的图标。 Android studio将显示如下图
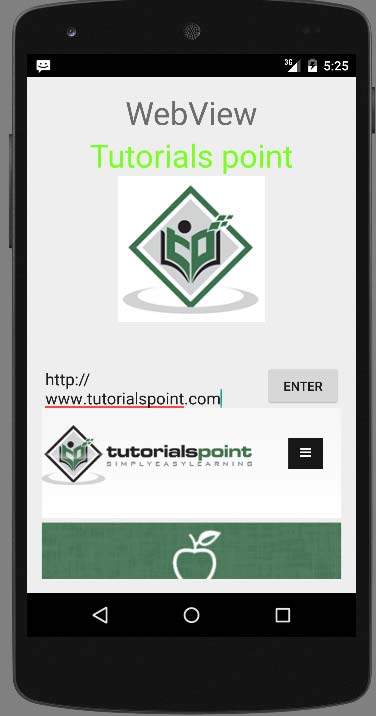
现在,只需在url字段中指定一个url,然后按出现的浏览按钮即可启动网站。但在此之前,请确保您已连接到互联网。按下按钮后,将出现以下屏幕-

注意。通过仅更改url字段中的url,您的WebView将打开所需的网站。

上图显示了tutorialspoint.com的Web视图