使用Java配置的 Spring Security 项目示例
Spring Security是基于 Spring 的应用程序中的安全标准,它为应用程序提供身份验证和授权。 Spring Security 是一个强大的工具,它为用户提供了自定义安全配置的功能,spring 中的安全配置可以通过以下两种方式进行自定义:
- 基于 XML 的配置
- Java配置。
在这里,我们将使用自定义的基于 java 的安全配置创建登录表单,并向我们的应用程序添加身份验证和授权。
Prerequisites: Introduction to spring, spring boot
创建基于 Java 的安全表单的步骤
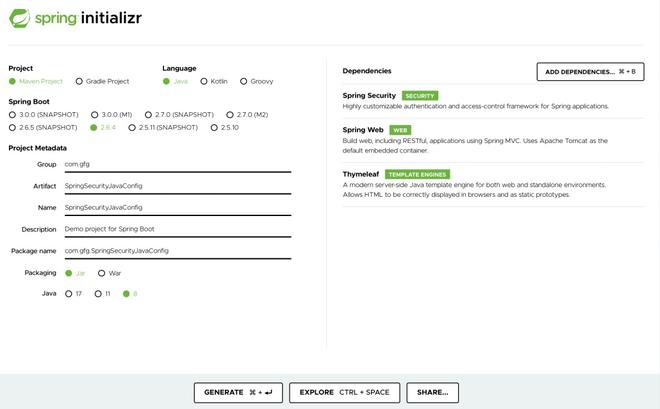
步骤 1:使用 spring initializr 创建一个Spring boot项目并提供一个 Group 和一个 Artifact Id,选择 Spring Boot 版本,添加 Spring Web、Spring Security 和 Thymeleaf 作为依赖项。
步骤 2:解压下载的文件并将其作为Maven项目导入Eclipse ,项目结构如下所示:
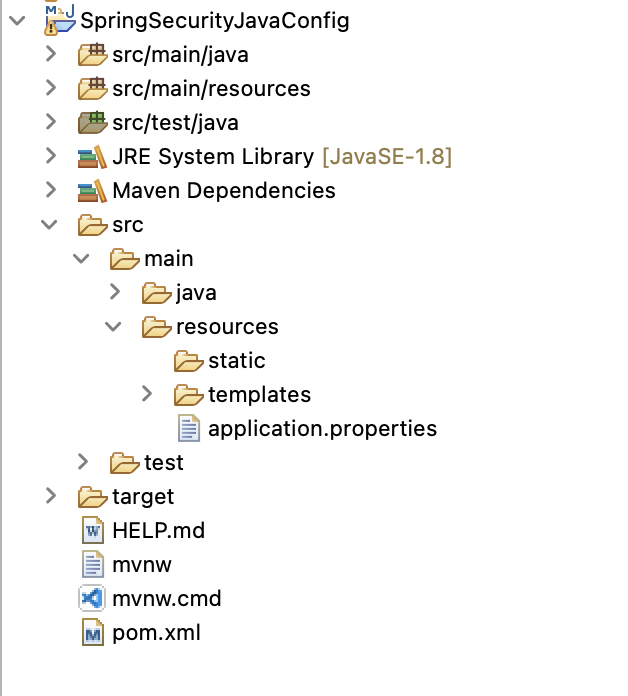
创建的项目应该有一个 pom.xml,其中定义了配置和所有依赖项。我们使用的是 spring boot,所以我们现在不需要定义任何额外的东西。
文件:pom.xml
XML
    4.0.0

        org.springframework.boot
        spring-boot-starter-parent
        2.6.4


    com.gfg
    SpringSecurityJavaConfig
    0.0.1-SNAPSHOT
    SpringSecurityJavaConfig
    Demo project for Spring Boot

        1.8


            org.springframework.boot
            spring-boot-starter-security


            org.springframework.boot
            spring-boot-starter-thymeleaf


            org.springframework.boot
            spring-boot-starter-web


            org.thymeleaf.extras
            thymeleaf-extras-springsecurity5


            org.springframework.boot
            spring-boot-starter-test
            test


            org.springframework.security
            spring-security-test
            test


                org.springframework.boot
                spring-boot-maven-plugin
Java
// Java program to Illustrate Configuration Java Application
// In Spring Security

package com.gfg.SpringSecurityJavaConfig;

// Importing required classes
import org.springframework.boot.SpringApplication;
import org.springframework.boot.autoconfigure.SpringBootApplication;

// Annotation
@SpringBootApplication
// Class
public class SpringSecurityJavaConfigApplication {

    // Main driver method
    public static void main(String[] args)
    {

        SpringApplication.run(
            SpringSecurityJavaConfigApplication.class,
            args);
    }
}
Java
// Java Program to Illustrate LoginController Class

package com.gfg.SpringSecurityJavaConfig.cotroller;

// Importing required classes
import org.springframework.stereotype.Controller;
import org.springframework.web.bind.annotation.GetMapping;

// Annotation
@Controller
// Class
public class LoginController {

    @GetMapping("/welcome") public String welcome()
    {
        return "welcome.html";
    }

    @GetMapping("/admin") public String user()
    {
        return "admin.html";
    }

    @GetMapping("/basic") public String basic()
    {
        return "basic.html";
    }

    @GetMapping("/login") public String login()
    {
        return "login.html";
    }
}
Java
// Java Program to Illustrate Spring Security

package com.gfg.SpringSecurityJavaConfig.security;

// Importing required classes
import org.springframework.context.annotation.Bean;
import org.springframework.security.config.annotation.authentication.builders.AuthenticationManagerBuilder;
import org.springframework.security.config.annotation.web.builders.HttpSecurity;
import org.springframework.security.config.annotation.web.configuration.EnableWebSecurity;
import org.springframework.security.config.annotation.web.configuration.WebSecurityConfigurerAdapter;
import org.springframework.security.crypto.bcrypt.BCryptPasswordEncoder;
import org.springframework.security.crypto.password.PasswordEncoder;
import org.springframework.security.web.util.matcher.AntPathRequestMatcher;

// Annotation
@EnableWebSecurity
// Class
public class SpringSecurityConfig
    extends WebSecurityConfigurerAdapter {

    // Annotation
    @Override
    protected void
    configure(AuthenticationManagerBuilder auth)
        throws Exception
    {
        auth.inMemoryAuthentication()
            .passwordEncoder(passwordEncoder())
            .withUser("gfg")
            .password(passwordEncoder().encode("pass"))
            .roles("ADMIN")
            .and()
            .passwordEncoder(passwordEncoder())
            .withUser("user")
            .password(passwordEncoder().encode("pass"))
            .roles("BASIC");
    }

    // Annotation
    @Bean
    // Method
    public PasswordEncoder passwordEncoder()
    {
        return new BCryptPasswordEncoder();
    }

    // Annotation
    @Override
    // Method
    protected void configure(HttpSecurity http)
        throws Exception
    {

        http.authorizeRequests()
            .antMatchers("/basic")
            .hasAnyRole("BASIC", "ADMIN")
            .antMatchers("/admin")
            .hasRole("ADMIN")
            .antMatchers("/")
            .permitAll()
            .anyRequest()
            .authenticated()
            .and()
            .formLogin()
            .permitAll()
            .loginPage("/login")
            .usernameParameter("username")
            .and()
            .logout()
            .logoutRequestMatcher(
                new AntPathRequestMatcher("/logout"))
            .permitAll();
    }
}
HTML
Insert title here
Login page
HTML
Insert title here


    LoggedIn Successful
    Welcome Back Click here to logout
HTML
basic page


    Welcome Basic User
HTML
Admin page


    Welcome Admin
This class is responsible to build everything up and run your spring boot application.
Java
// Java program to Illustrate Configuration Java Application
// In Spring Security

package com.gfg.SpringSecurityJavaConfig;

// Importing required classes
import org.springframework.boot.SpringApplication;
import org.springframework.boot.autoconfigure.SpringBootApplication;

// Annotation
@SpringBootApplication
// Class
public class SpringSecurityJavaConfigApplication {

    // Main driver method
    public static void main(String[] args)
    {

        SpringApplication.run(
            SpringSecurityJavaConfigApplication.class,
            args);
    }
}
代码说明:控制器类通过将传入请求重定向到适当的视图页面来处理传入的请求,必须在控制器类中定义任何 URL 才能发送请求。 LoginController类存在于com.gfg.SpringSecurityJavaConfig.cotroller包中,有四种方法用于映射到四个不同的视图页面。所有这些视图页面都可以根据用户的角色进行访问。现在,让我们看看如何为不同的用户定义不同的角色。
Java
// Java Program to Illustrate LoginController Class

package com.gfg.SpringSecurityJavaConfig.cotroller;

// Importing required classes
import org.springframework.stereotype.Controller;
import org.springframework.web.bind.annotation.GetMapping;

// Annotation
@Controller
// Class
public class LoginController {

    @GetMapping("/welcome") public String welcome()
    {
        return "welcome.html";
    }

    @GetMapping("/admin") public String user()
    {
        return "admin.html";
    }

    @GetMapping("/basic") public String basic()
    {
        return "basic.html";
    }

    @GetMapping("/login") public String login()
    {
        return "login.html";
    }
}
代码说明:
- com.gfg.SpringSecurityJavaConfig.security包中的SpringSecurityConfig类是定义 spring 安全配置的地方。此类扩展了WebSecurityConfigureAdapter类,该类提供了 configure 等方法来为用户添加自定义身份验证和授权。
- 第一个配置方法有AuthenticationManagerBuilder的参数,它定义了用户的身份验证。为简单起见,我们将使用硬编码的用户 ID 和密码。
- passwordEncoder使用BCryptPasswordEncoder加密密码。
- 第二个配置方法定义了用户的授权,它定义了具有特定角色的用户的映射,如您所见,我们已经定义了所有具有角色“ BASIC ”的用户只允许访问欢迎页面和基本页面,而具有角色“ ADMIN ”的用户被允许访问所有 URL。我们还定义了一个自定义登录页面,它将作为请求的任何 URL 的重定向点。
Java
// Java Program to Illustrate Spring Security

package com.gfg.SpringSecurityJavaConfig.security;

// Importing required classes
import org.springframework.context.annotation.Bean;
import org.springframework.security.config.annotation.authentication.builders.AuthenticationManagerBuilder;
import org.springframework.security.config.annotation.web.builders.HttpSecurity;
import org.springframework.security.config.annotation.web.configuration.EnableWebSecurity;
import org.springframework.security.config.annotation.web.configuration.WebSecurityConfigurerAdapter;
import org.springframework.security.crypto.bcrypt.BCryptPasswordEncoder;
import org.springframework.security.crypto.password.PasswordEncoder;
import org.springframework.security.web.util.matcher.AntPathRequestMatcher;

// Annotation
@EnableWebSecurity
// Class
public class SpringSecurityConfig
    extends WebSecurityConfigurerAdapter {

    // Annotation
    @Override
    protected void
    configure(AuthenticationManagerBuilder auth)
        throws Exception
    {
        auth.inMemoryAuthentication()
            .passwordEncoder(passwordEncoder())
            .withUser("gfg")
            .password(passwordEncoder().encode("pass"))
            .roles("ADMIN")
            .and()
            .passwordEncoder(passwordEncoder())
            .withUser("user")
            .password(passwordEncoder().encode("pass"))
            .roles("BASIC");
    }

    // Annotation
    @Bean
    // Method
    public PasswordEncoder passwordEncoder()
    {
        return new BCryptPasswordEncoder();
    }

    // Annotation
    @Override
    // Method
    protected void configure(HttpSecurity http)
        throws Exception
    {

        http.authorizeRequests()
            .antMatchers("/basic")
            .hasAnyRole("BASIC", "ADMIN")
            .antMatchers("/admin")
            .hasRole("ADMIN")
            .antMatchers("/")
            .permitAll()
            .anyRequest()
            .authenticated()
            .and()
            .formLogin()
            .permitAll()
            .loginPage("/login")
            .usernameParameter("username")
            .and()
            .logout()
            .logoutRequestMatcher(
                new AntPathRequestMatcher("/logout"))
            .permitAll();
    }
}
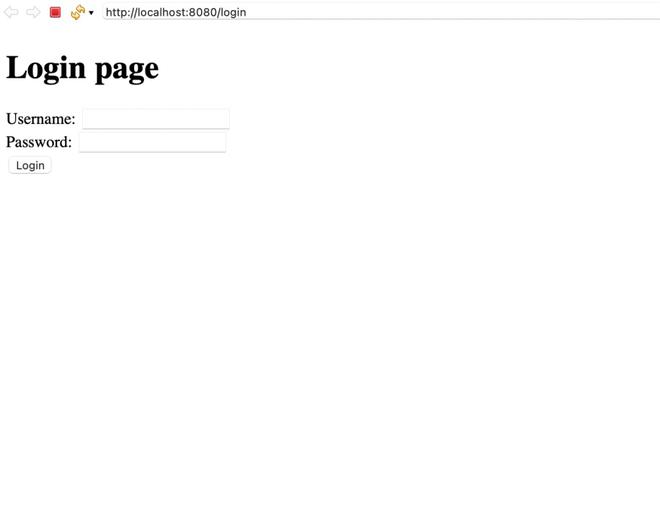
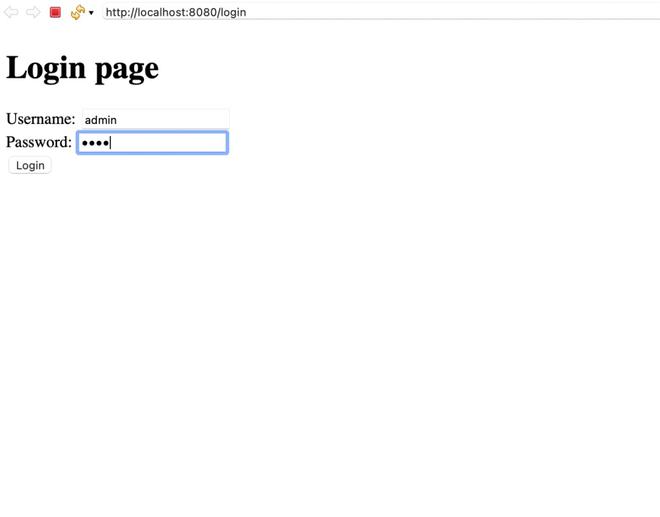
这是模板文件夹中的login.html页面,它定义了应用程序的登录页面。
文件:login.html
HTML
Insert title here
Login page
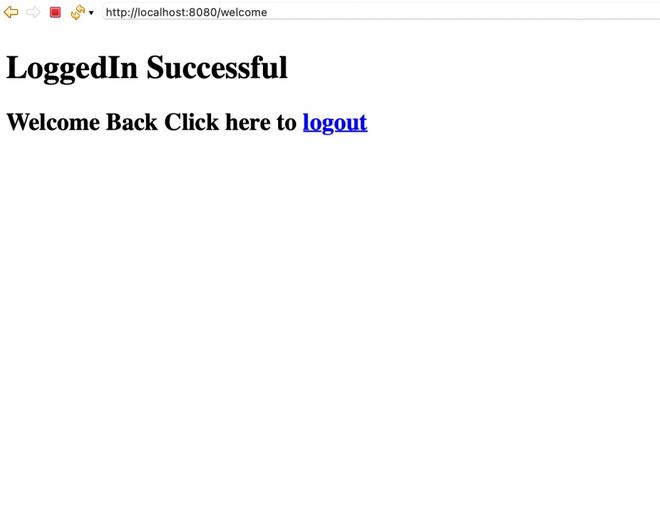
这是所有具有任何角色的用户都可以访问的welcome.html页面。
文件:welcome.html
HTML
Insert title here


    LoggedIn Successful
    Welcome Back Click here to logout
这是“BASIC”和“ADMIN”用户可以访问的basic.html页面。
文件:basic.html
HTML
basic page


    Welcome Basic User
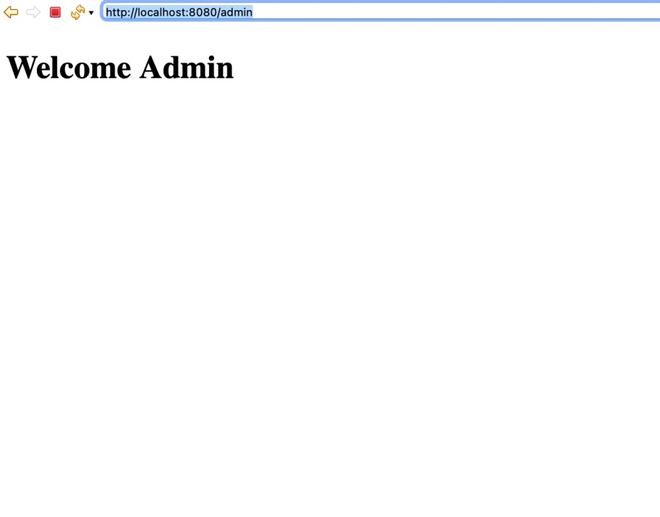
这是只有具有“ADMIN”角色的用户才能访问的admin.html页面。
文件:admin.html
HTML
Admin page


    Welcome Admin
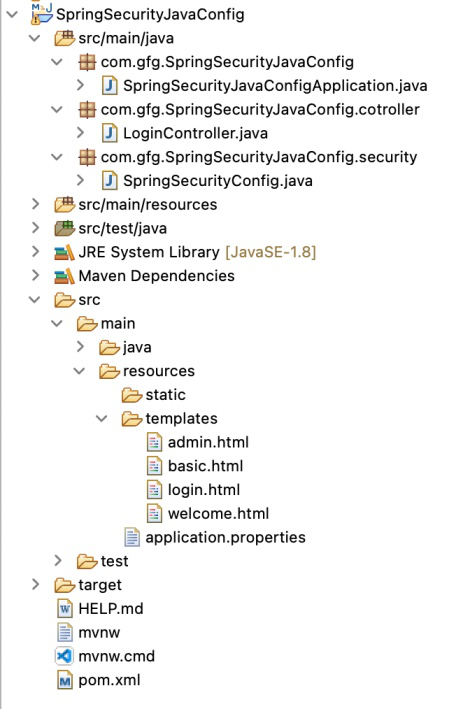
第 3 步:添加所有类和视图页面后,我们的项目结构如下所示:
第 4 步:现在是运行应用程序的时候了,运行应用程序后,在任何浏览器http://localhost:8080/SpringSecurityJavaConfig/welcome 中键入此 URL。
因此,我们使用基于Java的配置创建了一个Spring Security Web 应用程序,并向我们的应用程序添加了自定义身份验证和授权。