Microsoft Azure – 复制 Azure OS 托管磁盘
在本文中,我们必须从将数据复制到 azure 页 blob 的 OS 磁盘中需要一个 azure 托管 OS 磁盘,然后从该磁盘将数据传输到新的托管磁盘。在这里,我们将使用 Azure PowerShell 将数据从现有磁盘复制到新磁盘。
此方案可用于以下活动:
- 构建/克隆具有相同操作系统配置的天蓝色服务器
- 在不同的位置或数据中心创建相同的应用程序。
- 从一个区域到另一个区域的数据传输
- 在少数情况下,此过程也可用于版本控制。
注意: V1 Gen OS 不能与 V2 Gen 交换
先决条件:
- 你必须有一个现有的操作系统托管磁盘才能在 Azure 中复制
- 所有者,贡献者访问是必需的。
- 如果您使用的是 Windows PowerShell,则应安装 AzCopy v10。
执行:
按照以下步骤复制操作系统托管磁盘:1
步骤 1:登录到Azure 门户。
第 2 步:从 azure 菜单登录后,访问Azure Cloud Shell >> 切换到PowerShell模式。
第 3 步:现在,使用以下命令创建一个新的 PowerShell 文件。让我们说“copy-managed-disk.ps1”。
touch copy-managed-disk.ps1第 4 步:要写入文件或编辑文件,请使用以下命令
code copy-managed-data-disk.ps1将以下 PowerShell 脚本复制粘贴到 copy-managed-data-disk.ps1
$SubscriptionName = "_add_subscription_name"
Set-AzureRmContext -SubscriptionName "$SubscriptionName" | Out-Null

$sourceRG = "_add_source_rg_name_"
$sourceDiskName = "_add_source_datadisk_name_"

$targetDiskName = "_add_target_datadisk_name_"
$targetRG = "_add_target_rg_name_"
$targetLocate = "_add_target_location_"

#Expected value for OS is either "Windows" or "Linux"
$targetOS = "_add_system_ostype_"
$HyperVGeneration = "_add_vm_gen_" #either V1 or V2

$SKUName = '_add_disk_sku_type_' #Premium_LRS or Standard_LRS

$sourceDisk = Get-AzDisk -ResourceGroupName $sourceRG -DiskName $sourceDiskName

# Adding the sizeInBytes with the 512 offset, and the -Upload flag
$targetDiskconfig = New-AzDiskConfig -SkuName -osType $targetOS `
-UploadSizeInBytes $($sourceDisk.DiskSizeBytes+512) `
-Location $targetLocate -CreateOption 'Upload' `
-HyperVGeneration $HyperVGeneration

$targetDisk = New-AzDisk -ResourceGroupName $targetRG -DiskName $targetDiskName `
-Disk $targetDiskconfig

$sourceDiskSas = Grant-AzDiskAccess -ResourceGroupName $sourceRG -DiskName $sourceDiskName `
-DurationInSecond 86400 -Access 'Read'

$targetDiskSas = Grant-AzDiskAccess -ResourceGroupName $targetRG -DiskName $targetDiskName `
-DurationInSecond 86400 -Access 'Write'

azcopy copy $sourceDiskSas.AccessSAS $targetDiskSas.AccessSAS --blob-type PageBlob

Revoke-AzDiskAccess -ResourceGroupName $sourceRG -DiskName $sourceDiskName

Revoke-AzDiskAccess -ResourceGroupName $targetRG -DiskName $targetDiskName
现在,在脚本中填写以下详细信息
- $SubscriptionName = “_add_subscription_name”
- $sourceRG = “_add_source_rg_name_”
- $sourceDiskName = “_add_source_datadisk_name_”
- $targetDiskName = “_add_target_datadisk_name_”
- $targetRG = “_add_target_rg_name_”
- $targetLocate = “_add_target_location_”
- $targetOS = “add_system_ostype_” #“Windows”或“Linux”
- $HyperVGeneration = “_add_vm_gen_” #V1 或 V2
- $SKUName = '_add_disk_sku_type_' #“Premium_LRS”或“Standard_LRS”或任何其他。
注意:根据您将数据复制到磁盘的要求修改更改。
第 5 步:在脚本中进行更改后,使用以下命令运行 PowerShell 脚本
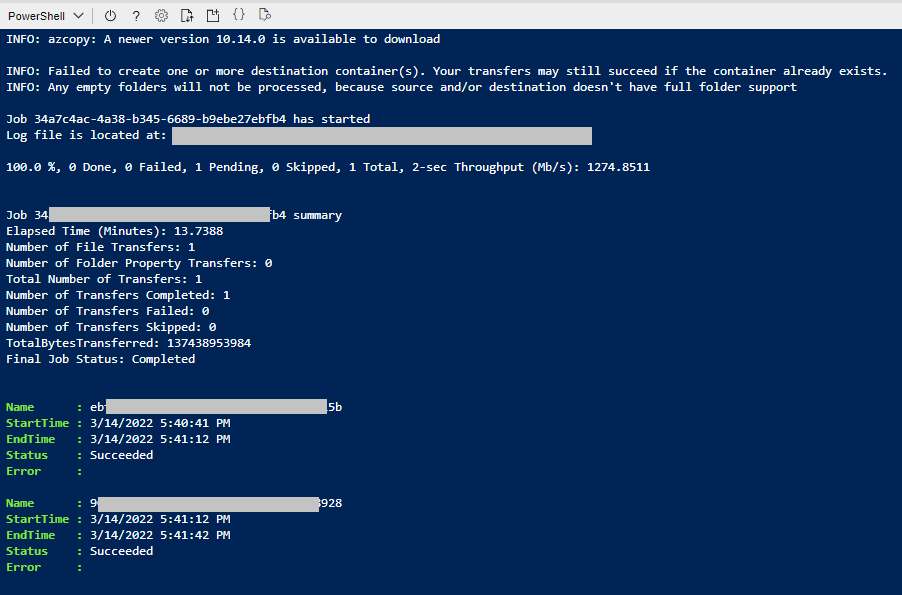
./copy-managed-data-disk.ps1注意:执行过程需要时间,具体取决于操作系统托管磁盘的大小。平均而言,如果您使用的是 Premium LRS,它将在 15-20 内处理 50 GB 的数据。在标准 LRS 的情况下,将数据从一个磁盘复制到另一个磁盘平均可能需要 30-40 分钟。如果您使用的是 HDD,甚至可能需要更多时间。
输出:一次,复制完成。然后结果将如下所示。