使用 Flask-SQLAlchemy 将 Flask 连接到数据库
Flask 是一个用Python编写的微型 Web 框架。微框架通常是一个几乎不依赖外部库的框架。虽然是一个微框架,但几乎所有东西都可以在需要时使用Python库和其他依赖项来实现。
在本文中,我们将构建一个 Flask 应用程序,该应用程序从用户的表单中获取数据,然后将其显示在网站的另一个页面上。我们也可以删除数据。我们不会专注于前端部分,而只会为 Web 应用程序编写后端代码。
安装烧瓶
在您觉得舒服的任何目录中创建一个文件夹并在该目录中打开命令行。使用下面的命令创建一个Python虚拟环境。
python -m venv 命令运行完成后,使用以下命令激活虚拟环境。
\scripts\activate 现在,使用 pip( Python 的包安装程序)安装 Flask。只需运行下面的命令。
pip install Flask创建 app.py
安装完成后,创建一个文件名 app.py 并在您喜欢的编辑器中打开它。要检查 Flask 是否已正确安装,您可以运行以下代码。
Python
from flask import Flask
app = Flask(__name__)


'''If everything works fine you will get a
message that Flask is working on the first
page of the application
'''

@app.route('/')
def check():
    return 'Flask is working'


if __name__ == '__main__':
    app.run()
Python
from flask import Flasky
from flask_sqlalchemy import SQLAlchemy

app = Flask(__name__)
app.debug = True

# adding configuration for using a sqlite database
app.config['SQLALCHEMY_DATABASE_URI'] = 'sqlite:///site.db'

# Creating an SQLAlchemy instance
db = SQLAlchemy(app)

if __name__ == '__main__':
    app.run()
Python
from flask import Flask, request, redirect
from flask.templating import render_template
from flask_sqlalchemy import SQLAlchemy

app = Flask(__name__)
app.debug = True

# adding configuration for using a sqlite database
app.config['SQLALCHEMY_DATABASE_URI'] = 'sqlite:///site.db'

# Creating an SQLAlchemy instance
db = SQLAlchemy(app)

# Models
class Profile(db.Model):
    # Id : Field which stores unique id for every row in
    # database table.
    # first_name: Used to store the first name if the user
    # last_name: Used to store last name of the user
    # Age: Used to store the age of the user
    id = db.Column(db.Integer, primary_key=True)
    first_name = db.Column(db.String(20), unique=False, nullable=False)
    last_name = db.Column(db.String(20), unique=False, nullable=False)
    age = db.Column(db.Integer, nullable=False)

    # repr method repersents how one object of this datatable
    # will look like
    def __repr__(self):
        return f"Name : {self.first_name}, Age: {self.age}"

if __name__ == '__main__':
    app.run()
Python
# Import for Migrations
from flask_migrate import Migrate, migrate

# Settings for migrations
migrate = Migrate(app, db)
HTML
      Index Page


      Profiles
Python
from flask import Flask, request, redirect
from flask.templating import render_template
from flask_sqlalchemy import SQLAlchemy

app = Flask(__name__)
app.debug = True

# adding configuration for using a sqlite database
app.config['SQLALCHEMY_DATABASE_URI'] = 'sqlite:///site.db'

# Creating an SQLAlchemy instance
db = SQLAlchemy(app)

# Models
class Profile(db.Model):

    id = db.Column(db.Integer, primary_key=True)
    first_name = db.Column(db.String(20), unique=False, nullable=False)
    last_name = db.Column(db.String(20), unique=False, nullable=False)
    age = db.Column(db.Integer, nullable=False)

    def __repr__(self):
        return f"Name : {self.first_name}, Age: {self.age}"

# function to render index page
@app.route('/')
def index():
    return render_template('index.html')

if __name__ == '__main__':
    app.run()
HTML
Add Profile
Profile form
Python
@app.route('/add_data')
def add_data():
    return render_template('add_profile.html')
Python
# function to add profiles
@app.route('/add', methods=["POST"])
def profile():

    # In this funcion we will input data from the
    # form page and store it in our database.
    # Remember that inside the get the name should
    # exactly be the same as that in the html
    # input fields
    first_name = request.form.get("first_name")
    last_name = request.form.get("last_name")
    age = request.form.get("age")

    # create an object of the Profile class of models
    # and store data as a row in our datatable
    if first_name != '' and last_name != '' and age is not None:
        p = Profile(first_name=first_name, last_name=last_name, age=age)
        db.session.add(p)
        db.session.commit()
        return redirect('/')
    else:
        return redirect('/')
HTML
      Index Page


      Profiles
      ADD


            Id
            First Name
            Last Name
            Age
            #

         {% for data in profiles %}

            {{data.id}}
            {{data.first_name}}
            {{data.last_name}}
            {{data.age}}
            Delete

         {% endfor%}
Python
@app.route('/')
def index():
      # Query all data and then pass it to the template
    profiles = Profile.query.all()
    return render_template('index.html', profiles=profiles)
Python
@app.route('/delete/')
def erase(id):
    # Deletes the data on the basis of unique id and
    # redirects to hoem page
    data = Profile.query.get(id)
    db.session.delete(data)
    db.session.commit()
    return redirect('/')
Python
from flask import Flask, request, redirect
from flask.templating import render_template
from flask_sqlalchemy import SQLAlchemy
from flask_migrate import Migrate, migrate

app = Flask(__name__)
app.debug = True

# adding configuration for using a sqlite database
app.config['SQLALCHEMY_DATABASE_URI'] = 'sqlite:///site.db'

# Creating an SQLAlchemy instance
db = SQLAlchemy(app)

# Settings for migrations
migrate = Migrate(app, db)

# Models
class Profile(db.Model):
    # Id : Field which stores unique id for every row in
    # database table.
    # first_name: Used to store the first name if the user
    # last_name: Used to store last name of the user
    # Age: Used to store the age of the user
    id = db.Column(db.Integer, primary_key=True)
    first_name = db.Column(db.String(20), unique=False, nullable=False)
    last_name = db.Column(db.String(20), unique=False, nullable=False)
    age = db.Column(db.Integer, nullable=False)

    # repr method repersents how one object of this datatable
    # will look like
    def __repr__(self):
        return f"Name : {self.first_name}, Age: {self.age}"

# function to render index page
@app.route('/')
def index():
    profiles = Profile.query.all()
    return render_template('index.html', profiles=profiles)

@app.route('/add_data')
def add_data():
    return render_template('add_profile.html')

# function to add profiles
@app.route('/add', methods=["POST"])
def profile():
    # In this funcion we will input data from the
    # form page and store it in our database. Remember
    # that inside the get the name shoukd exactly be the same
    # as that in the html input fields
    first_name = request.form.get("first_name")
    last_name = request.form.get("last_name")
    age = request.form.get("age")

    # create an object of the Profile class of models and
    # store data as a row in our datatable
    if first_name != '' and last_name != '' and age is not None:
        p = Profile(first_name=first_name, last_name=last_name, age=age)
        db.session.add(p)
        db.session.commit()
        return redirect('/')
    else:
        return redirect('/')

@app.route('/delete/')
def erase(id):

    # letes the data on the basis of unique id and
    # directs to hoem page
    data = Profile.query.get(id)
    db.session.delete(data)
    db.session.commit()
    return redirect('/')

if __name__ == '__main__':
    app.run()
HTML
      Index Page


      Profiles
      ADD


            Id
            First Name
            Last Name
            Age
            #

         {% for data in profiles %}

            {{data.id}}
            {{data.first_name}}
            {{data.last_name}}
            {{data.age}}
            Delete

         {% endfor%}
HTML
Add Profile
Profile form
输出:

设置 SQLAlchemy
现在,让我们继续为我们的应用程序创建一个数据库。出于本文的目的,我们将使用 SQLAlchemy 一个数据库工具包和一个 ORM(对象关系映射器)。我们将再次使用 pip 来安装 SQLAlchemy。命令如下,
pip install flask-sqlalchemy在您的 app.py 文件中导入 SQLAlchemy,如下面的代码所示。我们还需要向我们的应用程序添加一个配置设置,以便我们可以在我们的应用程序中使用 SQLite 数据库。我们还需要创建一个 SQLAlchemy 数据库实例,它就像创建一个对象一样简单。
Python
from flask import Flasky
from flask_sqlalchemy import SQLAlchemy

app = Flask(__name__)
app.debug = True

# adding configuration for using a sqlite database
app.config['SQLALCHEMY_DATABASE_URI'] = 'sqlite:///site.db'

# Creating an SQLAlchemy instance
db = SQLAlchemy(app)

if __name__ == '__main__':
    app.run()
创建模型
在 sqlalchemy 中,我们使用类来创建我们的数据库结构。在我们的应用程序中,我们将创建一个 Profile 表,该表将负责保存用户的 id、名字、姓氏和年龄。
Python
from flask import Flask, request, redirect
from flask.templating import render_template
from flask_sqlalchemy import SQLAlchemy

app = Flask(__name__)
app.debug = True

# adding configuration for using a sqlite database
app.config['SQLALCHEMY_DATABASE_URI'] = 'sqlite:///site.db'

# Creating an SQLAlchemy instance
db = SQLAlchemy(app)

# Models
class Profile(db.Model):
    # Id : Field which stores unique id for every row in
    # database table.
    # first_name: Used to store the first name if the user
    # last_name: Used to store last name of the user
    # Age: Used to store the age of the user
    id = db.Column(db.Integer, primary_key=True)
    first_name = db.Column(db.String(20), unique=False, nullable=False)
    last_name = db.Column(db.String(20), unique=False, nullable=False)
    age = db.Column(db.Integer, nullable=False)

    # repr method repersents how one object of this datatable
    # will look like
    def __repr__(self):
        return f"Name : {self.first_name}, Age: {self.age}"

if __name__ == '__main__':
    app.run()
下表解释了模型类中使用的一些关键字。Column used to create a new column in the database table Integer An integer data field primary_key If set to True for a field ensures that the field can be used to uniquely identify objects of the data table. String An string data field. String( unique If set to True it ensures that every data in that field in unique. nullable If set to False it ensures that the data in the field cannot be null. __repr__ Function used to represent objects of the data table.
创建数据库
在导航到项目目录和虚拟环境运行的命令行中,我们需要运行以下命令。
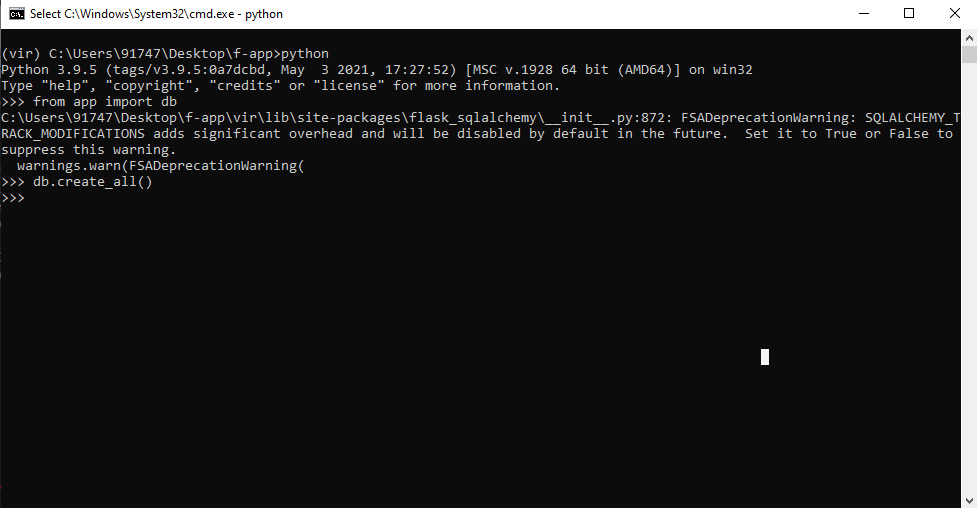
python上面的命令将在您的命令行中启动一个Python bash,您可以在其中使用更多代码行根据数据库中的模型类创建数据表。
from app import db
db.create_all()命令后,响应看起来像图片中的内容,在您的项目目录中,您会注意到一个名为'site.db'的新文件。

在数据库中进行迁移
使用 pip 安装 Flask-Migrate
pip install Flask-Migrate现在,在您的 app.py 中添加两行,代码如下,
Python
# Import for Migrations
from flask_migrate import Migrate, migrate

# Settings for migrations
migrate = Migrate(app, db)
现在要创建迁移,我们一个接一个地运行以下命令。
flask db init
烧瓶数据库初始化
flask db migrate -m "Initial migration"
flask db migrate -m “初始迁移”
flask db upgrade
烧瓶数据库升级
现在我们已经成功地在我们的数据库中创建了数据表。
创建应用程序的索引页面
在继续并构建我们的表单之前,让我们为我们的网站创建一个索引页面。 HTML 文件始终存储在名为'templates'的应用程序的父目录中的文件夹中。在模板文件夹中创建一个名为 index.html 的文件,并暂时粘贴以下代码。随着我们继续前进,我们将返回添加更多代码到我们的索引文件中。
HTML
      Index Page


      Profiles
在 app.py 中添加一个小函数,它将在 app.route 中指定的特定路由上呈现 HTML 页面。
Python
from flask import Flask, request, redirect
from flask.templating import render_template
from flask_sqlalchemy import SQLAlchemy

app = Flask(__name__)
app.debug = True

# adding configuration for using a sqlite database
app.config['SQLALCHEMY_DATABASE_URI'] = 'sqlite:///site.db'

# Creating an SQLAlchemy instance
db = SQLAlchemy(app)

# Models
class Profile(db.Model):

    id = db.Column(db.Integer, primary_key=True)
    first_name = db.Column(db.String(20), unique=False, nullable=False)
    last_name = db.Column(db.String(20), unique=False, nullable=False)
    age = db.Column(db.Integer, nullable=False)

    def __repr__(self):
        return f"Name : {self.first_name}, Age: {self.age}"

# function to render index page
@app.route('/')
def index():
    return render_template('index.html')

if __name__ == '__main__':
    app.run()
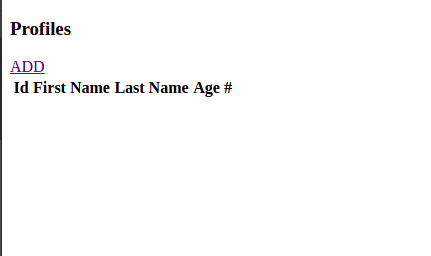
要测试一切是否正常,您可以使用以下命令运行您的应用程序
python app.py该命令将在 http://localhost:5000 设置本地服务器。
输出:

为表单创建 HTML 页面
我们将创建一个 HTML 页面,在其中呈现我们的表单。在您的模板文件夹中创建一个名为 add_profile 的 HTML 文件。 HTML 代码如下。代码中的重点将在您继续阅读时突出显示。
HTML
Add Profile
Profile form
在我们的应用程序中添加一个函数来呈现表单页面
在我们的 app.py 文件中,我们将添加以下函数。在路由或站点路径 'http://localhost:5000/add_data' 将呈现页面。
Python
@app.route('/add_data')
def add_data():
    return render_template('add_profile.html')
要检查代码是否正常工作,您可以运行以下命令启动本地服务器。
python app.py现在,访问 http://localhost:5000/add_data,您将能够看到该表单。
输出:

使用表单向数据库添加数据的函数
要将数据添加到数据库,我们将使用“POST”方法。 POST 用于将数据发送到服务器以创建/更新资源。在我们指定路由 app.route 的烧瓶中,我们还可以在那里指定 HTTP 方法。然后在函数内部,我们创建变量来存储数据并使用请求对象从表单中获取数据。
注意: HTML 文件的输入标签中使用的名称必须与此函数使用的名称相同,
例如,
“年龄”也应该用在Python函数中,
age = request.form.get("age")然后我们继续创建 Profile 类的对象,并使用数据库会话将其存储在我们的数据库中。
Python
# function to add profiles
@app.route('/add', methods=["POST"])
def profile():

    # In this funcion we will input data from the
    # form page and store it in our database.
    # Remember that inside the get the name should
    # exactly be the same as that in the html
    # input fields
    first_name = request.form.get("first_name")
    last_name = request.form.get("last_name")
    age = request.form.get("age")

    # create an object of the Profile class of models
    # and store data as a row in our datatable
    if first_name != '' and last_name != '' and age is not None:
        p = Profile(first_name=first_name, last_name=last_name, age=age)
        db.session.add(p)
        db.session.commit()
        return redirect('/')
    else:
        return redirect('/')
一旦函数被执行,它会将我们重定向回应用程序的索引页面。
在索引页上显示数据
现在在我们的索引页面上,我们将显示已存储在我们的数据表中的所有数据。我们将使用“ Profile.query.all() ”来查询 Profile 类的所有对象,然后使用Jinja 模板语言在我们的索引 HTML 文件上动态显示它。
按如下方式更新您的索引文件。删除函数将在本文稍后部分编写。现在,我们将从数据表中查询所有数据并将其显示在我们的主页上。
我们遍历配置文件中的每个对象,这些对象在索引函数传递给我们的模板,并以表格形式打印其所有数据。我们 app.py 中的 index函数更新如下。
Python
@app.route('/')
def index():
      # Query all data and then pass it to the template
    profiles = Profile.query.all()
    return render_template('index.html', profiles=profiles)
从我们的数据库中删除数据
为了删除数据,我们已经在表中使用了一个锚标记,现在我们只需将一个函数与它相关联。
Python
@app.route('/delete/')
def erase(id):
    # Deletes the data on the basis of unique id and
    # redirects to hoem page
    data = Profile.query.get(id)
    db.session.delete(data)
    db.session.commit()
    return redirect('/')
该函数根据 id 查询数据,然后将其从我们的数据库中删除。
完整代码
app.py、index.html 和 add-profile.html 的完整代码已经给出。
应用程序
Python
from flask import Flask, request, redirect
from flask.templating import render_template
from flask_sqlalchemy import SQLAlchemy
from flask_migrate import Migrate, migrate

app = Flask(__name__)
app.debug = True

# adding configuration for using a sqlite database
app.config['SQLALCHEMY_DATABASE_URI'] = 'sqlite:///site.db'

# Creating an SQLAlchemy instance
db = SQLAlchemy(app)

# Settings for migrations
migrate = Migrate(app, db)

# Models
class Profile(db.Model):
    # Id : Field which stores unique id for every row in
    # database table.
    # first_name: Used to store the first name if the user
    # last_name: Used to store last name of the user
    # Age: Used to store the age of the user
    id = db.Column(db.Integer, primary_key=True)
    first_name = db.Column(db.String(20), unique=False, nullable=False)
    last_name = db.Column(db.String(20), unique=False, nullable=False)
    age = db.Column(db.Integer, nullable=False)

    # repr method repersents how one object of this datatable
    # will look like
    def __repr__(self):
        return f"Name : {self.first_name}, Age: {self.age}"

# function to render index page
@app.route('/')
def index():
    profiles = Profile.query.all()
    return render_template('index.html', profiles=profiles)

@app.route('/add_data')
def add_data():
    return render_template('add_profile.html')

# function to add profiles
@app.route('/add', methods=["POST"])
def profile():
    # In this funcion we will input data from the
    # form page and store it in our database. Remember
    # that inside the get the name shoukd exactly be the same
    # as that in the html input fields
    first_name = request.form.get("first_name")
    last_name = request.form.get("last_name")
    age = request.form.get("age")

    # create an object of the Profile class of models and
    # store data as a row in our datatable
    if first_name != '' and last_name != '' and age is not None:
        p = Profile(first_name=first_name, last_name=last_name, age=age)
        db.session.add(p)
        db.session.commit()
        return redirect('/')
    else:
        return redirect('/')

@app.route('/delete/')
def erase(id):

    # letes the data on the basis of unique id and
    # directs to hoem page
    data = Profile.query.get(id)
    db.session.delete(data)
    db.session.commit()
    return redirect('/')

if __name__ == '__main__':
    app.run()
索引.html
add_profile.html
HTML
Add Profile
Profile form
输出:
