使用 Matplotlib 和 GDAL 使用Python可视化 Tiff 文件
Tiff 文件格式用于存储光栅图像。一个名为 GDAL-地理空间数据抽象库的库专门用于读取此类光栅文件以及其他文件格式(如矢量格式)。 gdal 模块属于开源地理空间基金会
要安装此模块,请在终端中运行此命令。
pip install GDAL
要可视化 tiff 文件,我们需要Python中的 matplotlib 和 GDAL 模块。
方法:
- 导入模块
- 计算带的数量。
- 从 tiff 文件中获取所有光栅带。
- 将波段读入 NumPy 数组。
- 将数组传递到 Matplotlib 的 imshow() 以进行可视化。
tiff 文件可以从这里下载。
分步实施:
步骤 1:导入模块并打开文件。
Python3
from osgeo import gdal
import matplotlib.pyplot as plt


dataset = gdal.Open(r'land_shallow_topo_2048.tif')
Python3
print(dataset.RasterCount)Python3
# since there are 3 bands
# we store in 3 different variables
band1 = dataset.GetRasterBand(1) # Red channel
band2 = dataset.GetRasterBand(2) # Green channel
band3 = dataset.GetRasterBand(3) # Blue channel
Python3
b1 = band1.ReadAsArray()
b2 = band2.ReadAsArray()
b3 = band3.ReadAsArray()
Python3
img = np.dstack((b1, b2, b3))
f = plt.figure()
plt.imshow(img)
plt.savefig('Tiff.png')
plt.show()
第 2 步:计算波段数。
蟒蛇3
print(dataset.RasterCount)
输出:
3
第 3 步:获取乐队,
为了获取波段,我们使用 GDAL 的 GetRasterBand(int)。
请注意,我们传递的 int 值总是从 1 开始(带的索引从 1 开始),
蟒蛇3
# since there are 3 bands
# we store in 3 different variables
band1 = dataset.GetRasterBand(1) # Red channel
band2 = dataset.GetRasterBand(2) # Green channel
band3 = dataset.GetRasterBand(3) # Blue channel
第 4 步:将波段读取为 Numpy 数组。
GDAL 提供了 ReadAsArray() 方法,将带区转换为 numpy 数组并返回它们。
蟒蛇3
b1 = band1.ReadAsArray()
b2 = band2.ReadAsArray()
b3 = band3.ReadAsArray()
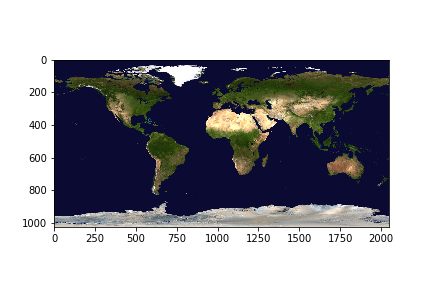
第 5 步:使用 imshow() 绘制数组。
为了绘制三个数组,我们将按顺序堆叠它们。
蟒蛇3
img = np.dstack((b1, b2, b3))
f = plt.figure()
plt.imshow(img)
plt.savefig('Tiff.png')
plt.show()
输出: