Flutter的Wakelock 包用于在使用时保持屏幕唤醒。可以根据需要(保持清醒的时间)进行调整。这些都是非常简单的事情,可以提高应用程序的质量并增加应用程序的用户友好性。
在本文中,我们将探讨在不使用应用程序时保持手机屏幕唤醒的过程。为此,我们将构建一个带有两个按钮的简单应用程序,即:
- 启用唤醒锁:它会阻止手机屏幕自我锁定,无论它保持这种状态多长时间。
- 禁用唤醒锁:它将禁用应用程序的唤醒锁功能。
现在让我们构建应用程序。为此,请执行以下步骤:
- 将依赖添加到pubspec.yaml 文件中
- 将依赖项导入到 main.js 中。dart文件
- 创建一个Statefulwidget为应用程序提供一个简单的结构
- 将OutlineButton添加到应用程序的主体
- 为按钮分配操作
现在让我们详细讨论这些步骤。
添加依赖:
在pubspec.yaml 文件的依赖项属性中,添加唤醒锁依赖项,如下所示:

导入依赖:
将唤醒锁依赖项导入到主文件中。 dart文件,使用以下内容:
import 'package:wakelock/wakelock.dart';
创建应用程序结构:
StatefulWidget可用于为应用程序提供一个简单的结构,如下所示:
Dart
class WakelockExampleApp extends StatefulWidget {
  @override
  _WakelockExampleAppState createState() => _WakelockExampleAppState();
}

class _WakelockExampleAppState extends State {
  @override
  Widget build(BuildContext context) {
    return MaterialApp(
      home: Scaffold(
        appBar: AppBar(
          title: const Text('GeeksForGeeks'),
          backgroundColor: Colors.green,
        ),
}
Dart
body: Center(
         child: Column(
           mainAxisAlignment: MainAxisAlignment.spaceEvenly,
           children: [
             const Spacer(
               flex: 3,
             ),
             OutlineButton(
               onPressed: () {
                 setState(() {
                   Wakelock.enable();
                 });
               },
               child: const Text('enable wakelock'),
             ),
             const Spacer(),
             OutlineButton(
               onPressed: () {
                 setState(() {
                   Wakelock.disable();
                 });
               },
               child: const Text('disable wakelock'),
             ),
Dart
FutureBuilder(
                future: Wakelock.enabled,
                builder: (context, AsyncSnapshot snapshot) {
                  if (!snapshot.hasData) {
                    return Container();
                  }

                  return Text('The wakelock is currently '
                      '${snapshot.data ? 'enabled' : 'disabled'}.');
                },
              ),
              const Spacer(
                flex: 3,
              ),
Dart
import 'package:flutter/material.dart';
import 'package:wakelock/wakelock.dart';

void main() {
  runApp(WakelockExampleApp());
}

class WakelockExampleApp extends StatefulWidget {
  @override
  _WakelockExampleAppState createState() => _WakelockExampleAppState();
}

class _WakelockExampleAppState extends State {
  @override
  Widget build(BuildContext context) {
    return MaterialApp(
      home: Scaffold(
        appBar: AppBar(
          title: const Text('GeeksForGeeks'),
          backgroundColor: Colors.green,
        ),
        body: Center(
          child: Column(
            mainAxisAlignment: MainAxisAlignment.spaceEvenly,
            children: [
              const Spacer(
                flex: 3,
              ),
              OutlineButton(
                onPressed: () {
                  setState(() {
                    Wakelock.enable();
                  });
                },
                child: const Text('enable wakelock'),
              ),
              const Spacer(),
              OutlineButton(
                onPressed: () {
                  setState(() {
                    Wakelock.disable();
                  });
                },
                child: const Text('disable wakelock'),
              ),
              const Spacer(
                flex: 2,
              ),
              FutureBuilder(
                future: Wakelock.enabled,
                builder: (context, AsyncSnapshot snapshot) {
                  if (!snapshot.hasData) {
                    return Container();
                  }

                  return Text('The wakelock is currently '
                      '${snapshot.data ? 'enabled' : 'disabled'}.');
                },
              ),
              const Spacer(
                flex: 3,
              ),
            ],
          ),
        ),
      ),
    );
  }
}
添加按钮:
一个以添加一个应用程序按钮的方法是使用内置的OutlineButton小部件flutter。这些实现起来很简单,如前所述,我们将向应用程序主体添加两个按钮,即:启用唤醒锁和禁用唤醒锁,如下所示:
Dart
body: Center(
         child: Column(
           mainAxisAlignment: MainAxisAlignment.spaceEvenly,
           children: [
             const Spacer(
               flex: 3,
             ),
             OutlineButton(
               onPressed: () {
                 setState(() {
                   Wakelock.enable();
                 });
               },
               child: const Text('enable wakelock'),
             ),
             const Spacer(),
             OutlineButton(
               onPressed: () {
                 setState(() {
                   Wakelock.disable();
                 });
               },
               child: const Text('disable wakelock'),
             ),
为按钮分配动作:
在这里,我们将使用一个简单的FutureBuilder为按钮分配操作。顾名思义,第一个按钮(即启用唤醒锁定)将使屏幕保持唤醒状态,而后一个按钮(即禁用唤醒锁定)将禁用唤醒锁定功能。这可以使用以下方法完成:
Dart
FutureBuilder(
                future: Wakelock.enabled,
                builder: (context, AsyncSnapshot snapshot) {
                  if (!snapshot.hasData) {
                    return Container();
                  }

                  return Text('The wakelock is currently '
                      '${snapshot.data ? 'enabled' : 'disabled'}.');
                },
              ),
              const Spacer(
                flex: 3,
              ),
完整的源代码:
Dart
import 'package:flutter/material.dart';
import 'package:wakelock/wakelock.dart';

void main() {
  runApp(WakelockExampleApp());
}

class WakelockExampleApp extends StatefulWidget {
  @override
  _WakelockExampleAppState createState() => _WakelockExampleAppState();
}

class _WakelockExampleAppState extends State {
  @override
  Widget build(BuildContext context) {
    return MaterialApp(
      home: Scaffold(
        appBar: AppBar(
          title: const Text('GeeksForGeeks'),
          backgroundColor: Colors.green,
        ),
        body: Center(
          child: Column(
            mainAxisAlignment: MainAxisAlignment.spaceEvenly,
            children: [
              const Spacer(
                flex: 3,
              ),
              OutlineButton(
                onPressed: () {
                  setState(() {
                    Wakelock.enable();
                  });
                },
                child: const Text('enable wakelock'),
              ),
              const Spacer(),
              OutlineButton(
                onPressed: () {
                  setState(() {
                    Wakelock.disable();
                  });
                },
                child: const Text('disable wakelock'),
              ),
              const Spacer(
                flex: 2,
              ),
              FutureBuilder(
                future: Wakelock.enabled,
                builder: (context, AsyncSnapshot snapshot) {
                  if (!snapshot.hasData) {
                    return Container();
                  }

                  return Text('The wakelock is currently '
                      '${snapshot.data ? 'enabled' : 'disabled'}.');
                },
              ),
              const Spacer(
                flex: 3,
              ),
            ],
          ),
        ),
      ),
    );
  }
}
输出:
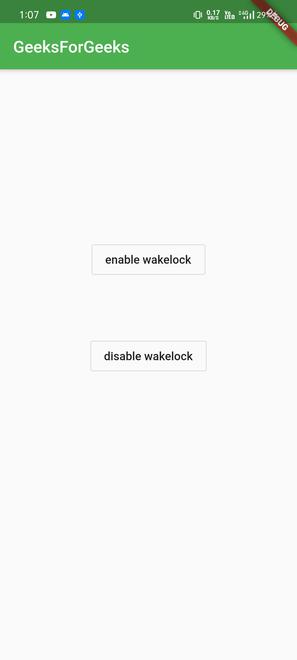
由于除非亲自尝试,否则无法以任何形式显示输出,因此请使用上述源代码并自行尝试。上面的输出仅显示了我们构建的应用程序的基本 UI。
想要一个更快节奏和更具竞争力的环境来学习 Android 的基础知识吗?
单击此处前往由我们的专家精心策划的指南,旨在让您立即做好行业准备!