这个Python程序将允许您检测运动并存储运动的时间间隔。
要求:
- 蟒蛇3
- OpenCV(库)
- 熊猫(库)
安装要求:安装 Python3,安装 Pandas 和 OpenCV 库。
主要逻辑:视频可以被视为称为帧的图片堆栈。在这里,我将不同的帧(图片)与应该是静态的(最初没有移动)的第一帧进行比较。我们通过比较每个像素的强度值来比较两个图像。在Python,我们可以很容易地做到这一点,如以下代码所示:
# Python program to implement
# Webcam Motion Detector

# importing OpenCV, time and Pandas library
import cv2, time, pandas
# importing datetime class from datetime library
from datetime import datetime

# Assigning our static_back to None
static_back = None

# List when any moving object appear
motion_list = [ None, None ]

# Time of movement
time = []

# Initializing DataFrame, one column is start
# time and other column is end time
df = pandas.DataFrame(columns = ["Start", "End"])

# Capturing video
video = cv2.VideoCapture(0)

# Infinite while loop to treat stack of image as video
while True:
    # Reading frame(image) from video
    check, frame = video.read()

    # Initializing motion = 0(no motion)
    motion = 0

    # Converting color image to gray_scale image
    gray = cv2.cvtColor(frame, cv2.COLOR_BGR2GRAY)

    # Converting gray scale image to GaussianBlur
    # so that change can be find easily
    gray = cv2.GaussianBlur(gray, (21, 21), 0)

    # In first iteration we assign the value
    # of static_back to our first frame
    if static_back is None:
        static_back = gray
        continue

    # Difference between static background
    # and current frame(which is GaussianBlur)
    diff_frame = cv2.absdiff(static_back, gray)

    # If change in between static background and
    # current frame is greater than 30 it will show white color(255)
    thresh_frame = cv2.threshold(diff_frame, 30, 255, cv2.THRESH_BINARY)[1]
    thresh_frame = cv2.dilate(thresh_frame, None, iterations = 2)

    # Finding contour of moving object
    cnts,_ = cv2.findContours(thresh_frame.copy(),
                       cv2.RETR_EXTERNAL, cv2.CHAIN_APPROX_SIMPLE)

    for contour in cnts:
        if cv2.contourArea(contour) < 10000:
            continue
        motion = 1

        (x, y, w, h) = cv2.boundingRect(contour)
        # making green rectangle arround the moving object
        cv2.rectangle(frame, (x, y), (x + w, y + h), (0, 255, 0), 3)

    # Appending status of motion
    motion_list.append(motion)

    motion_list = motion_list[-2:]

    # Appending Start time of motion
    if motion_list[-1] == 1 and motion_list[-2] == 0:
        time.append(datetime.now())

    # Appending End time of motion
    if motion_list[-1] == 0 and motion_list[-2] == 1:
        time.append(datetime.now())

    # Displaying image in gray_scale
    cv2.imshow("Gray Frame", gray)

    # Displaying the difference in currentframe to
    # the staticframe(very first_frame)
    cv2.imshow("Difference Frame", diff_frame)

    # Displaying the black and white image in which if
    # intensity difference greater than 30 it will appear white
    cv2.imshow("Threshold Frame", thresh_frame)

    # Displaying color frame with contour of motion of object
    cv2.imshow("Color Frame", frame)

    key = cv2.waitKey(1)
    # if q entered whole process will stop
    if key == ord('q'):
        # if something is movingthen it append the end time of movement
        if motion == 1:
            time.append(datetime.now())
        break

# Appending time of motion in DataFrame
for i in range(0, len(time), 2):
    df = df.append({"Start":time[i], "End":time[i + 1]}, ignore_index = True)

# Creating a CSV file in which time of movements will be saved
df.to_csv("Time_of_movements.csv")

video.release()

# Destroying all the windows
cv2.destroyAllWindows()
所有窗口的分析
运行代码后,屏幕上会出现 4 个新窗口。我们来一一分析:
- 灰帧:在灰帧中图像有点模糊,在灰度中我们这样做是因为,在灰色图片中只有一个强度值,而在 RGB(红色、绿色和蓝色)图像中则有三个强度值。所以很容易计算灰度的强度差异。
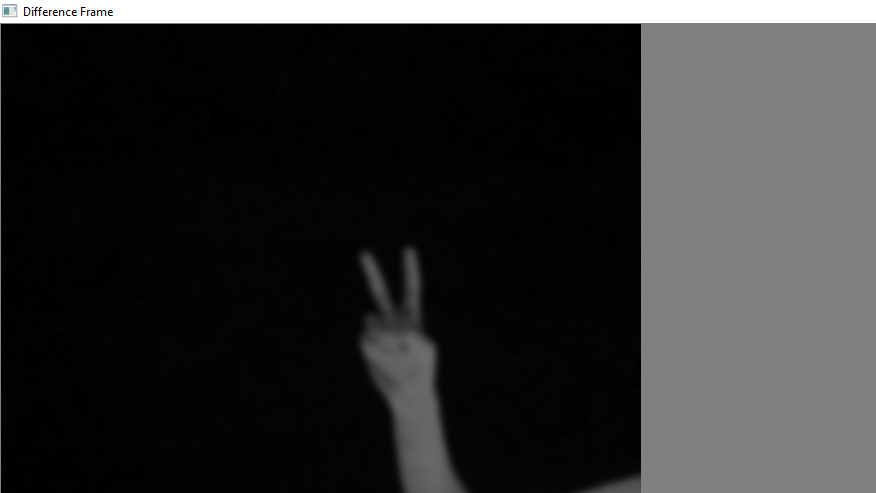
- 差异帧:差异帧显示第一帧与当前帧的强度差异。

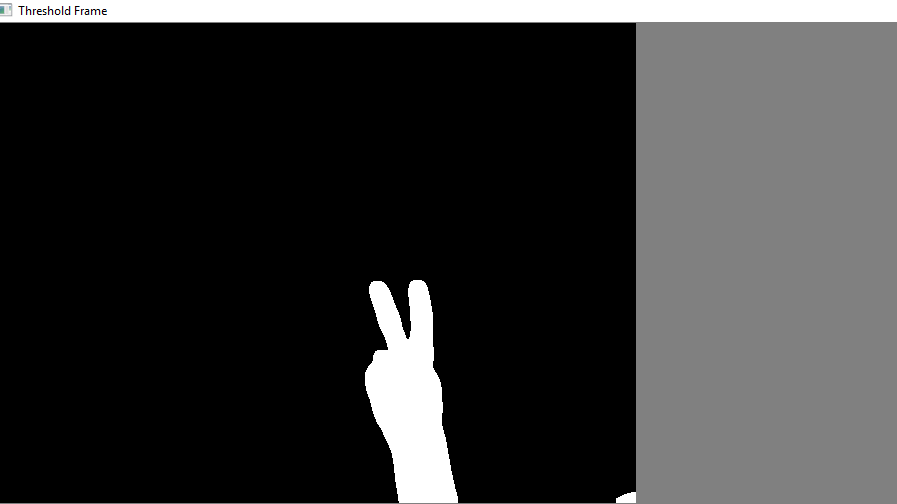
- 阈值帧:如果特定像素的强度差异大于 30(在我的情况下),则该像素将为白色,如果差异小于 30,则该像素将为黑色

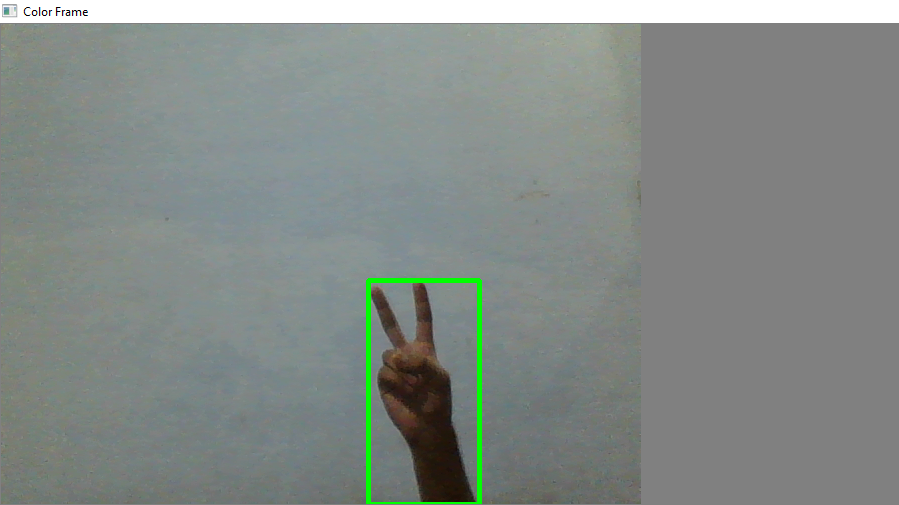
- 色框:在此框中,您可以看到色框中的彩色图像以及移动物体周围的绿色轮廓

动作时间记录
Time_of_movements 文件将存储在您的代码文件所在的文件夹中。该文件将采用 csv 扩展名。在此文件中将记录运动的开始时间和运动的结束时间。正如你在图片中看到的: 
视频演示