文件上传是制作存储某种图像数据的表单的重要组成部分。它有助于使用图像上传或文件共享的应用程序。这个文件上传组件使用file.io API 来上传文件,作为回报,它提供了一个可共享的链接。此外,我们可以向可共享链接发送 get 请求以获取文件,但目前,我们唯一关注的是上传部分,因此我们仅使用 post 方法。
方法:
- 使用以下命令创建一个新的 angular 应用程序 –
ng new angular-file-upload - 使用 cd 命令在应用程序内部移动 –
cd src/app/ - 生成新的组件文件-上传-
ng g c file-upload/ - 打开 src/app 文件夹并开始编辑app.component.html文件。
- 通过命令为文件上传组件创建服务-
ng g s file-upload/ - 打开 src/app/file-upload 文件夹并开始编辑file-upload.component.ts文件。
import { Component, OnInit } from '@angular/core'; import { FileUploadService } from './file-upload.service'; @Component({ selector: 'app-file-upload', templateUrl: './file-upload.component.html', styleUrls: ['./file-upload.component.css'] }) export class FileUploadComponent implements OnInit { // Variable to store shortLink from api response shortLink: string = ""; loading: boolean = false; // Flag variable file: File = null; // Variable to store file // Inject service constructor(private fileUploadService: FileUploadService) { } ngOnInit(): void { } // On file Select onChange(event) { this.file = event.target.files[0]; } // OnClick of button Upload onUpload() { this.loading = !this.loading; console.log(this.file); this.fileUploadService.upload(this.file).subscribe( (event: any) => { if (typeof (event) === 'object') { // Short link via api response this.shortLink = event.link; this.loading = false; // Flag variable } } ); } } - 打开 src/app/file-upload/ 并开始编辑file-upload.service.ts文件。
import { Injectable } from '@angular/core'; import {HttpClient} from '@angular/common/http'; import {Observable} from 'rxjs'; @Injectable({ providedIn: 'root' }) export class FileUploadService { // API url baseApiUrl = "https://file.io" constructor(private http:HttpClient) { } // Returns an observable upload(file):Observable{ // Create form data const formData = new FormData(); // Store form name as "file" with file data formData.append("file", file, file.name); // Make http post request over api // with formData as req return this.http.post(this.baseApiUrl, formData) } } - 打开 src/app/file-upload 并开始编辑file-upload.component.html文件。
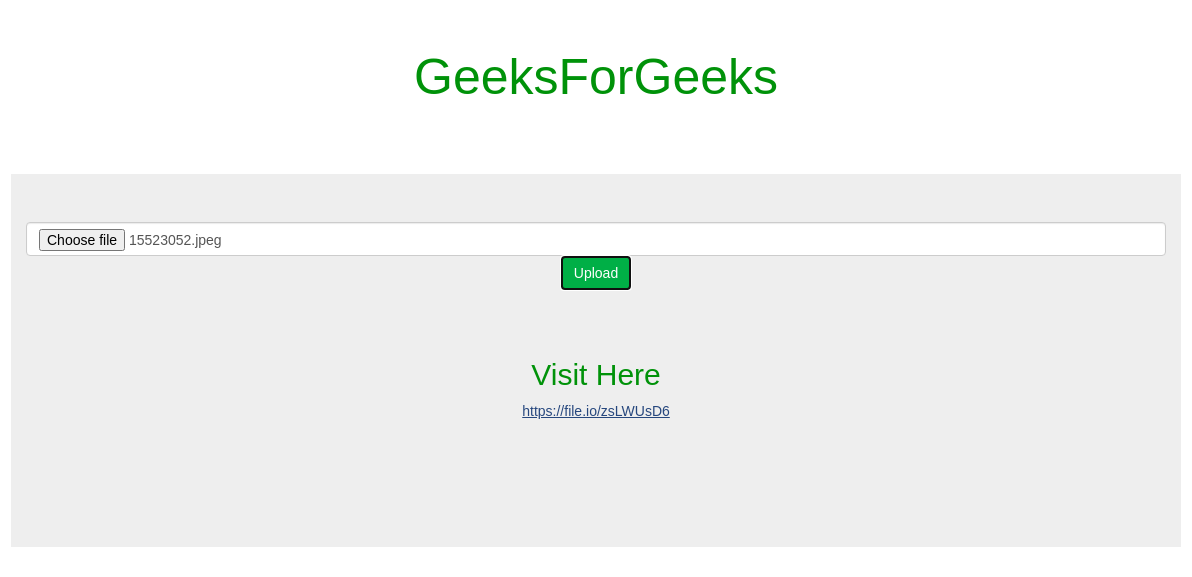
Visit Here
{{shortLink}}Loading ...
- 打开 src/app/ 并开始编辑app.module.ts文件。
import { BrowserModule } from '@angular/platform-browser'; import { NgModule } from '@angular/core'; import { FileUploadComponent } from './file-upload/file-upload.component'; import { AppComponent } from './app.component'; import {HttpClientModule} from '@angular/common/http'; @NgModule({ declarations: [ AppComponent, FileUploadComponent, ], imports: [ BrowserModule, HttpClientModule ], providers: [], bootstrap: [AppComponent] }) export class AppModule { } - 现在运行此命令以在本地主机上提供服务
ng serve输出:
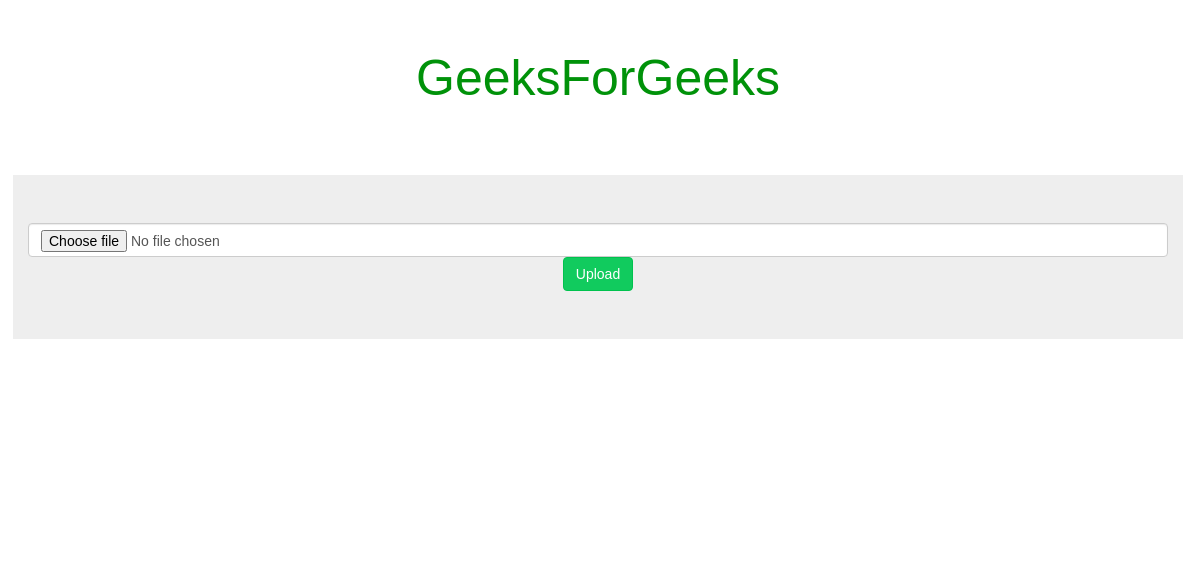
- 文件选择前:
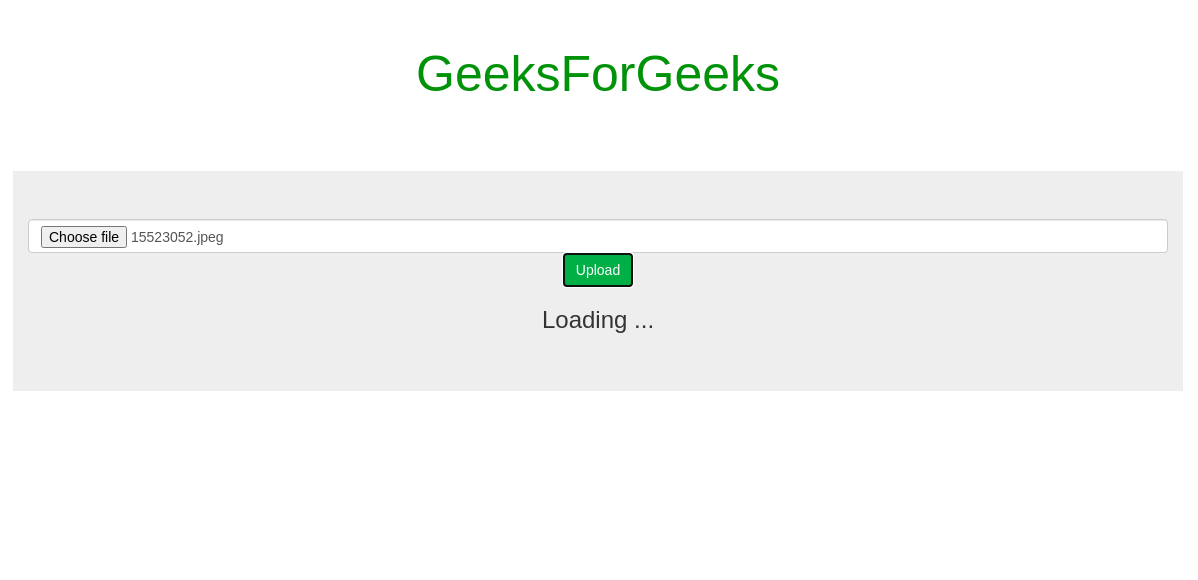
- 选择文件并单击按钮后:
- 加载完成后:
HTML 是网页的基础,用于通过构建网站和 Web 应用程序进行网页开发。您可以按照此 HTML 教程和 HTML 示例从头开始学习 HTML。
- 文件选择前: