使用 Sharp 包的 Node.js 图像上传、处理和调整大小
通常在我们的 Web 应用程序中,我们需要以个人资料图片或电子商务原型中产品图像的形式存储多种形式和格式的图像。在大多数情况下,我们需要存储压缩为多种尺寸的图像,以保持质量。例如,对于电子商务网站上的产品,我们需要存储 3 个版本的产品图像:
- 缩略图
- 低分辨率预览等。
- 实际产品的原始高分辨率。
先决条件:
- Node.js 基础知识
- express.js 中的路由处理
使用的模块: sharp, Multer
根据官方 npm 文档,sharp 的典型用例是将常见格式的大图像转换为更小的、对 web 友好的 JPEG、PNG 和不同尺寸的 WebP 图像。
在空目录中初始化 npm 以使用以下命令开始:
npm init -y使用以下命令安装所需的模块:
npm install express --save
npm install body-parser --save
npm install sharp --save
npm install multer --save
多重设置:
要上传文件,我们需要将multer配置为要传递的中间件。要设置 multer,我们需要将以下代码添加到我们的应用程序中。
注意:关于更多的使用和更多关于上传和 multer 的信息,你可以参考 Multer 的官方文档
// Importing the module
const multer = require('multer');

// Setting up a middleware specifying the
// destination for storing the images
const upload = multer({dest : './images'})
由于 multer 使用表单数据,您需要确保通过配置为 multipart/form-data 的表单进行上传。
文件名:app.js
// Importing the required modules
var express = require('express');
var bodyparser = require('body-parser');
var fs = require('fs');
var multer = require('multer');
var sharp = require('sharp');

var upload = multer({dest : './images'})

// Initialize the express object
var app = express();

// Use body-parser to parse incoming data
app.use(bodyparser.urlencoded({extended : true}))

// Use the upload middleware containing
// our file configuration, with the name
// of input file attribute as "avatar"
// to the desired configuration.

app.post('/upload', upload.single("avatar"), (req, res)=>
{
    fs.rename(req.file.path, './images/avatar.jpg', (err)=>{
        console.log(err);
    })

    return res.json("File Uploaded Successfully!");
});

app.listen(3000, ()=>{
    console.log("Server Running!")
})
运行上述代码的步骤:
- 使用以下命令运行 app.js 文件:
node app.js执行上述命令后,您将看到以下输出:
Server Running! - 使用 Postman 向https://localhost:3000/upload发送 POST 请求。您需要将“头像”作为 KEY 并将图片作为 VALUE 传递。
- 在点击请求后,将使用我们想要的图像创建一个图像目录。
使用 Sharp 处理图像:我们将通过 Sharp 包处理图像。要创建具有不同属性的多个实例,我们使用以下代码:
// Configuring thumbnail image
sharp(__dirname + '/images/avatar.jpg').resize(200,200)
.jpeg({quality : 50}).toFile(__dirname
        + '/images/avatar_thumb.jpg');

// Configuring Preview Image
sharp(__dirname + '/images/avatar.jpg').resize(640,480)
.jpeg({quality : 80}).toFile(__dirname
        + '/images/avatar_preview.jpg');
所以一切都设置好了,最终的app.js将如下所示:
文件名:app.js
var express = require('express');
var bodyparser = require('body-parser');
var fs = require('fs');
var multer = require('multer');
var sharp = require('sharp');

var upload = multer({dest : './images'})

var app = express();

app.use(bodyparser.urlencoded({extended : true}))

app.post('/upload', upload.single("avatar"), (req, res)=>
{
    fs.rename(req.file.path, './images/avatar.jpg', (err)=>{
        console.log(err);
    })

    sharp(__dirname + '/images/avatar.jpg').resize(200,200)
    .jpeg({quality : 50}).toFile(__dirname
        + '/images/avatar_thumb.jpg');


    sharp(__dirname + '/images/avatar.jpg').resize(640,480)
    .jpeg({quality : 80}).toFile(__dirname
        + '/images/avatar_preview.jpg');

    return res.json("File Uploaded Successfully!");
});

app.listen(3000, ()=>{
    console.log("Server Running!")
})
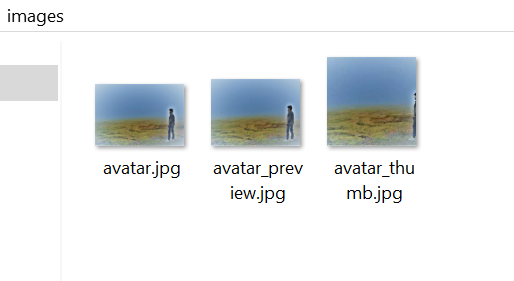
运行服务器并发送与以前相同的请求后,您将在图像目录中获取所有上传的图像,并具有所需的配置,如下所示: 
其他夏普选项: https ://sharp.pixelplumbing.com/