MoviePy - 使用 Matplotlib 创建动画
在本文中,我们将了解如何使用 matplotlib 在 MoviePy 中创建动画。 MoviePy 是一个用于视频编辑的Python模块,可用于视频和 GIF 的基本操作。视频是由帧组成的,帧的组合创建一个视频,每一帧都是一个单独的图像。 Matplotlib 是Python编程语言及其数值数学扩展 NumPy 的绘图库。它提供了一个面向对象的 API,用于使用 Tkinter、wxPython、Qt 或 GTK+ 等通用 GUI 工具包将绘图嵌入到应用程序中。
In order to do this we have to do the following
1. Import matplotlib modules
2. Import moviepy modules
3. Create a numpy array
4. Create a subplot using matplotlib
5. Create a Video clip file by calling the make_frame method
6. Inside the the make frame method
7. Clear the plot and create a new plot using trigonometry methods according to the frame time
8. Return the plot after converting it into numpy image.
下面是实现
Python3
# importing matplot lib
import matplotlib.pyplot as plt
import numpy as np

# importing movie py libraries
from moviepy.editor import VideoClip
from moviepy.video.io.bindings import mplfig_to_npimage

# numpy array
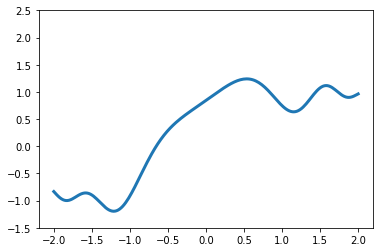
x = np.linspace(-2, 2, 200)

# duration of the video
duration = 2

# matplot subplot
fig, ax = plt.subplots()

# method to get frames
def make_frame(t):

    # clear
    ax.clear()

    # plotting line
    ax.plot(x, np.sinc(x**2) + np.sin(x + 2 * np.pi / duration * t), lw = 3)
    ax.set_ylim(-1.5, 2.5)

    # returning numpy image
    return mplfig_to_npimage(fig)

# creating animation
animation = VideoClip(make_frame, duration = duration)

# displaying animation with auto play and looping
animation.ipython_display(fps = 20, loop = True, autoplay = True)
Python3
# importing matplot lib
import matplotlib.pyplot as plt
import numpy as np

# importing movie py libraries
from moviepy.editor import VideoClip
from moviepy.video.io.bindings import mplfig_to_npimage

# numpy array
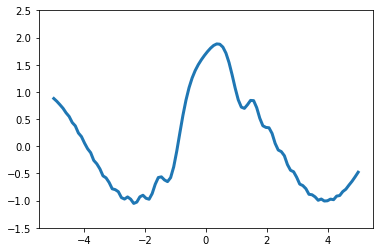
x = np.linspace(-5, 5, 100)

# duration of the video
duration = 2

# matplot subplot
fig, ax = plt.subplots()

# method to get frames
def make_frame(t):

    # clear
    ax.clear()

    # plotting line
    ax.plot(x, np.sinc(x**2) + np.cos(x + 10 * np.pi / duration * t), lw = 3)
    ax.set_ylim(-1.5, 2.5)

    # returning numpy image
    return mplfig_to_npimage(fig)

# creating animation
animation = VideoClip(make_frame, duration = duration)

# displaying animation with auto play and looping
animation.ipython_display(fps = 20, loop = True, autoplay = True)
输出 :
Moviepy - Building video __temp__.mp4.
Moviepy - Writing video __temp__.mp4


Moviepy - Done !
Moviepy - video ready __temp__.mp4
另一个例子
Python3
# importing matplot lib
import matplotlib.pyplot as plt
import numpy as np

# importing movie py libraries
from moviepy.editor import VideoClip
from moviepy.video.io.bindings import mplfig_to_npimage

# numpy array
x = np.linspace(-5, 5, 100)

# duration of the video
duration = 2

# matplot subplot
fig, ax = plt.subplots()

# method to get frames
def make_frame(t):

    # clear
    ax.clear()

    # plotting line
    ax.plot(x, np.sinc(x**2) + np.cos(x + 10 * np.pi / duration * t), lw = 3)
    ax.set_ylim(-1.5, 2.5)

    # returning numpy image
    return mplfig_to_npimage(fig)

# creating animation
animation = VideoClip(make_frame, duration = duration)

# displaying animation with auto play and looping
animation.ipython_display(fps = 20, loop = True, autoplay = True)
输出 :
Moviepy - Building video __temp__.mp4.
Moviepy - Writing video __temp__.mp4


Moviepy - Done !
Moviepy - video ready __temp__.mp4