📌 相关文章
- Spring WS-概述(1)
- Spring WS-概述
- wsdl (1)
- WSDL-示例(1)
- WSDL-示例
- ws (1)
- Spring WS-环境设置
- Spring WS-环境设置(1)
- Spring WS-第一个应用程序(1)
- Spring WS-第一个应用程序
- Spring WS-有用的资源(1)
- Spring WS-有用的资源
- WSDL-元素
- WSDL-元素(1)
- WSDL-元素
- WSDL-元素
- WSDL-元素
- WSDL-元素
- WSDL-元素
- WSDL-元素(1)
- WSDL-元素
- WSDL-元素
- WSDL-元素(1)
- WSDL-元素(1)
- wsdl - 任何代码示例
- Spring WS-编写客户端(1)
- Spring WS-编写客户端
- ws - 任何代码示例
- Spring WS-单元测试服务器
📜 Spring WS-静态WSDL
📅 最后修改于: 2020-11-11 06:43:22 🧑 作者: Mango
在上一章Spring -WS-First Application中,我们已经使用Spring WS Configuration自动生成了WSDL。在这种情况下,我们将展示如何使用Spring WS公开现有的WSDL。
| Step | Description |
|---|---|
| 1 | Create a project with a name leaveService under a package com.tutorialspoint as explained in the Spring WS – First Application chapter. |
| 2 | Create a WSDL leave.wsdl under the /WEB-INF/wsdl sub-folder. |
| 3 | Update spring-ws-servlet.xml under the /WEB-INF sub-folder. We are using the static-wsdl tag here instead of the dynamic-wsdl. |
| 4 | The final step is to create content of all source and configuration files and export the application as explained below. |
/WEB-INF/spring-ws-servlet.xml
/WEB-INF/spring-ws-servlet.xml
运行项目
创建完源文件和配置文件后,我们应该导出应用程序。右键单击该应用程序,使用“导出”→“ WAR文件”选项,然后将您的stayService.war文件保存在Tomcat的webapps文件夹中。
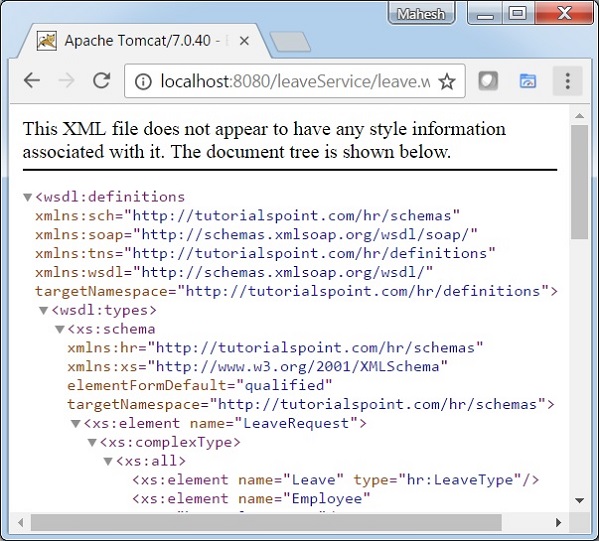
现在,启动Tomcat服务器,并确保我们可以使用标准浏览器从webapps文件夹访问其他网页。尝试访问URL – http:// localhost:8080 / leaveService / leave.wsdl,如果Spring Web Application一切正常,我们将看到以下屏幕。
