Spring Boot - 使用 Tomcat 进行项目部署
Spring Boot 是一个基于微服务的框架,在其中制作可用于生产的应用程序只需要很少的时间。 Spring Boot 建立在 Spring 之上,包含了 Spring 的所有特性。并且现在正成为开发人员的最爱,因为它是一个快速的生产就绪环境,使开发人员能够直接专注于逻辑,而不是为配置和设置而苦恼。
Spring Boot 上的项目部署流程
在 Tomcat Server 上部署 Spring Boot 应用程序涉及三个步骤:
- 创建示例 Spring Boot 应用程序
- Spring Boot WAR的创建方式
- 将 WAR 部署到 Tomcat – 最好需要更高版本的 Tomcat。
要使用适当的 tomcat 版本和Java版本,事先访问 HTML 文件会很有帮助。
第 1 步:创建示例 Spring Boot 应用程序
这是一个spring boot web应用项目,即项目需要部署在tomcat上。该项目可以创建为基于 maven 的项目,因此我们可以在 pom.xml 文件中指定所需的依赖项
pom.xml->Configurations can be specified in a Maven project via pom.xml由于项目需要使用 Tomcat 进行部署,因此必须将其打包为“WAR” ( Web Application Resource 或 Web application Archive)。
Basically, pom.xml should have spring boot related dependencies like
- spring-boot-starter-parent
- spring-boot-starter-web
- spring-boot-starter-tomcat and its scope is set to be provided “geeks-web-services” should be the name of “WAR” file as per pom.xml
示例 1:
XML
    4.0.0

    com.geeksforgeeks
    spring-boot-war-deployment-example-on-tomcat
    0.0.1-SNAPSHOT

    war

    SpringBootWarDeploymentOnTomcatServer
    Demo project for Spring Boot deployable on Tomcat


        org.springframework.boot
        spring-boot-starter-parent
        2.2.2.RELEASE


        UTF-8
        UTF-8
        1.8


            org.springframework.boot
            spring-boot-starter-web


            org.springframework.boot
            spring-boot-starter-tomcat
            provided


    geeks-web-services


                org.springframework.boot
                spring-boot-maven-plugin
Java
import org.springframework.web.bind.annotation.GetMapping;
import org.springframework.web.bind.annotation.RestController;

// Annotation
@RestController

// Class
public class SampleRestControllerExample {

     @GetMapping("/hello")
    // Easy method just to print encouraging and consoling words
    public String hello() {
        return "Hello Geek, this is a simple hello message to take care and have a nice day.";
    }

    @GetMapping("/greet")
    //Easy method just to print greeting message by saying spring-based applications
    public String greet() {
        return "Hello Geek, Fast and easy development can be possible on Spring-based applications by reducing source code;.";
    }
}
Java
// Java Program to Illustrate SpringBoot WarDeployment
// On Tomcat Server

// Importing required classes
import org.springframework.boot.SpringApplication;
import org.springframework.boot.autoconfigure.SpringBootApplication;
import org.springframework.boot.builder.SpringApplicationBuilder;
import org.springframework.boot.web.servlet.support.SpringBootServletInitializer;

// Annotation
@SpringBootApplication

// Class
public class SpringBootWarDeploymentOnTomcatServer
    extends SpringBootServletInitializer {
    @Override

    // Configuring method has to be overridden
    protected SpringApplicationBuilder
    configure(SpringApplicationBuilder application)
    {
        return application.sources(
            SpringBootWarDeploymentOnTomcatServer.class);
    }

    // Method 2
    // Main driver method
    public static void main(String[] args)
    {
        SpringApplication.run(
            SpringBootWarDeploymentOnTomcatServer.class,
            args);
    }
}
需要一个控制器类,通过它我们可以以 GET 方法或 POST 方法调用服务。作为示例,让我们看看“SampleRestControllerExample. Java”,其中包含两个方法作为“ GET ”方法
Two methods are written which provide a static text as output.
因为这是一个简单的例子,所以让我们在调用“geeks-web-services/hello”时显示Hello Geek,这是一个简单的问候消息,请注意并祝您有美好的一天。
在调用“geeks-web-services/greet”时,显示 Hello Geek,通过减少源代码可以在基于 Spring 的应用程序上快速轻松地开发。
@RestController is a specialized version of the controller. It includes the @Controller and @ResponseBody annotations, and as a result, simplifies the controller implementation.
示例 2: SampleRestControllerExample。Java
Java
import org.springframework.web.bind.annotation.GetMapping;
import org.springframework.web.bind.annotation.RestController;

// Annotation
@RestController

// Class
public class SampleRestControllerExample {

     @GetMapping("/hello")
    // Easy method just to print encouraging and consoling words
    public String hello() {
        return "Hello Geek, this is a simple hello message to take care and have a nice day.";
    }

    @GetMapping("/greet")
    //Easy method just to print greeting message by saying spring-based applications
    public String greet() {
        return "Hello Geek, Fast and easy development can be possible on Spring-based applications by reducing source code;.";
    }
}
第 2 步:创建 Spring Boot WAR 的方法
有 3 种创建 Spring Boot WAR 的方法:
- “Main” 类应在主类中包含“extends SpringBootServletInitializer”类。
- “嵌入式 servlet 容器应标记为已提供。
- 包装应该是WAR
SpringBootWarDeploymentOnTomcatServer.java is our Main class
例子:
Java
// Java Program to Illustrate SpringBoot WarDeployment
// On Tomcat Server

// Importing required classes
import org.springframework.boot.SpringApplication;
import org.springframework.boot.autoconfigure.SpringBootApplication;
import org.springframework.boot.builder.SpringApplicationBuilder;
import org.springframework.boot.web.servlet.support.SpringBootServletInitializer;

// Annotation
@SpringBootApplication

// Class
public class SpringBootWarDeploymentOnTomcatServer
    extends SpringBootServletInitializer {
    @Override

    // Configuring method has to be overridden
    protected SpringApplicationBuilder
    configure(SpringApplicationBuilder application)
    {
        return application.sources(
            SpringBootWarDeploymentOnTomcatServer.class);
    }

    // Method 2
    // Main driver method
    public static void main(String[] args)
    {
        SpringApplication.run(
            SpringBootWarDeploymentOnTomcatServer.class,
            args);
    }
}
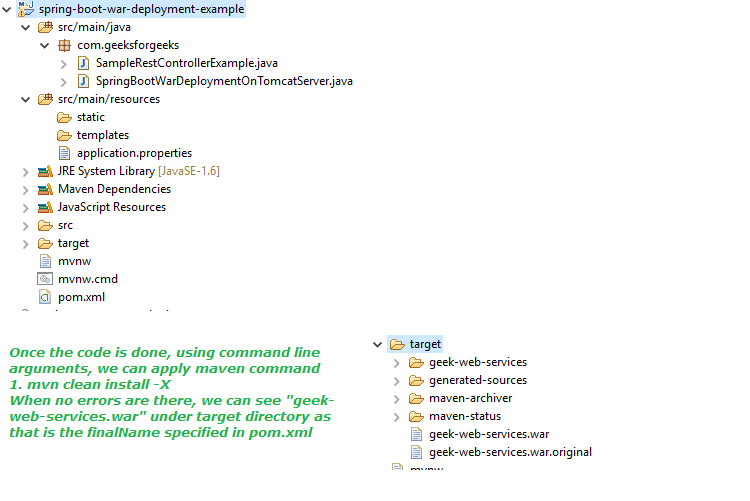
我们可以使用命令行运行 maven 步骤
mvn clean install -X作为图像,让我们查看项目结构和目标文件夹
第 3 步:将 WAR 部署到 Tomcat
如果之前没有安装 Apache Tomcat Server,则必须安装。最好是更高版本的 tomcat 会有所帮助。例如,我们使用的是 9.0.x 版的 tomcat
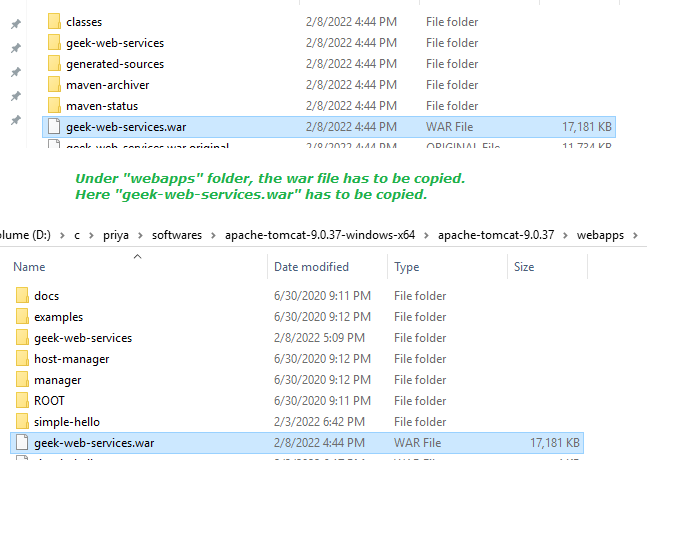
要使用适当的 tomcat 版本和Java版本,检查 HTML 文件会很有帮助。在上一步中,我们得到了“geek-web-services.war”,它必须复制到 tomcat 的“webapps”文件夹下。
现在,打开命令提示符并指向 tomcat 位置的 bin 文件夹

需要从 bin 文件夹中提供“startup.bat”
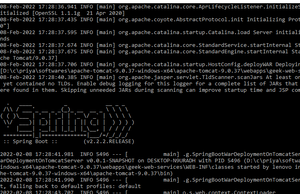
图像显示 spring boot 已启动
而且我们的war文件也部署在tomcat中。下面的屏幕截图证实了这一点

部署了 geek-web-services 战争文件
我们可以通过在浏览器中执行以下 URL 来进行测试
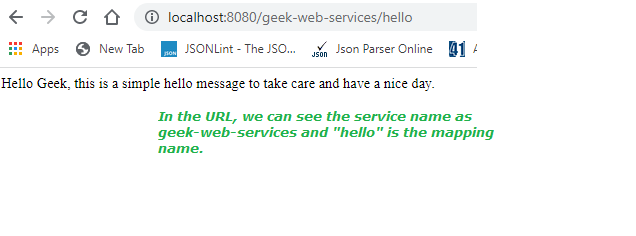
极客网络服务/你好输出
输出:第二
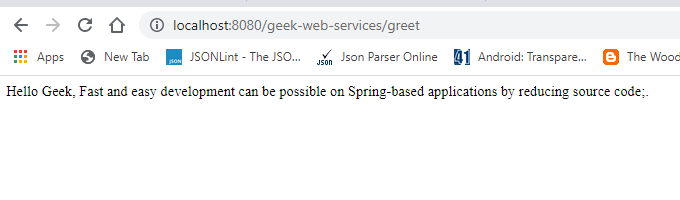
极客网络服务/问候输出
项目说明:通过下面提供的视频证明如下:
Conclusion: As explained above, a spring boot project can be deployable in Tomcat. Do remember certain important points as listed:
- By default, Spring Boot 1.4.4.RELEASE requires Java 7 and Spring Framework 4.3.6.RELEASE or above
- Higher versions of Tomcat will be helpful to deploy spring-boot applications.