Amazon Web Services(AWS)是用于云生态系统的IaaS(基础设施即服务)和PaaS(平台即服务)的全球领导者之一,用于创建可扩展的云应用程序。因此,在本文中,我们将学习如何使用AWS EC2服务来设置Web服务器(LAMP堆栈)。
入门(创建实例)
首先,您需要使用合法卡在亚马逊上创建帐户,然后启动12个月的免费套餐。如果您是学生,则可以在AWS上通过您的大学ID获得学生入门包。
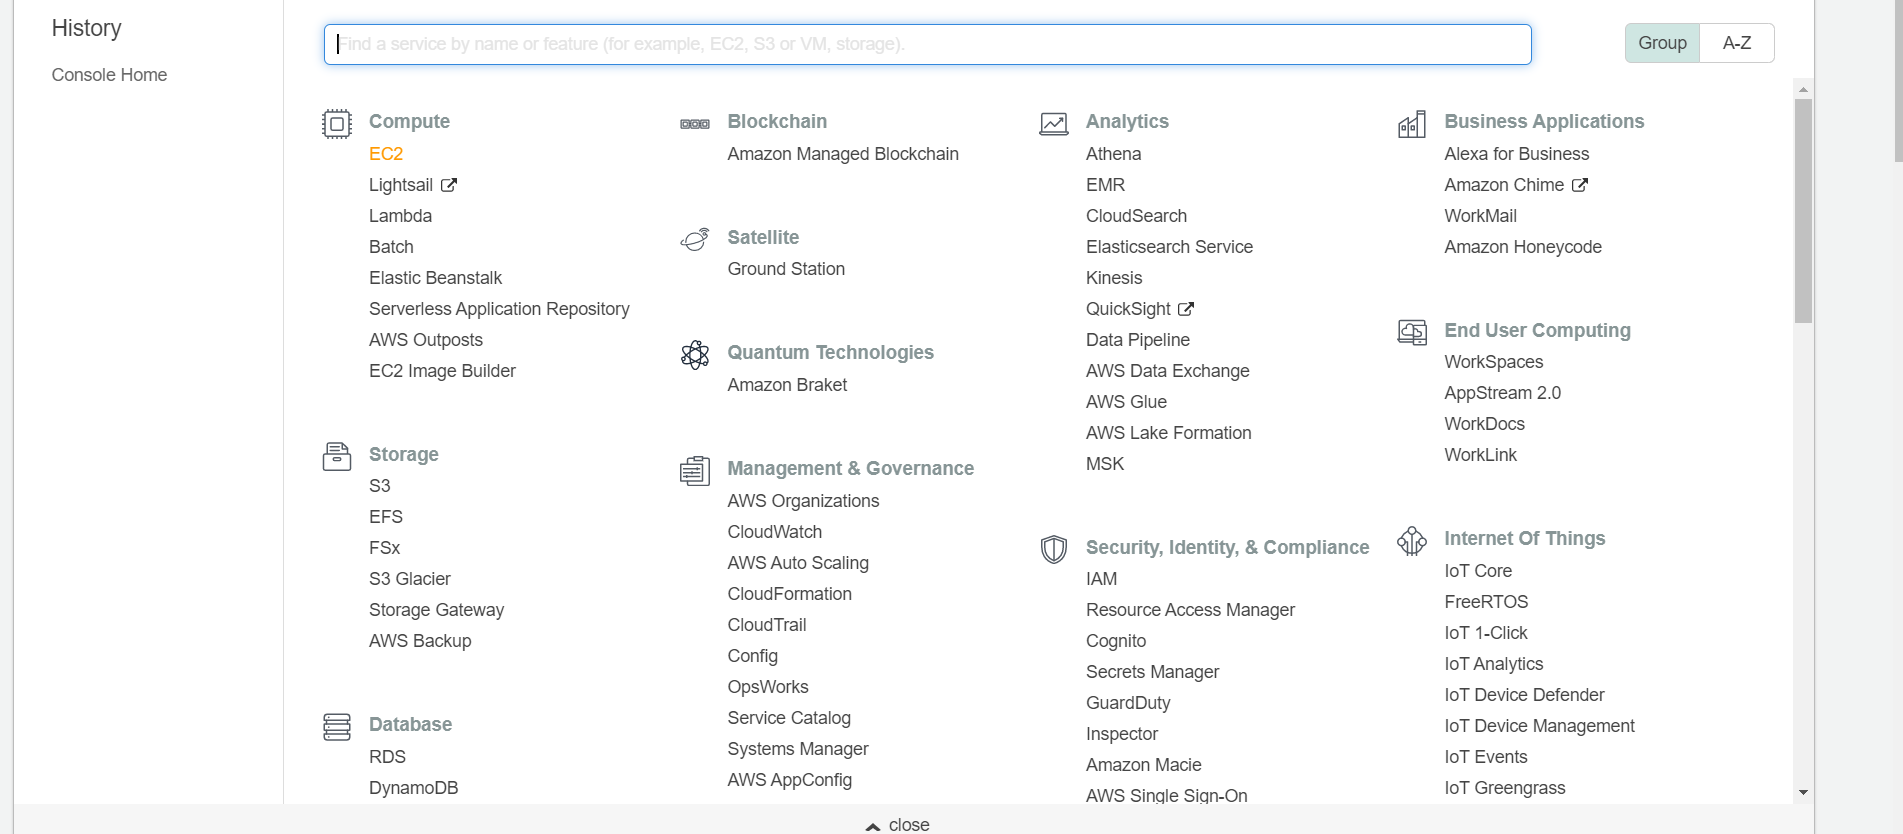
步骤1:在AWS控制台面板中,转到服务并搜索EC2并将其选中。
步骤2:转到侧面板菜单,然后选择实例。
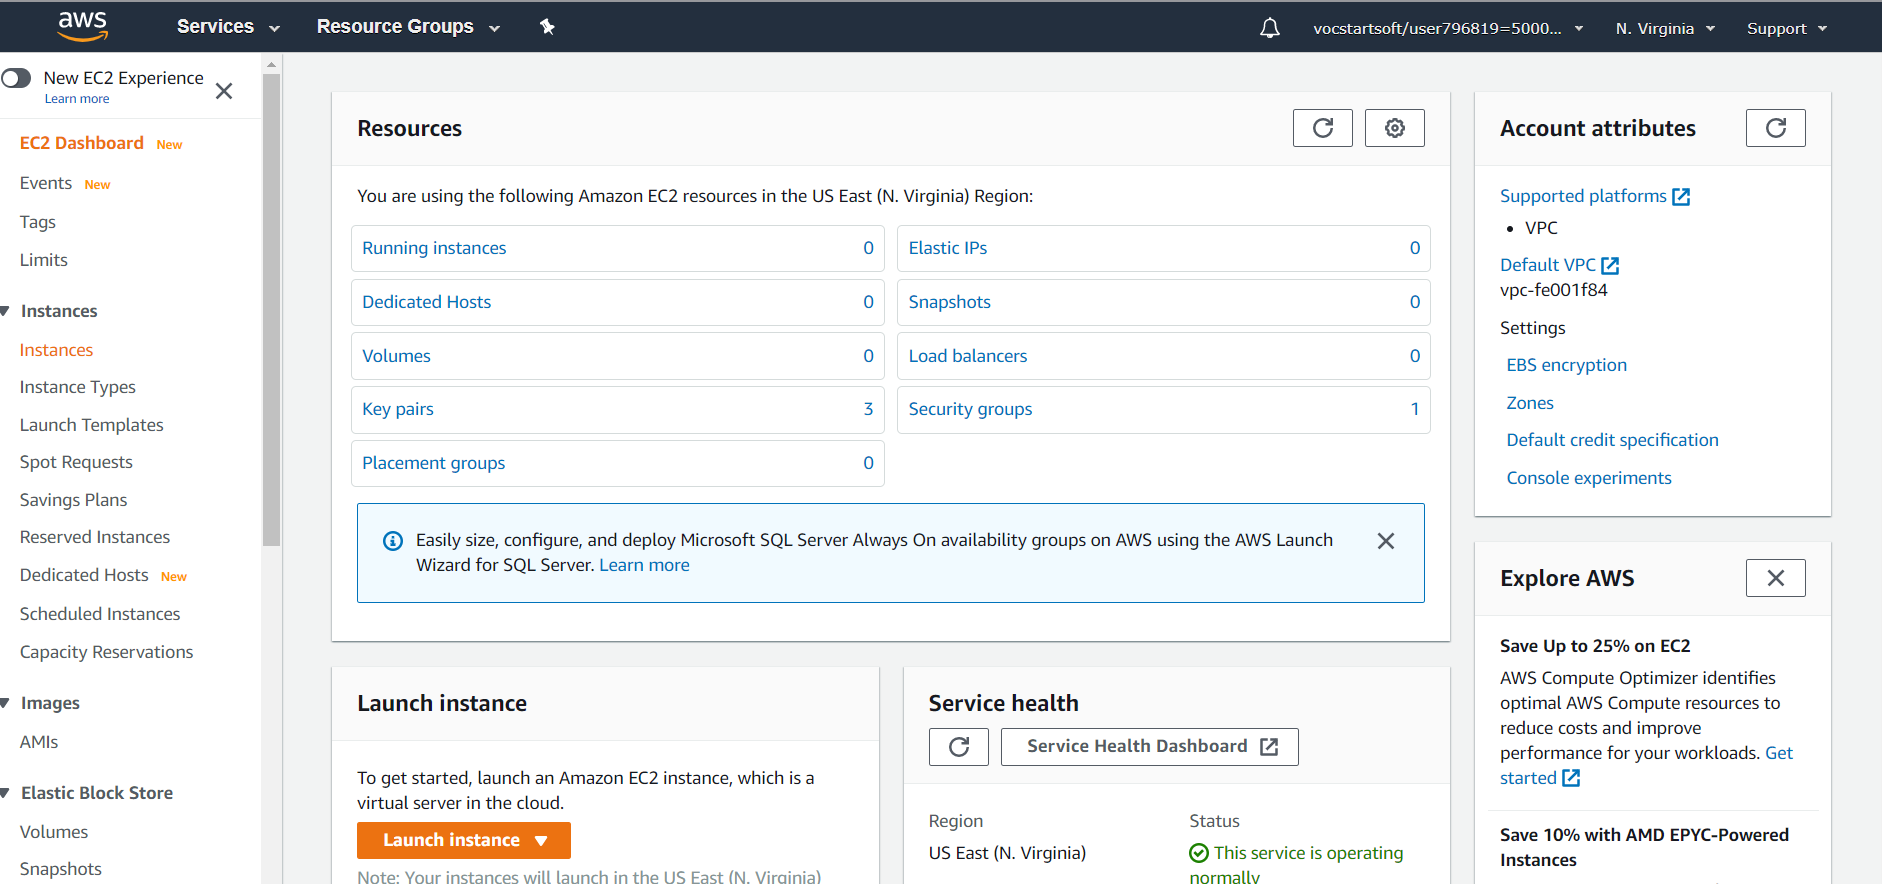
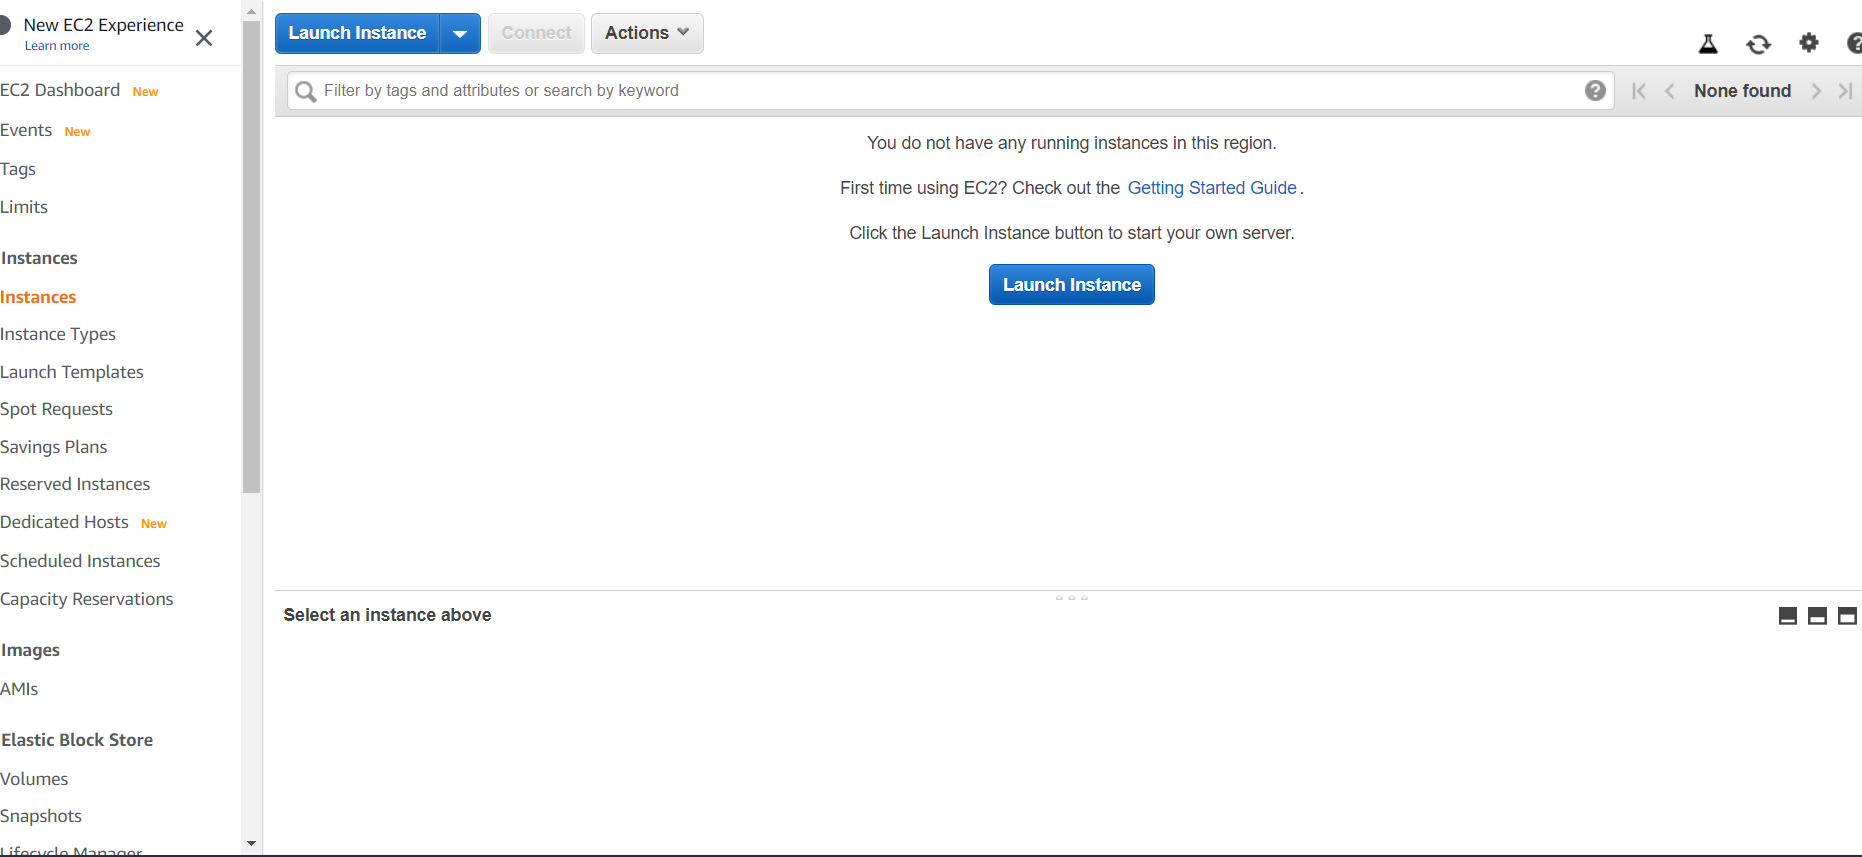
步骤3:点击启动实例按钮。
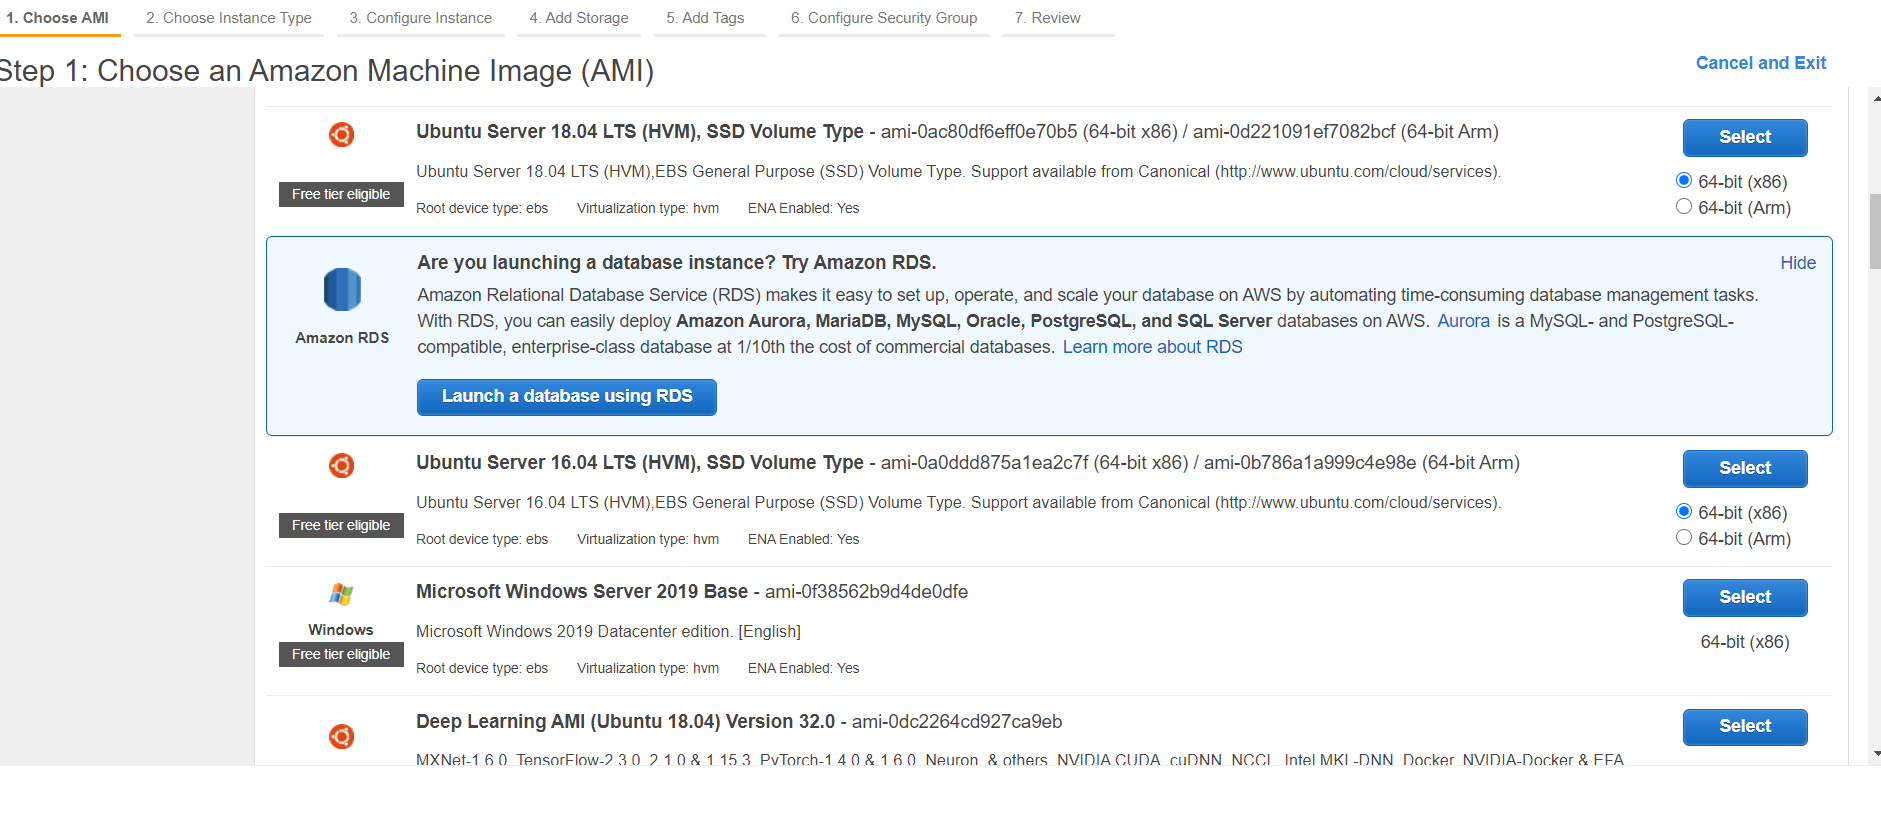
步骤4:为您的实例选择操作系统(AMI)。
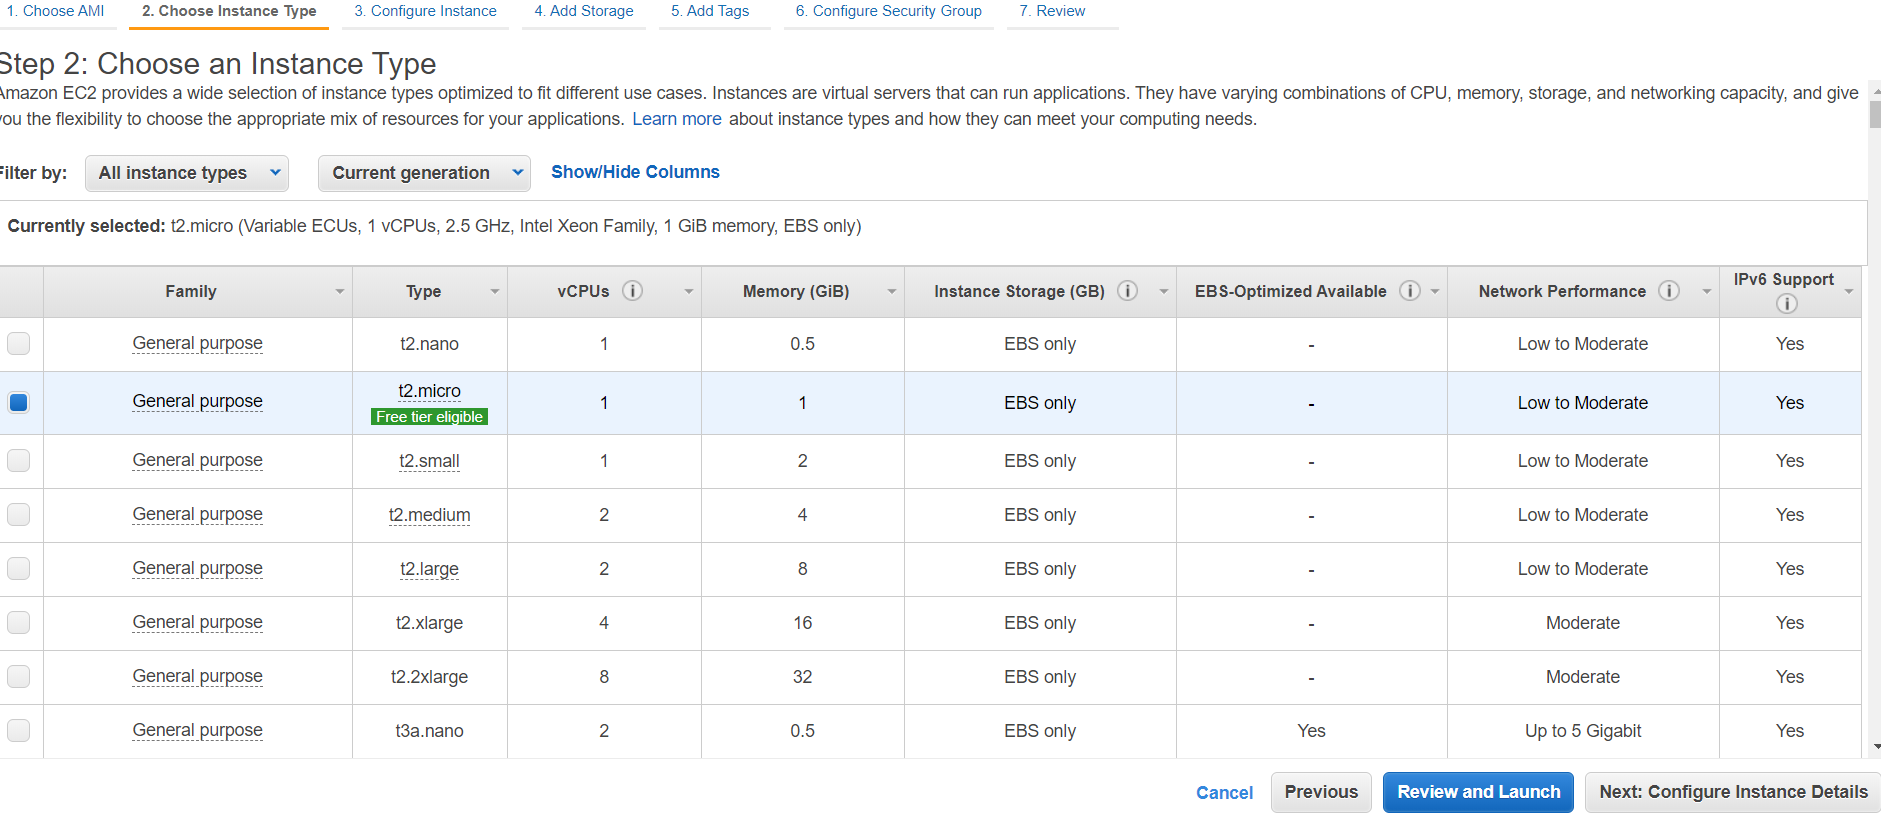
步骤5:根据需要选择实例的类型。
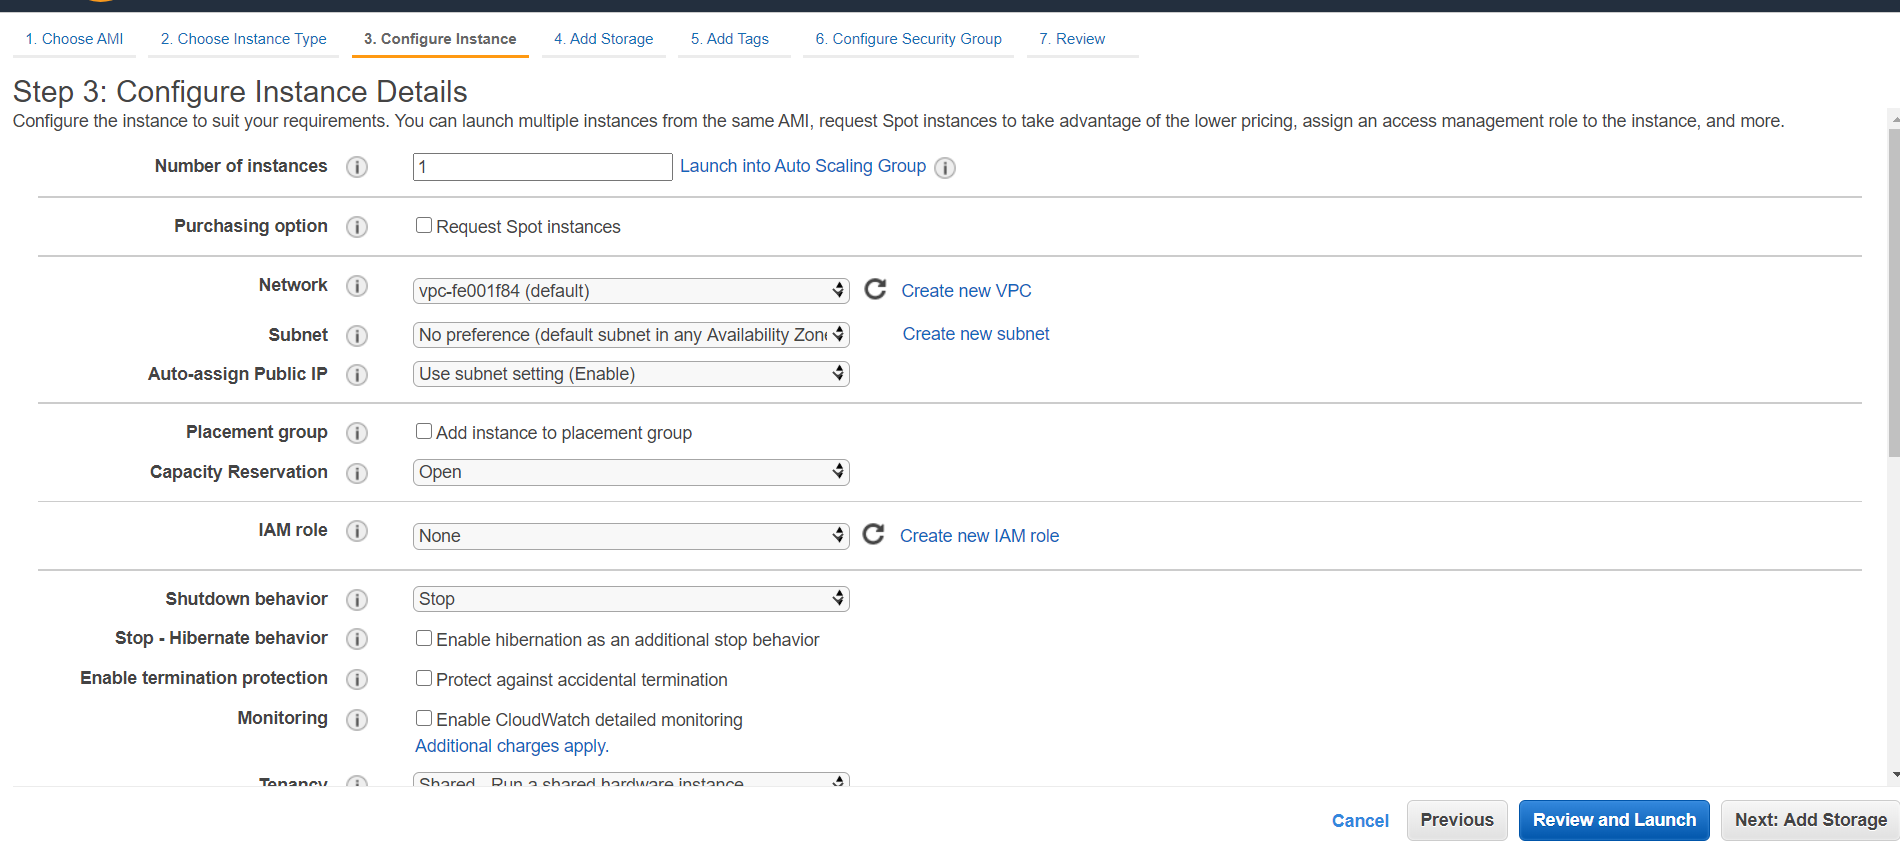
步骤6 :现在配置您的实例,即您可以选择VPC或创建一个新的VPC,创建IAM角色,启用监视等。
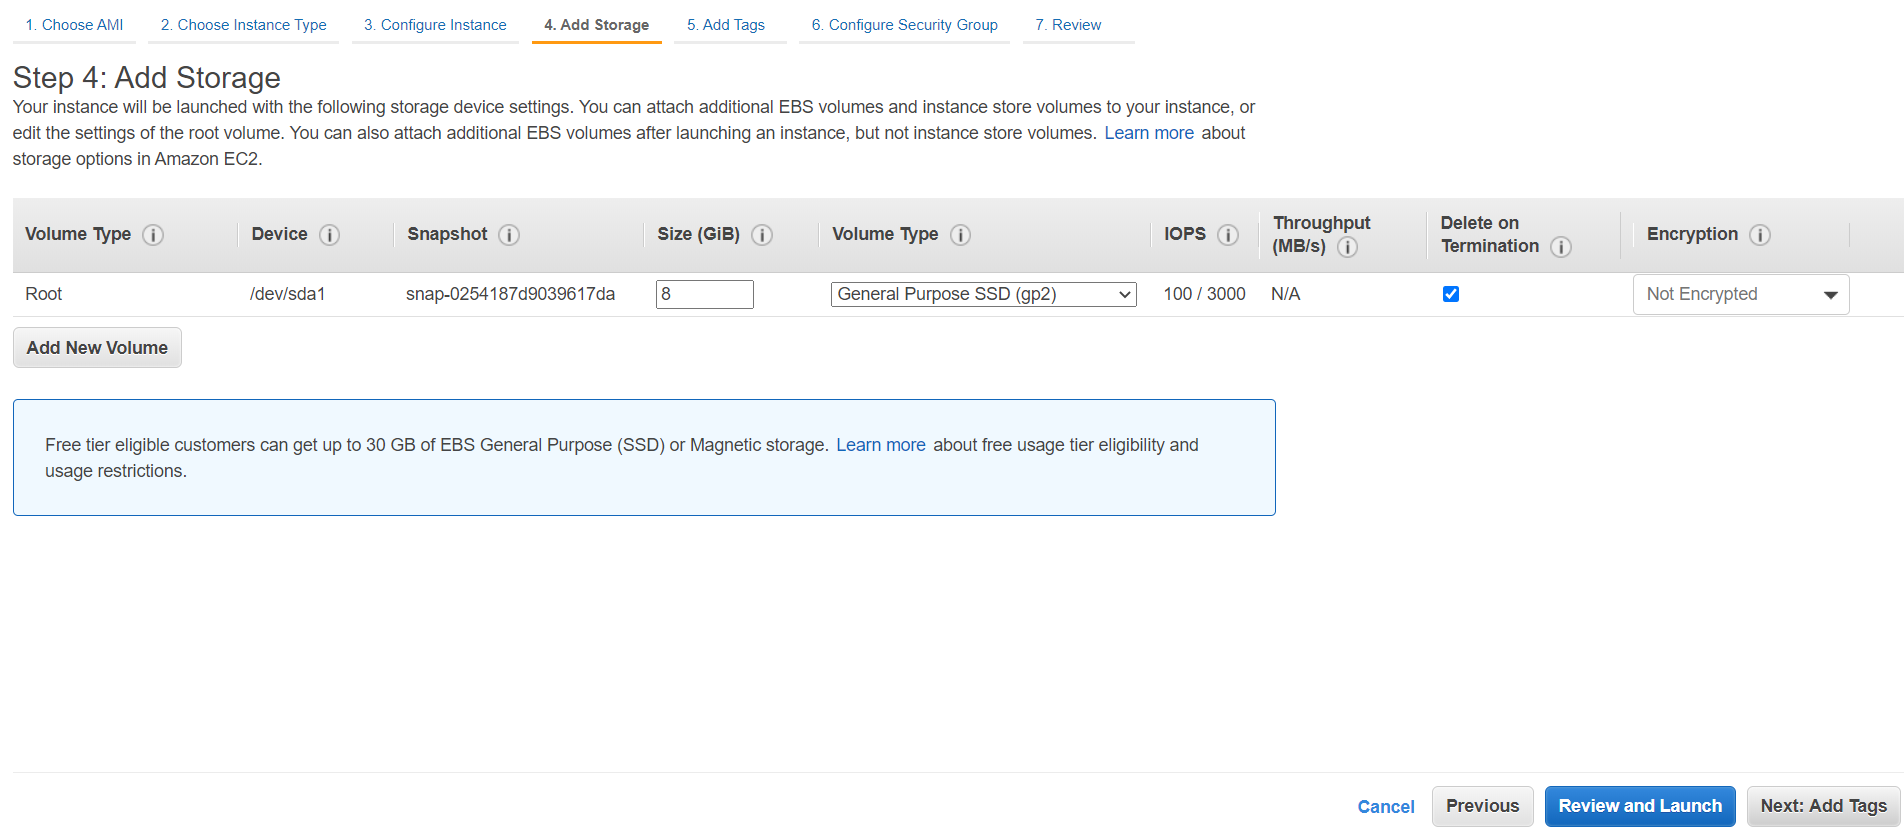
步骤7:现在选择存储量和类型。
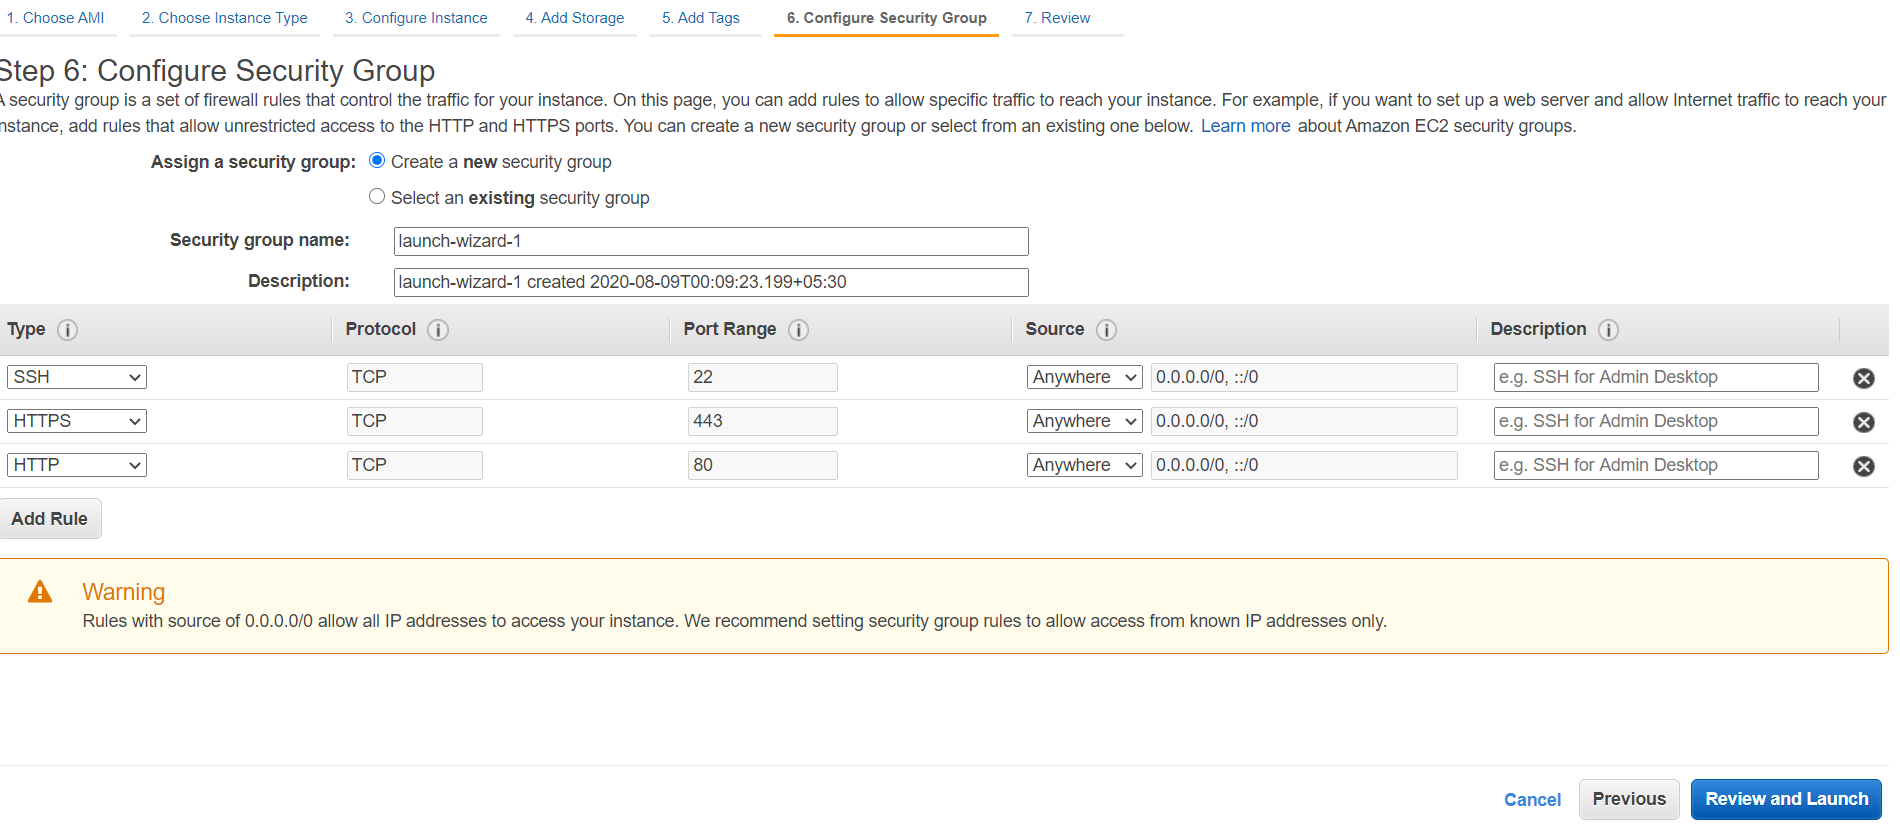
步骤8:为安全性配置防火墙。要使用Web服务器,请打开HTTP和HTTPS端口,并且要访问实例,请打开SSH端口。
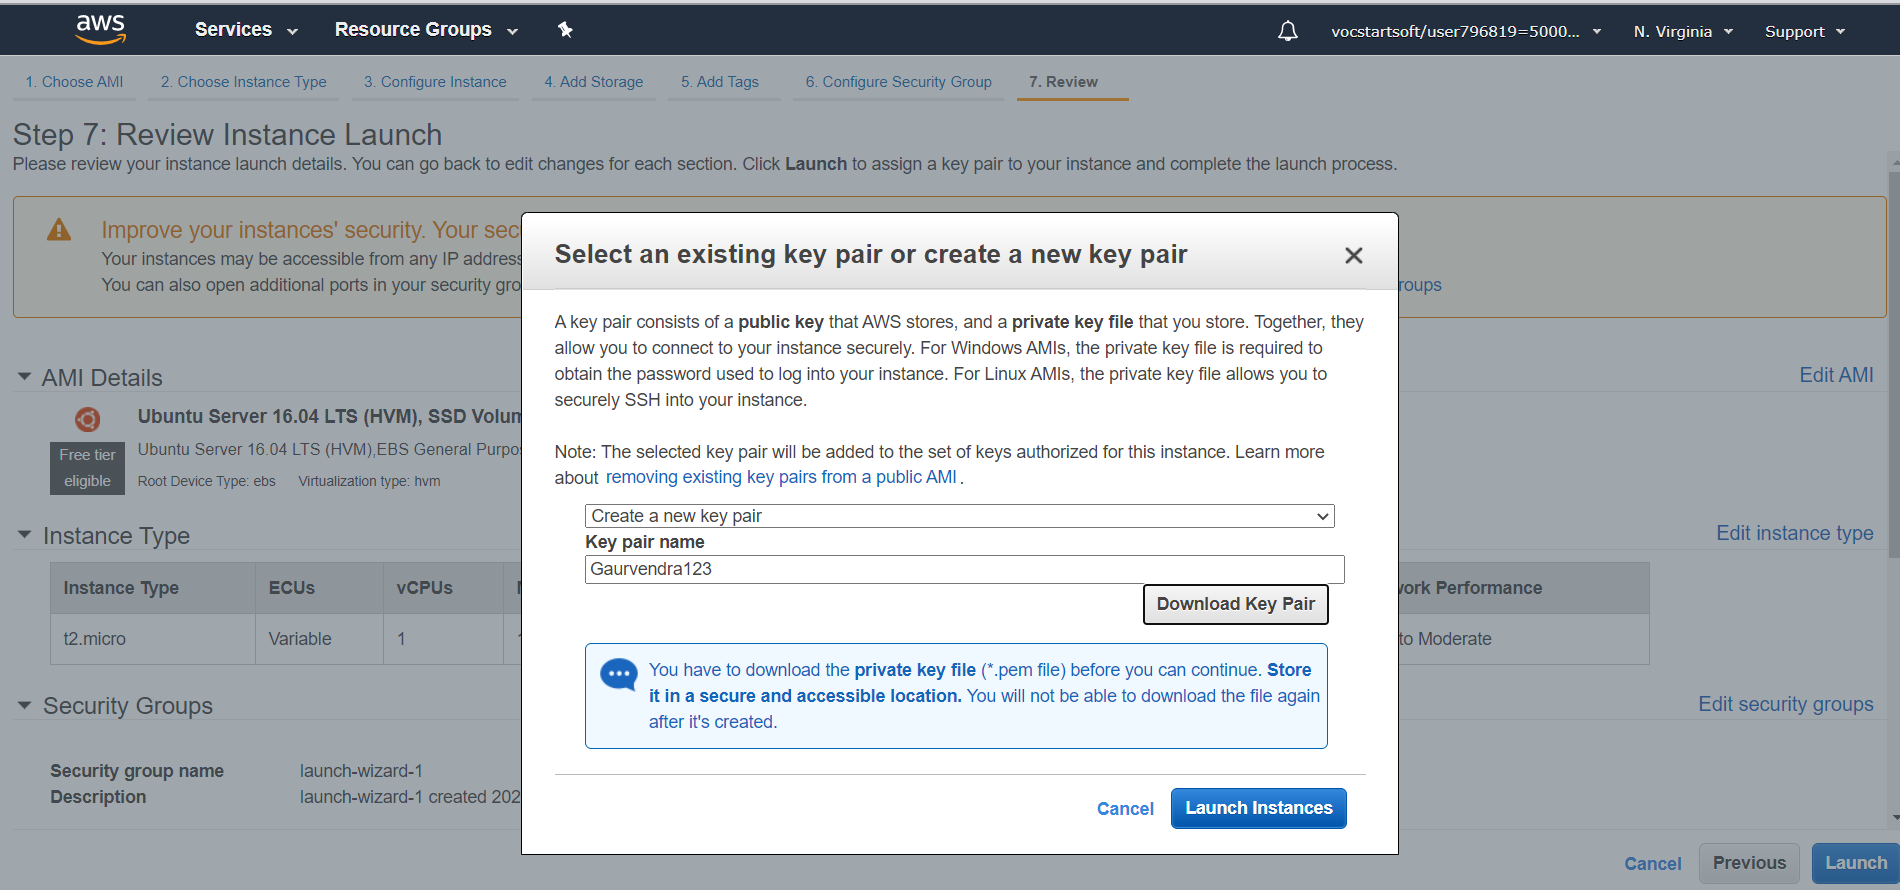
步骤9 :现在查看并启动实例。然后创建一个密钥对并下载。
步骤10:您的实例已成功创建。

为Web服务器安装XAMPP
在本节中,我们将使用Linux / mac终端,对于Windows 10,您可以使用Power Shell或可以使用腻子。
步骤1:转到存储key(.pem)文件的文件夹,并使用以下命令通过SSH连接到您的实例。
ssh -i keyname.pem ubuntu@ip_address
步骤2:使用以下命令并更新您的os软件包。
ubuntu@ip-159-73-16-319:~$ sudo su
sudo apt-get update
步骤3:现在停止默认的Apache(如果有)。
sudo /etc/inid.d/apache stop
步骤4:现在下载并安装XAMPP。
wget https://www.apachefriends.org/xampp-files/7.2.2/xampp-linux-x64-7.2.2-0-installer.run   // Installer
sudo chmod +x xampp-linux-x64-7.0.23-0-installer.run                                         // Changing permission
sudo ./xampp-linux-x64-7.0.23-0-installer.run                                                // Runing Installer
Note: The stack includes – Apache 2.4.29, MariaDB 10.1.30, PHP 7.2.2 + SQLite 2.8.17/3.7.17
For PHP 5 use: https://www.apachefriends.org/xampp-files/5.6.33/xampp-linux-x64-5.6.33-0-installer.run
步骤5:安装后,您必须检查以下XAMPP说明。
Select the components you want to install; clear the components you do not want to install. Click Next when you are ready to continue.
XAMPP Core Files : Y (Cannot be edited)
XAMPP Developer Files [Y/n] : Y
Is the selection above correct? [Y/n]: Y

Installation Directory
XAMPP will be installed to /opt/lampp
Press [Enter] to continue:
Do you want to continue? [Y/n]:Y
步骤6:现在启动服务。
sudo /opt/lampp/lampp start
步骤7:现在,您必须编辑XAMPP配置文件,然后重新启动xampp。
vi /opt/lampp/etc/extra/httpd-xampp.conf
Require local
ErrorDocument 403 /error/XAMPP_FORBIDDEN.html.var


to


Order deny,allow
Allow from all
Allow from ::1 127.0.0.0/8 \
fc00::/7 10.0.0.0/8 172.16.0.0/12 192.168.0.0/16 \
fe80::/10 169.254.0.0/16
ErrorDocument 403 /error/XAMPP_FORBIDDEN.html.var
sudo /opt/lampp/lampp restart
步骤8:现在我们必须设置安全设置以设置MySQL的密码。
XAMPP: Your XAMPP pages are NOT secured by a password.
XAMPP: Do you want to set a password? [yes]
XAMPP: Your XAMPP pages are NOT secured by a password.
XAMPP: Do you want to set a password? [yes] no
XAMPP: MySQL is accessable via network.
XAMPP: Normaly that's not recommended. Do you want me to turn it off? [yes] yes
XAMPP: Turned off.
XAMPP: Stopping MySQL...ok.
XAMPP: Starting MySQL...ok.
XAMPP: The MySQL/phpMyAdmin user pma has no password set!!!
XAMPP: Do you want to set a password? [yes] yes
XAMPP: Password:*********
XAMPP: Password (again):*********
XAMPP: Setting new MySQL pma password.
XAMPP: Setting phpMyAdmin's pma password to the new one.
XAMPP: MySQL has no root passwort set!!!
XAMPP: Do you want to set a password? [yes] yes
XAMPP: Write the password somewhere down to make sure you won't forget it!!!
XAMPP: Password:*********
XAMPP: Password (again):*********
XAMPP: Setting new MySQL root password.
XAMPP: Change phpMyAdmin's authentication method.
XAMPP: The FTP password for user 'daemon' is still set to 'xampp'.
XAMPP: Do you want to change the password? [yes] no
XAMPP: Done.
一切都已完成。您可以访问网站:http:// IP-ADDRESS /和数据库:http:// IPAddress / phpmyadmin /
Web服务器目录为:
/opt/lampp/htdocs/