可视化每个 CNN 层的输出/激活表示
卷积神经网络在图像分类和识别任务中非常强大。 CNN 模型通过在每一层应用的各种过滤器来学习训练图像的特征。在每个卷积层学习到的特征显着不同。一个观察到的事实是,初始层主要捕获边缘、图像的方向和图像中的颜色,这些都是低级特征。随着层数的增加,CNN 捕获有助于区分各种图像类别的高级特征。
为了了解卷积神经网络如何学习图像的空间和时间依赖性,可以通过以下方式可视化在每一层捕获的不同特征。
To visualize the features at each layer, Keras Model class is used.
It allows the model to have multiple outputs.
It maps given a list of input tensors to list of output tensors.

tf.keras.Model()

Arguments:
inputs: It can be a single input or a list of inputs which are objects of keras.Input class
outputs: Output/ List of outputs.
考虑一个包含猫和狗图像的数据集,我们构建了一个卷积神经网络并在其上添加一个分类器,以识别给定的图像是猫还是狗。
使用Keras ImageDataGenerator将训练图像和验证图像加载到数据生成器中。
类模式被认为是“Binary”,Batch size 被认为是 20。图像的目标大小固定为 (150, 150)。
from keras.preprocessing.image import ImageDataGenerator
train_datagen = ImageDataGenerator(rescale = 1./255)
test_datagen = ImageDataGenerator(rescale = 1./255)

train_generator = train_datagen.flow_from_directory(train_img_path, target_size =(150, 150),
                                                      batch_size = 20, class_mode = "binary")

validation_generator = test_datagen.flow_from_directory(val_img_path, target_size =(150, 150),
                                                      batch_size = 20, class_mode = "binary")
第 2 步:模型的架构
添加了二维卷积层和最大池化层的组合,并在其之上添加了密集分类层。对于最后的 Dense 层,使用 Sigmoid 激活函数,因为它是一个二分类问题。
from keras import models
from keras import layers

model = models.Sequential()

model.add(layers.Conv2D(32, (3, 3), activation ='relu', input_shape =(150, 150, 3)))
model.add(layers.MaxPooling2D((2, 2)))

model.add(layers.Conv2D(64, (3, 3), activation ='relu'))
model.add(layers.MaxPooling2D((2, 2)))

model.add(layers.Conv2D(128, (3, 3), activation ='relu'))
model.add(layers.MaxPooling2D((2, 2)))

model.add(layers.Conv2D(128, (3, 3), activation ='relu'))
model.add(layers.MaxPooling2D((2, 2)))

model.add(layers.Flatten())

model.add(layers.Dense(512, activation ='relu'))
model.add(layers.Dense(1, activation ="sigmoid"))

model.summary()
输出:模型摘要
Model: "sequential_1"
_________________________________________________________________
Layer (type)                 Output Shape              Param #
=================================================================
conv2d_1 (Conv2D)            (None, 148, 148, 32)      896
_________________________________________________________________
max_pooling2d_1 (MaxPooling2 (None, 74, 74, 32)        0
_________________________________________________________________
conv2d_2 (Conv2D)            (None, 72, 72, 64)        18496
_________________________________________________________________
max_pooling2d_2 (MaxPooling2 (None, 36, 36, 64)        0
_________________________________________________________________
conv2d_3 (Conv2D)            (None, 34, 34, 128)       73856
_________________________________________________________________
max_pooling2d_3 (MaxPooling2 (None, 17, 17, 128)       0
_________________________________________________________________
conv2d_4 (Conv2D)            (None, 15, 15, 128)       147584
_________________________________________________________________
max_pooling2d_4 (MaxPooling2 (None, 7, 7, 128)         0
_________________________________________________________________
flatten_1 (Flatten)          (None, 6272)              0
_________________________________________________________________
dense_1 (Dense)              (None, 512)               3211776
_________________________________________________________________
dense_2 (Dense)              (None, 1)                 513
=================================================================
Total params: 3, 453, 121
Trainable params: 3, 453, 121
Non-trainable params: 0
第三步:在猫狗数据集上编译和训练模型
损失函数:二元交叉熵
优化器:RMSprop
指标:准确度
from keras import optimizers

model.compile(loss ="binary_crossentropy", optimizer = optimizers.RMSprop(lr = 1e-4),
metrics =['accuracy'])

history = model.fit_generator(train_generator, steps_per_epoch = 100, epochs = 30,
validation_data = validation_generator, validation_steps = 50)
第 4 步:可视化中间激活(每层的输出)
考虑一个不用于训练的图像,即来自测试数据,将图像的路径存储在变量“image_path”中。
from keras.preprocessing import image
import numpy as np

# Pre-processing the image
img = image.load_img(image_path, target_size = (150, 150))
img_tensor = image.img_to_array(img)
img_tensor = np.expand_dims(img_tensor, axis = 0)
img_tensor = img_tensor / 255.

# Print image tensor shape
print(img_tensor.shape)

# Print image
import matplotlib.pyplot as plt
plt.imshow(img_tensor[0])
plt.show()
输出:
张量形状:(1, 150, 150, 3)输入图像: 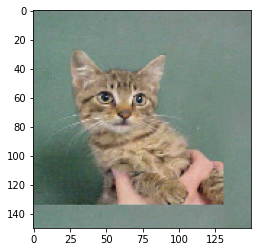
代码:使用 Keras Model 类获取每一层的输出
# Outputs of the 8 layers, which include conv2D and max pooling layers
layer_outputs = [layer.output for layer in model.layers[:8]]
activation_model = models.Model(inputs = model.input, outputs = layer_outputs)
activations = activation_model.predict(img_tensor)

# Getting Activations of first layer
first_layer_activation = activations[0]

# shape of first layer activation
print(first_layer_activation.shape)

# 6th channel of the image after first layer of convolution is applied
plt.matshow(first_layer_activation[0, :, :, 6], cmap ='viridis')

# 15th channel of the image after first layer of convolution is applied
plt.matshow(first_layer_activation[0, :, :, 15], cmap ='viridis')
输出:
第一层激活形状:(1, 148, 148, 32) 第一层激活的第六通道:  第一层激活的第十五通道:
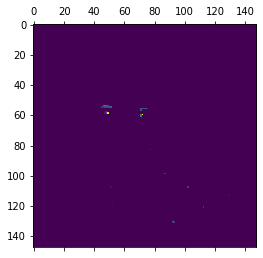
如前所述,初始层识别低级特征。第 6 个通道识别图像中的边缘,而第 15 个通道识别眼睛的颜色。
代码:我们模型中八层的名称
layer_names = []

for layer in model.layers[:8]:
  layer_names.append(layer.name)
print(layer_names)
输出:
Layer names:

['conv2d_1',
 'max_pooling2d_1',
 'conv2d_2',
 'max_pooling2d_2',
 'conv2d_3',
 'max_pooling2d_3',
 'conv2d_4',
 'max_pooling2d_4']
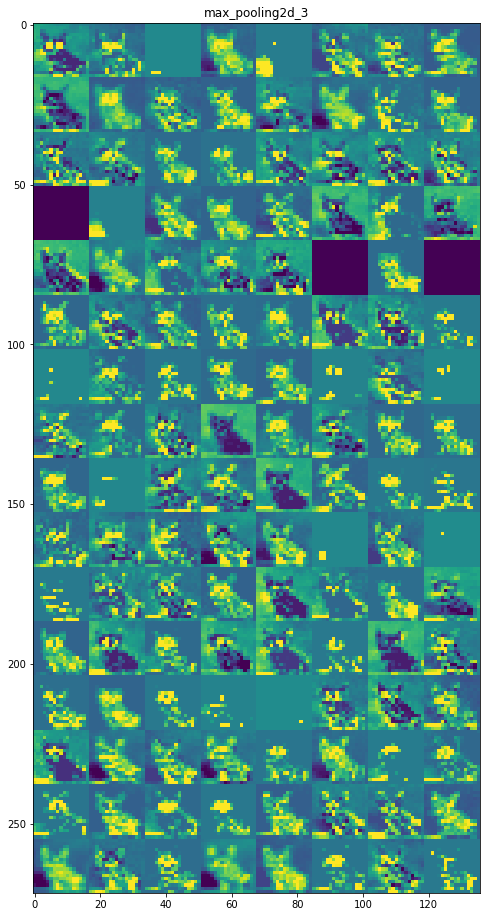
每一层的特征图:
第 1 层:conv2d_1 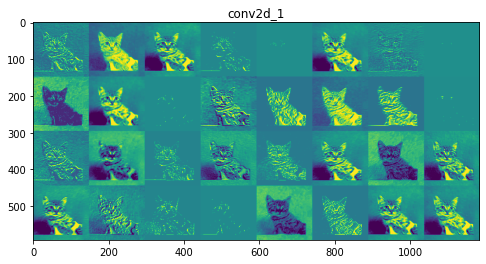
第 2 层:max_pooling2d_1 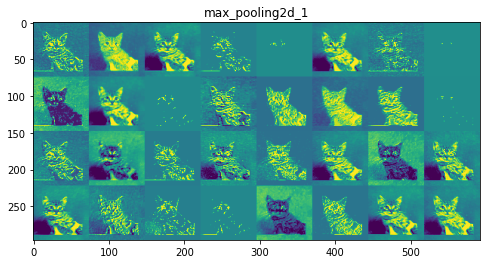
第 3 层:conv2d_2 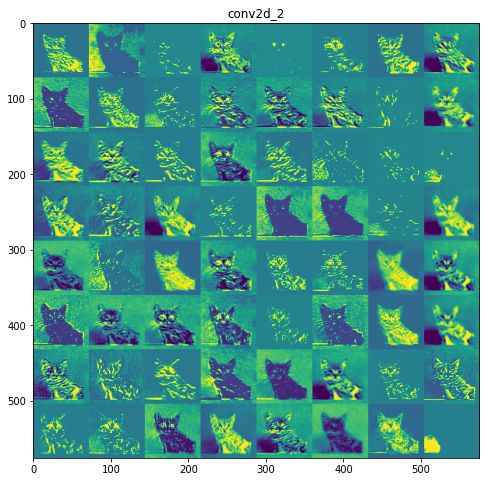
第 4 层:max_pooling2d_2 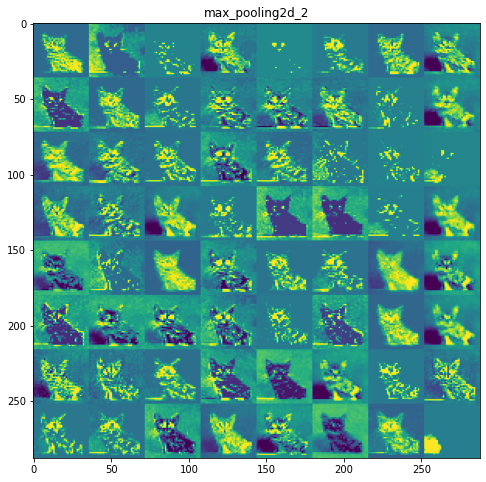
第 5 层:conv2d_3 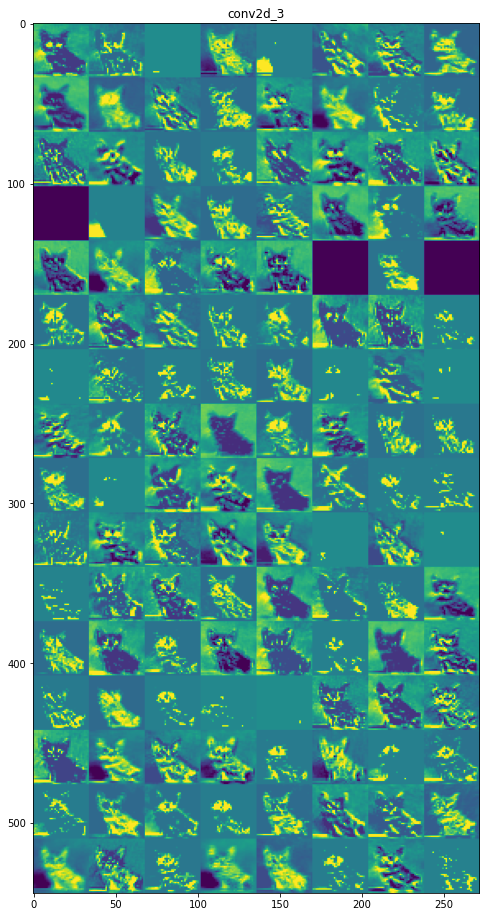
第 6 层:max_pooling2d_3
第 7 层:conv2d_4 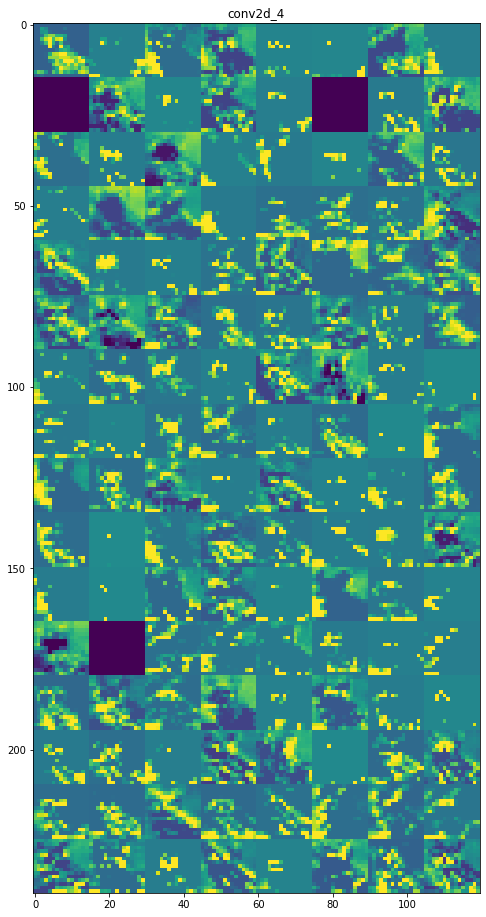
第 8 层:max_pooling2d_4 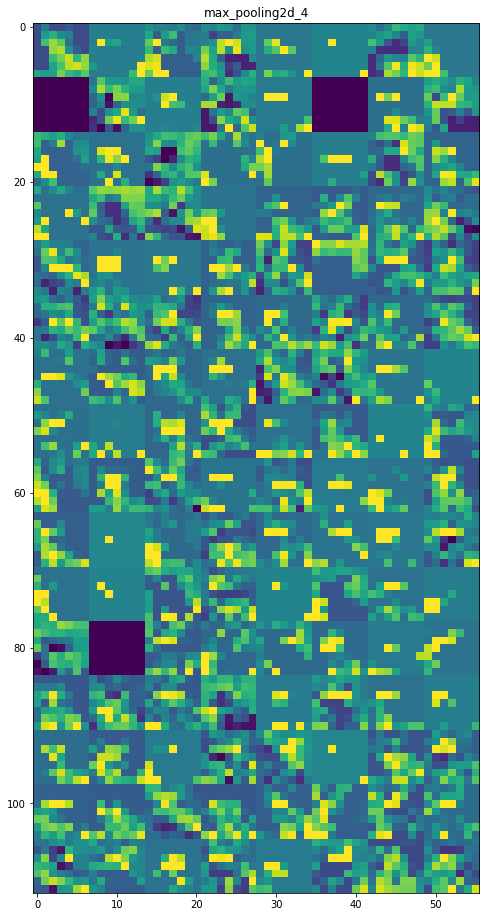
推理:
初始层更具可解释性,并保留了输入图像中的大部分特征。随着层级的增加,特征变得越来越难以解释,它们变得更加抽象,并且它们识别出特定于类的特征,而留下图像的一般特征。
参考:
- https://keras.io/api/models/model/
- https://www.kaggle.com/c/dogs-vs-cats
- https://www.geeksforgeeks.org/introduction-convolution-neural-network/
在评论中写代码?请使用 ide.geeksforgeeks.org,生成链接并在此处分享链接。