使用 Google 表单和 Pandas 收集数据
在本文中,我们将讨论如何使用 Pandas 从 Google 表单中收集数据。
需要的模块
- pydrive:用于简化许多常见的 Google Drive API 任务。要安装此类型,请在终端中输入以下命令。
pip install pydrive- xlrd:此模块用于从电子表格中提取数据。要安装此类型,请在终端中输入以下命令。
pip install xlrd- openpyxl :这是一个用于读写 Excel 的Python库。要安装此类型,请在终端中输入以下命令。
pip install openpyxl入门
整个过程的第一个重要部分是创建一个谷歌表单。访问此链接并创建一个新表单。
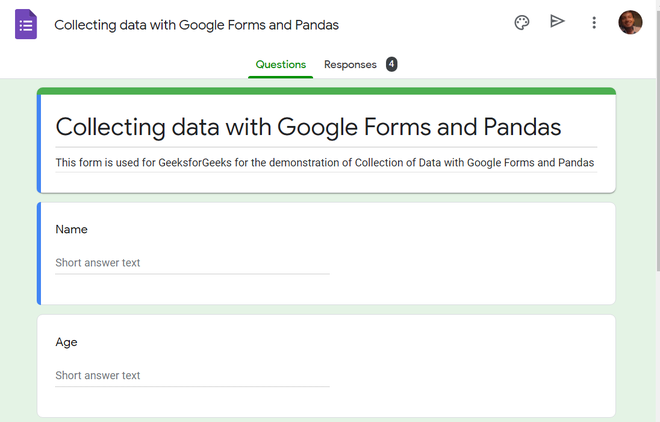
在 Google 表单中创建表单
当我们完成问题设置后,单击发送按钮发布表单。要访问此 Google 表单,请单击此处。
下一步是向 Google 验证我们的Python脚本和本地环境,并通过在 Google Cloud Platform 中启用 Google Drive API 来访问来自 Google Drive 的 Google 表单数据。按着这些次序:
- 转到 Google 表单
- 响应选项卡,
- 单击电子表格图标
- 并为我们的谷歌表单创建一个新的目的地电子表格。
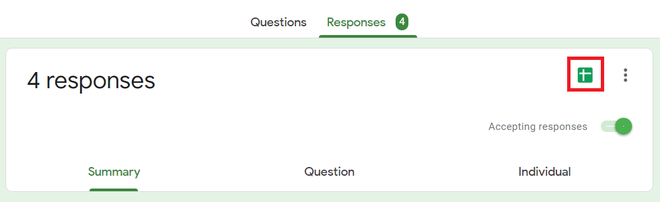
关联新电子表格和 Google 表单
此电子表格将被创建并存储在 Google 云端硬盘中。我们必须集成 Google Drive 和Python环境。首先,我们必须通过 Google 进行身份验证。
验证 Google Drive API
现在,要使用 Google Drive API,我们必须设置我们的帐户,启用 Google Drive API 并获取我们的client_secrets.json密钥。
1. 转到 Google Cloud Platform Console,单击 GCP 工具栏上的新建项目 / 项目 → 新建项目。

单击项目名称,然后选择新建项目
2. 为我们的项目输入一个名称,然后单击创建。
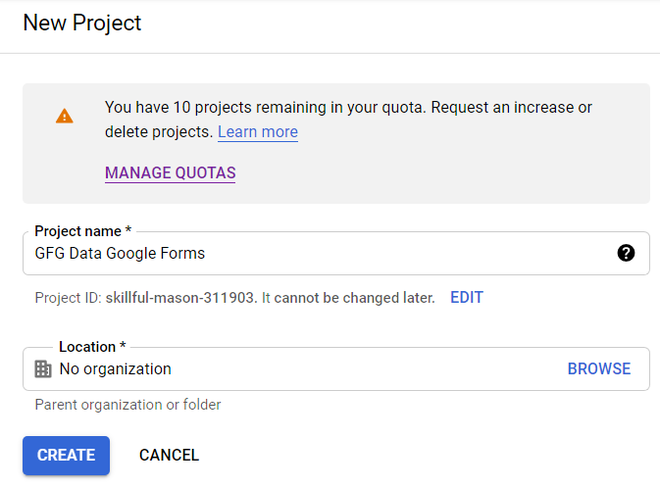
创建 GCP 项目
3. 在我们项目的主屏幕中,单击左上角的导航栏并单击 API 和服务,然后选择 OAuth 同意屏幕。
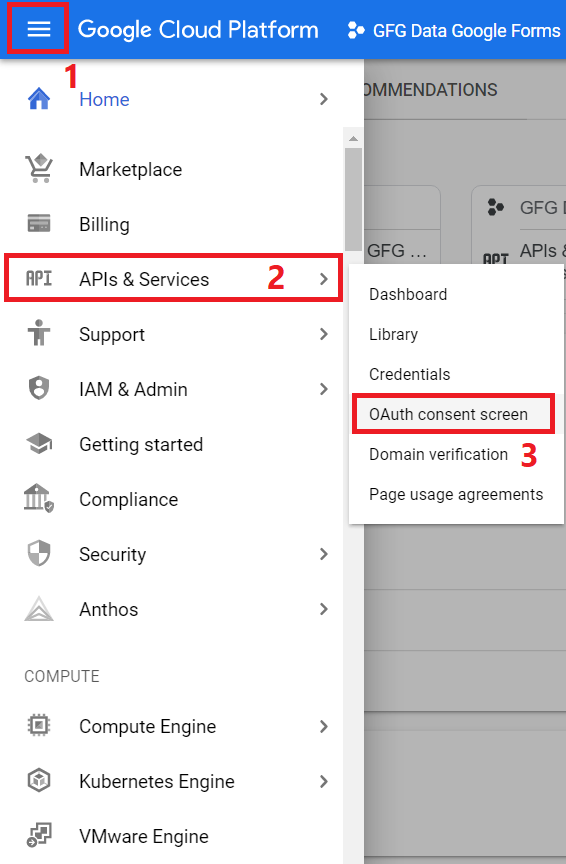
导航到 Oauth 同意屏幕
4. 在 OAuth 同意屏幕主页中,选择外部并单击创建

Oauth 初始步骤
5. 在下一个屏幕中,输入必填详细信息,包括应用程序名称、用户支持电子邮件和开发人员联系信息。单击“保存并继续”并进入摘要页面。
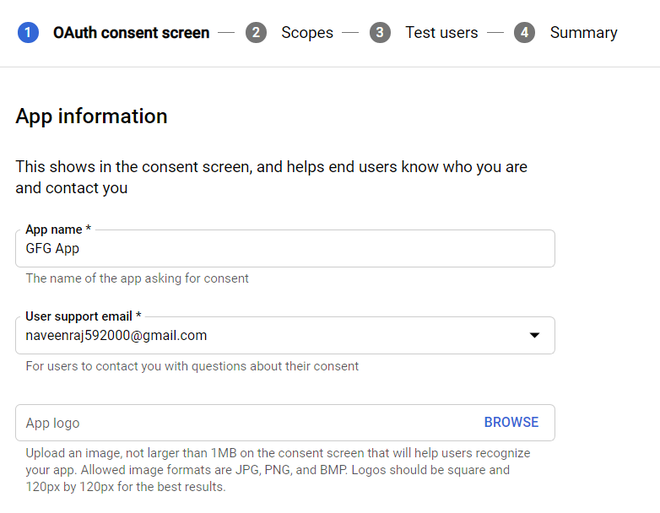
应用详情
6. 在摘要屏幕中,单击“返回仪表板”。我们现在可以选择发布我们的应用程序。现在我们准备将我们的应用程序推送到生产环境。
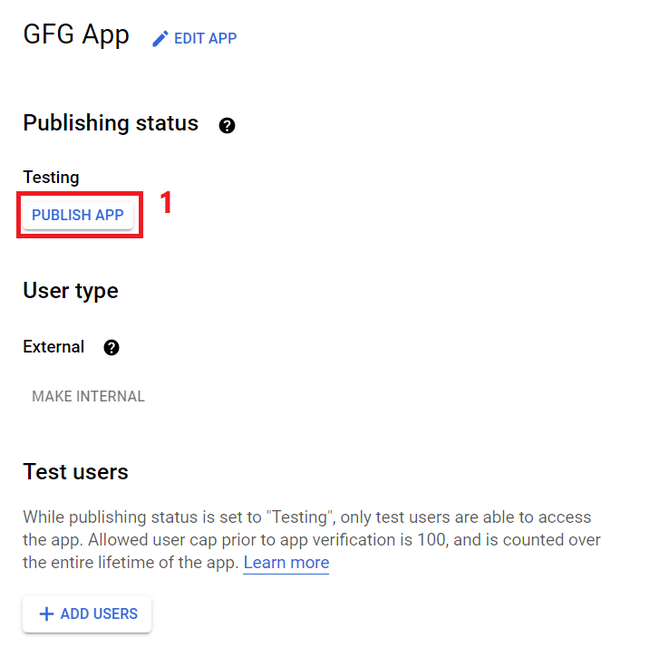
发布我们的应用程序
7. 现在我们已经发布了我们的应用程序,点击搜索栏并搜索 Google Drive API。选择 Google Drive API 并启用该服务。
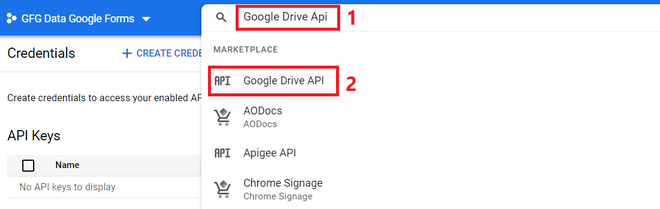
搜索 Google Drive API 服务
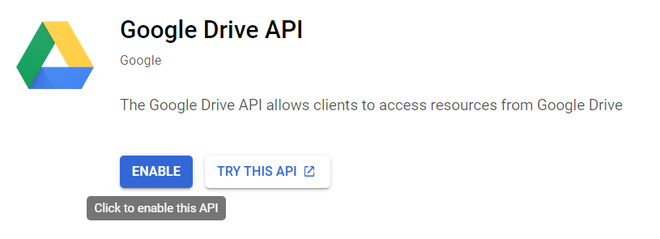
启用 Google Drive API
8. 现在我们已经发布了我们的应用程序并启用了 Google Drive API,点击导航栏,在 APIs and Services 中,选择 Credentials。
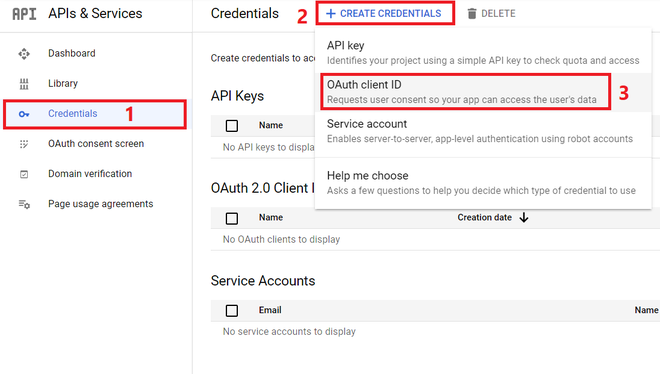
创建凭证
9. 在 OAuth 客户端 ID 屏幕中,选择应用程序类型作为桌面应用程序,输入名称并单击创建。
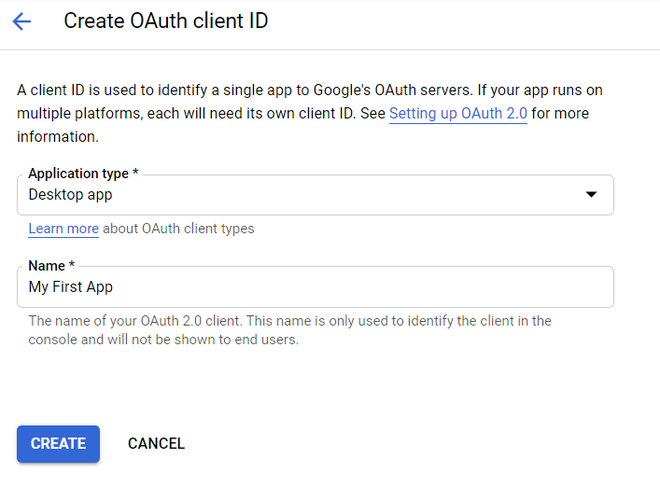
创建 OAuth 客户端 ID
9. 我们将被重定向到凭据主页,在那里我们将能够找到我们的 OAuth 客户端 ID。单击下载密钥选项并以名称client_secrets.json保存 .JSON 文件
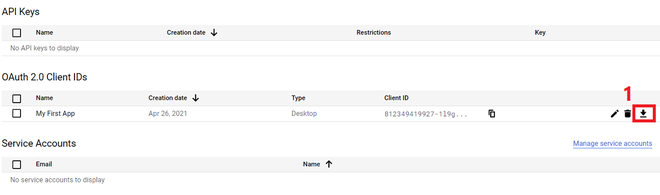
下载密钥
注意:此密钥和下面创建的Python文件应存在于同一目录中。
Python实现:
Python3
from pydrive.auth import GoogleAuth
from pydrive.drive import GoogleDrive
import pandas as pd

# Initializing a GoogleAuth Object
gauth = GoogleAuth()

# client_secrets.json file is verified
# and it automatically handles authentication
gauth.LocalWebserverAuth()

# GoogleDrive Instance is created using
# authenticated GoogleAuth instance
drive = GoogleDrive(gauth)

# Initialize GoogleDriveFile instance with file id
file_obj = drive.CreateFile({'id': 'FILE_ID'})
file_obj.GetContentFile('FILE_NAME.xls',
         mimetype='application/vnd.openxmlformats-officedocument.spreadsheetml.sheet')

dataframe = pd.read_excel('FILE_NAME.xls')
print(dataframe)注意:用于创建 Google Forms 和Python Environment GDrive Authentication 的 Google Accounts 必须相同
当我们运行代码时,会在我们的默认 Web 浏览器中弹出一个 Google 身份验证流程窗口。我们必须选择我们的 Google 帐户并继续流程。
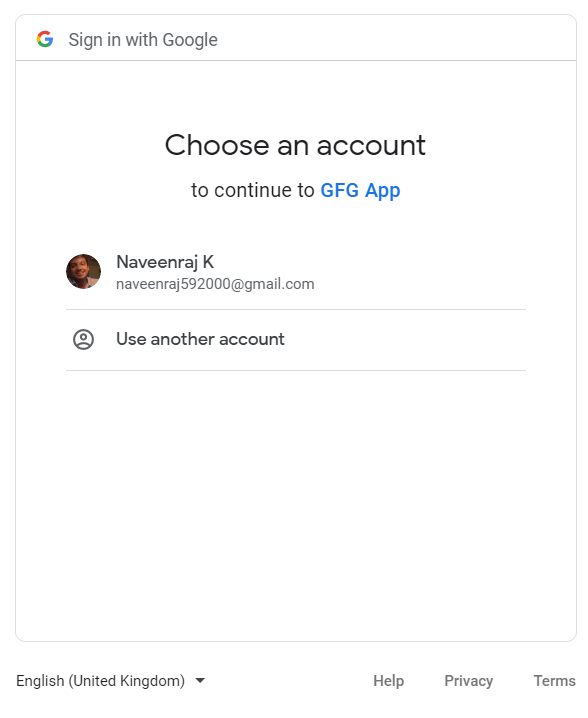
选择我们的谷歌账户
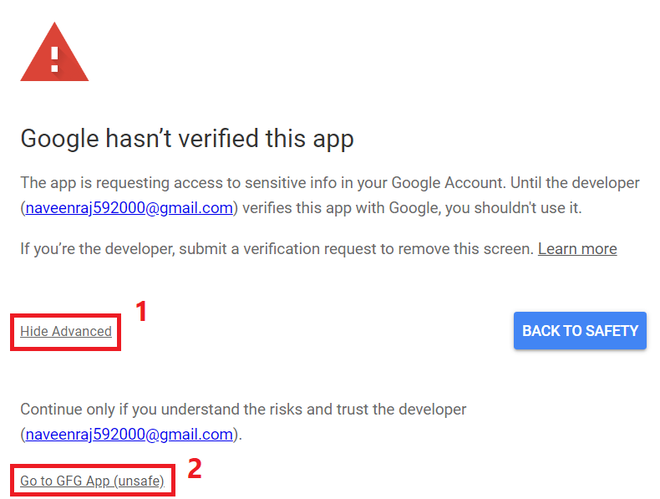
点击 Advanced -> Go to GFG App (unsafe)
我们必须允许权限,然后在下一个屏幕中再次单击允许。
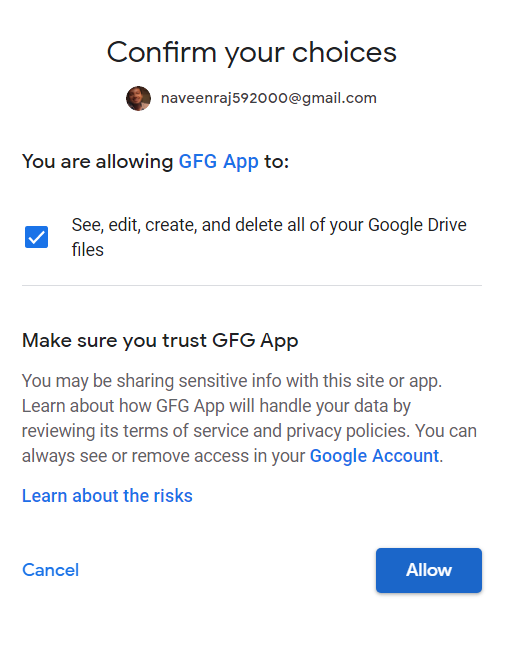
为我们的应用程序启用权限
现在我们将在浏览器中收到一条消息,上面写着“身份验证流程已完成”。转到我们的Python环境,我们将能够看到 Pandas Dataframe 格式的数据。
输出:

通过 Google Drive API 从 Google 表单实时获取的 Pandas 数据帧