使用 Django 框架的投票系统项目
项目名称:使用 Django 框架的 Pollster(投票系统)Web 应用程序
应用程序类型(类别): Web 应用程序。
简介:我们将使用 Django 创建一个 pollster(投票系统)Web 应用程序。此应用程序将进行一系列问题以及许多选择。用户将被允许通过选择一个选项对该问题进行投票。根据答案计算总票数并将其显示给用户。用户还可以直接在网站上查看特定问题的总票数结果。我们还将构建这个项目的管理部分。管理员用户将被允许在应用程序中添加问题和管理问题。
先决条件:了解Python和 Django 框架的基础知识。 Python应该安装在系统中。用于处理应用程序的 Visual Studio 代码或任何代码编辑器。
项目中使用的技术: Django 框架和 Django 默认自带的 SQLite 数据库。
项目实施
创建项目
步骤 1:在您的目录中创建一个空文件夹pollster_project 。
步骤 2:现在切换到您的文件夹并使用以下命令在此文件夹中创建一个虚拟环境。
pip install pipenvpipenv shell第 3 步:将在上述步骤的文件夹中创建一个Pipfile 。现在使用以下命令在您的文件夹中安装 Django。
pipenv install djangoStep-4:现在我们需要建立Django项目。在您的文件夹中运行以下命令并启动 Django 项目。
django-admin startproject pollster将创建一个名为pollster的新文件夹。使用以下命令切换到 pollster 文件夹。
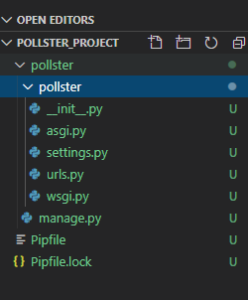
cd pollster文件夹结构看起来像这样。
在这里,您可以使用以下命令启动服务器,并在浏览器中使用http://127.0.0.1:8000/检查应用程序是否正在运行。
python manage.py runserver第 5 步:使用以下命令创建应用程序“ polls ”
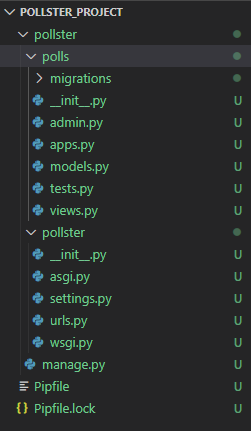
python manage.py startapp polls下面是在项目中创建“polls”应用程序后的文件夹结构。
创建模型
步骤 1:在您的models.py文件中编写下面给出的代码以在您的数据库中创建两个表。一个是“问题”,另一个是“选择”。 “问题”将有两个字段,即“question_text”和“pub_date”。 Choice 包含三个字段:“question”、“choice_text”和“votes”。每个选项都与一个问题相关联。
Python3
from django.db import models

# Create your models here.

class Question(models.Model):
    question_text = models.CharField(max_length = 200)
    pub_date = models.DateTimeField('date published')

    def __str__(self):
        return self.question_text


class Choice(models.Model):
    question = models.ForeignKey(Question, on_delete = models.CASCADE)
    choice_text = models.CharField(max_length = 200)
    votes = models.IntegerField(default = 0)

    def __str__(self):
        return self.choice_text
Python3
INSTALLED_APPS = [
    'polls.apps.PollsConfig',
    'django.contrib.admin',
    'django.contrib.auth',
    'django.contrib.contenttypes',
    'django.contrib.sessions',
    'django.contrib.messages',
    'django.contrib.staticfiles',
]
Python3
from django.contrib import admin
# Register your models here.
from .models import Question, Choice

# admin.site.register(Question)
# admin.site.register(Choice)

admin.site.site_header = "Pollster Admin"
admin.site.site_title = "Pollster Admin Area"
admin.site.index_title = "Welcome to the Pollster Admin Area"


class ChoiceInLine(admin.TabularInline):
    model = Choice
    extra = 3


class QuestionAdmin(admin.ModelAdmin):
    fieldsets = [(None, {'fields': ['question_text']}), ('Date Information', {
        'fields': ['pub_date'], 'classes': ['collapse']}), ]
    inlines = [ChoiceInLine]


admin.site.register(Question, QuestionAdmin)
Python3
from django.template import loader
from django.http import HttpResponse, HttpResponseRedirect
from django.shortcuts import get_object_or_404, render
from django.urls import reverse

from .models import Question, Choice

# Get questions and display them


def index(request):
    latest_question_list = Question.objects.order_by('-pub_date')[:5]
    context = {'latest_question_list': latest_question_list}
    return render(request, 'polls / index.html', context)

# Show specific question and choices


def detail(request, question_id):
    try:
        question = Question.objects.get(pk = question_id)
    except Question.DoesNotExist:
        raise Http404("Question does not exist")
    return render(request, 'polls / detail.html', {'question': question})

# Get question and display results


def results(request, question_id):
    question = get_object_or_404(Question, pk = question_id)
    return render(request, 'polls / results.html', {'question': question})

# Vote for a question choice


def vote(request, question_id):
    # print(request.POST['choice'])
    question = get_object_or_404(Question, pk = question_id)
    try:
        selected_choice = question.choice_set.get(pk = request.POST['choice'])
    except (KeyError, Choice.DoesNotExist):
        # Redisplay the question voting form.
        return render(request, 'polls / detail.html', {
            'question': question,
            'error_message': "You didn't select a choice.",
        })
    else:
        selected_choice.votes += 1
        selected_choice.save()
        # Always return an HttpResponseRedirect after successfully dealing
        # with POST data. This prevents data from being posted twice if a
        # user hits the Back button.
        return HttpResponseRedirect(reverse('polls:results', args =(question.id, )))
Python3
from django.urls import path
from . import views

app_name = 'polls'
urlpatterns = [
    path('', views.index, name ='index'),
    path('/', views.detail, name ='detail'),
    path('/results/', views.results, name ='results'),
    path('/vote/', views.vote, name ='vote'),
]
Python3
TEMPLATES = [
    {
        # make changes in DIRS[].
        'BACKEND': 'django.template.backends.django.DjangoTemplates',
        'DIRS': [os.path.join(BASE_DIR, 'templates')],
        'APP_DIRS': True,
        'OPTIONS': {
            'context_processors': [
                'django.template.context_processors.debug',
                'django.template.context_processors.request',
                'django.contrib.auth.context_processors.auth',
                'django.contrib.messages.context_processors.messages',
            ],
        },
    },
]
Python3
{% extends 'base.html' %}
{% block content %}
Poll Questions
{% if latest_question_list %}
{% for question in latest_question_list %}
{% endfor %}
{% else %}
No polls available
{% endif %}
{% endblock %}Python3
{% extends 'base.html' %}
{% block content %}
Back To Polls
{{ question.question_text }}
{% if error_message %}
{{ error_message }}
{% endif %}
{% endblock %}Python3
{% extends 'base.html' %}
{% block content %}
{{ question.question_text }}
{% for choice in question.choice_set.all %}
-
{{ choice.choice_text }} {{ choice.votes }}
vote{{ choice.votes | pluralize }}
{% endfor %}
Back To Polls
Vote again?
{% endblock %}Python3
Python3
    Pollster {% block title %}{% endblock %}


    {% include 'partials/_navbar.html'%}


                {% block content %}{% endblock %}
Python3
from django.shortcuts import render

# Create your views here.

def index(request):
    return render(request, 'pages / index.html')
Python3
from django.urls import path

from . import views

urlpatterns = [
    path('', views.index, name ='index'),
]
Python3
{% extends 'base.html' %}
{% block content %}
{% endblock %}Python3
from django.contrib import admin
from django.urls import include, path

urlpatterns = [
    path('', include('pages.urls')),
    path('polls/', include('polls.urls')),
    path('admin/', admin.site.urls),
]
第 2 步:转到settings.py文件并在列表中,INSTALLED_APPS 写下以下代码以将应用程序包含在我们的项目中。这将引用 polls -> apps.py -> PollsConfig 类。
Python3
INSTALLED_APPS = [
    'polls.apps.PollsConfig',
    'django.contrib.admin',
    'django.contrib.auth',
    'django.contrib.contenttypes',
    'django.contrib.sessions',
    'django.contrib.messages',
    'django.contrib.staticfiles',
]
第 3 步:我们在数据库中进行了更改并创建了一些表,但为了反映这些更改,我们需要在此处创建迁移,然后 Django 应用程序将存储对我们模型的更改。运行下面给出的以下命令来创建迁移。
python manage.py makemigrations polls在 polls->migrations 中将创建一个文件0001_initial.py ,您可以在其中找到我们在 models.py 文件中创建的数据库表。现在要在我们的数据库中插入所有表,请运行下面给出的命令......
python manage.py migrate 创建管理员用户
步骤 1:运行下面给出的命令来创建一个可以登录到管理站点的用户。
python manage.py createsuperuser它将提示我们需要输入的用户名。
Username: geeks123现在它会提示一个电子邮件地址,我们需要在此处再次输入该地址。
Email address: xyz@example.com最后一步是输入密码。我们需要输入两次密码,第二次作为第一次的确认。
Password: ******
Password (again): ******
Superuser created successfully.现在我们可以使用相同的命令Python manage.py runserver运行服务器,我们可以检查我们的管理面板浏览 URL http://127.0.0.1:8000/admin 。
第 2 步:在admin.py文件中,我们将编写下面给出的代码,将每个问题映射到可供选择的选项。此外,我们将编写代码来更改站点标题、站点标题和 index_title。完成此操作后,我们可以从管理面板添加问题和问题选择。
Python3
from django.contrib import admin
# Register your models here.
from .models import Question, Choice

# admin.site.register(Question)
# admin.site.register(Choice)

admin.site.site_header = "Pollster Admin"
admin.site.site_title = "Pollster Admin Area"
admin.site.index_title = "Welcome to the Pollster Admin Area"


class ChoiceInLine(admin.TabularInline):
    model = Choice
    extra = 3


class QuestionAdmin(admin.ModelAdmin):
    fieldsets = [(None, {'fields': ['question_text']}), ('Date Information', {
        'fields': ['pub_date'], 'classes': ['collapse']}), ]
    inlines = [ChoiceInLine]


admin.site.register(Question, QuestionAdmin)
注意:我们可以通过为这些问题添加一些问题和选项来测试应用程序。
创建视图
现在我们将创建应用程序的视图,该视图将从数据库中获取数据,并将数据呈现在应用程序的“模板”(我们将在下一节中创建“模板”文件夹和该文件夹内的文件)中将其显示给用户。
第 1 步打开views.py文件并写下下面给出的代码。
Python3
from django.template import loader
from django.http import HttpResponse, HttpResponseRedirect
from django.shortcuts import get_object_or_404, render
from django.urls import reverse

from .models import Question, Choice

# Get questions and display them


def index(request):
    latest_question_list = Question.objects.order_by('-pub_date')[:5]
    context = {'latest_question_list': latest_question_list}
    return render(request, 'polls / index.html', context)

# Show specific question and choices


def detail(request, question_id):
    try:
        question = Question.objects.get(pk = question_id)
    except Question.DoesNotExist:
        raise Http404("Question does not exist")
    return render(request, 'polls / detail.html', {'question': question})

# Get question and display results


def results(request, question_id):
    question = get_object_or_404(Question, pk = question_id)
    return render(request, 'polls / results.html', {'question': question})

# Vote for a question choice


def vote(request, question_id):
    # print(request.POST['choice'])
    question = get_object_or_404(Question, pk = question_id)
    try:
        selected_choice = question.choice_set.get(pk = request.POST['choice'])
    except (KeyError, Choice.DoesNotExist):
        # Redisplay the question voting form.
        return render(request, 'polls / detail.html', {
            'question': question,
            'error_message': "You didn't select a choice.",
        })
    else:
        selected_choice.votes += 1
        selected_choice.save()
        # Always return an HttpResponseRedirect after successfully dealing
        # with POST data. This prevents data from being posted twice if a
        # user hits the Back button.
        return HttpResponseRedirect(reverse('polls:results', args =(question.id, )))
Step-2:在 pollster->polls 文件夹中创建一个文件urls.py来定义我们在 views.py 文件中实现的所有方法的路由(不要与 pollster->pollster-> 中的文件混淆urls.py 文件)。下面是 urls.py 文件的代码……
Python3
from django.urls import path
from . import views

app_name = 'polls'
urlpatterns = [
    path('', views.index, name ='index'),
    path('/', views.detail, name ='detail'),
    path('/results/', views.results, name ='results'),
    path('/vote/', views.vote, name ='vote'),
]
创建模板
步骤 1:按照下面给出的步骤创建页面的正面布局。
- 在顶级 pollster 文件夹(与 polls 和 pollster 一起)中创建一个文件夹“模板”,即 pollster-> 模板。
- 在模板文件夹中创建“ base.html ”文件。我们将在此文件中定义应用程序的头部、主体和导航栏。
- 在“模板”文件夹中创建另一个文件夹“投票”。在“polls”文件夹中创建三个文件“ index.html ”、“ results.html ”和“ detail.html ”。
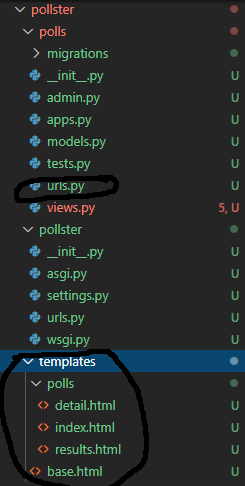
文件夹结构如下图所示(我们突出显示了我们在“创建视图,即 urls.py”和“创建模板”部分中创建的文件)......
第 2 步:默认情况下,Django 将在“民意调查”应用程序内搜索“模板”,但我们在民意调查应用程序之外创建了一个全局“模板”文件夹。因此,为了使其工作,我们需要在 settings.py 文件中定义“模板”文件夹路径。打开settings.py文件并在“模板”列表中添加下面给出的代码。
Python3
TEMPLATES = [
    {
        # make changes in DIRS[].
        'BACKEND': 'django.template.backends.django.DjangoTemplates',
        'DIRS': [os.path.join(BASE_DIR, 'templates')],
        'APP_DIRS': True,
        'OPTIONS': {
            'context_processors': [
                'django.template.context_processors.debug',
                'django.template.context_processors.request',
                'django.contrib.auth.context_processors.auth',
                'django.contrib.messages.context_processors.messages',
            ],
        },
    },
]
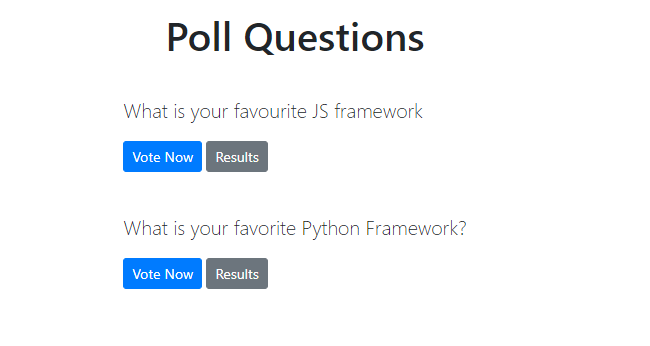
步骤 3:打开index.html文件并编写下面给出的代码。该文件将显示存储在我们数据库中的问题列表。此外,还将向用户显示两个按钮。一个用于投票(我们将创建一个 detail.html 文件用于投票),另一个用于检查结果(我们将为结果创建 results.html 文件)。
Python3
第四步:打开detail.html文件并编写下面给出的代码。该文件将负责对特定问题进行投票。无论用户从问题列表(index.html 文件)中选择什么问题进行投票,该特定问题和该问题的选择都将显示在此页面上。用户将被允许选择一个选项并通过单击投票按钮进行投票。
Python3
{% extends 'base.html' %}
{% block content %}
Back To Polls
{{ question.question_text }}
{% if error_message %}
{{ error_message }}
{% endif %}
{% endblock %}
第 5 步:打开results.html文件并编写下面给出的代码。无论用户选择什么问题(从 index.html 文件中)来检查结果,该文件都会显示对特定问题的总投票结果。
Python3
{% extends 'base.html' %}
{% block content %}
{{ question.question_text }}
{% for choice in question.choice_set.all %}
-
{{ choice.choice_text }} {{ choice.votes }}
vote{{ choice.votes | pluralize }}
{% endfor %}
Back To Polls
Vote again?
{% endblock %}
第 6 步:让我们为我们的应用程序创建导航栏。在文件夹“templates”中创建一个文件夹“ partials ”,然后在“partial”文件夹中创建一个文件“ _navbar.html ”。文件结构将是模板->部分->_navbar.html。在此文件中编写下面给出的代码。
Python3
第 7 步:到目前为止,我们还没有在我们创建的每个 HTML 文件中包含 head 和 body 标签。我们可以将这些代码写在一个单独的文件base.html中,我们可以为我们的页面提供布局。我们还将在此页面上带来我们的导航栏(_navbar.html 文件)。因此,打开“模板”文件夹中的base.html文件并写下下面给出的代码。
Python3
    Pollster {% block title %}{% endblock %}


    {% include 'partials/_navbar.html'%}


                {% block content %}{% endblock %}
创建登陆页面
URL http://127.0.0.1:8000/应该显示我们的 Web 应用程序的登录页面。因此,要创建登录页面,我们将按照以下步骤操作。
Step-1切换到顶级 pollster 文件夹并运行下面给出的命令来创建一个应用程序' pages '。
python manage.py startapp pages以下是创建“页面”应用程序后的文件夹结构。

步骤 2打开“pages”文件夹中的“ views.py ”,即 pages->views.py。写下下面给出的代码以访问登录页面。
Python3
from django.shortcuts import render

# Create your views here.

def index(request):
    return render(request, 'pages / index.html')
步骤 3在“pages”文件夹中创建urls.py文件,即 pages->urls.py。编写下面给出的代码来定义 pages->index.html 文件的路由(检查步骤 1)。
Python3
from django.urls import path

from . import views

urlpatterns = [
    path('', views.index, name ='index'),
]
第 4 步在“模板”文件夹中创建一个文件夹“页面”。现在在 'pages' 文件夹中创建一个文件index.html 。写下下面给出的代码以向用户显示登录页面。
Python3
{% extends 'base.html' %}
{% block content %}
{% endblock %}
在应用程序的主 urls.py 文件中创建路由
我们在应用程序“ polls ”和“ pages ”中创建了两个应用程序。我们需要在主urls.py文件中定义这两个应用程序的路由,即 pollster->pollster->urls.py 文件。因此,打开 pollster 文件夹中的主urls.py文件并写下下面给出的代码来定义这两个应用程序的路由('polls' 和 'pages')。
Python3
from django.contrib import admin
from django.urls import include, path

urlpatterns = [
    path('', include('pages.urls')),
    path('polls/', include('polls.urls')),
    path('admin/', admin.site.urls),
]
应用程序测试
管理前端
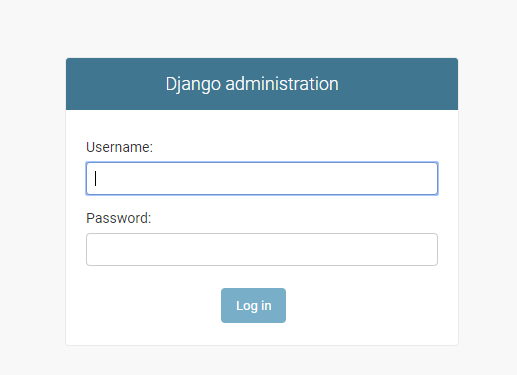
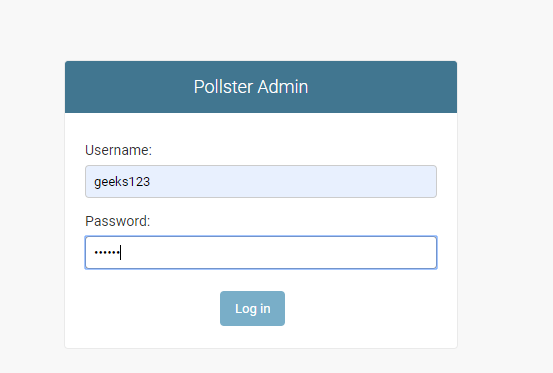
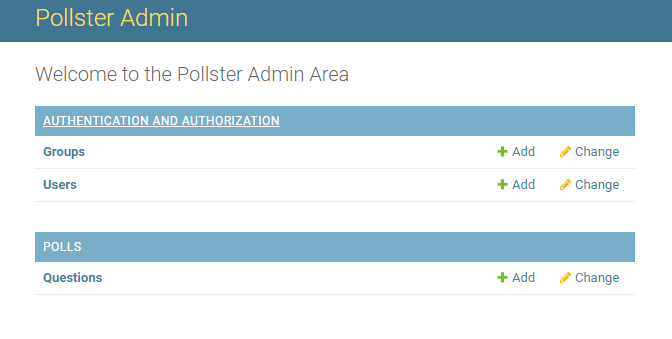
Step-1使用命令Python manage.py runserver运行服务器并浏览 URL http://127.0.0.1:8000/admin/ 。现在输入用户名和密码登录系统。
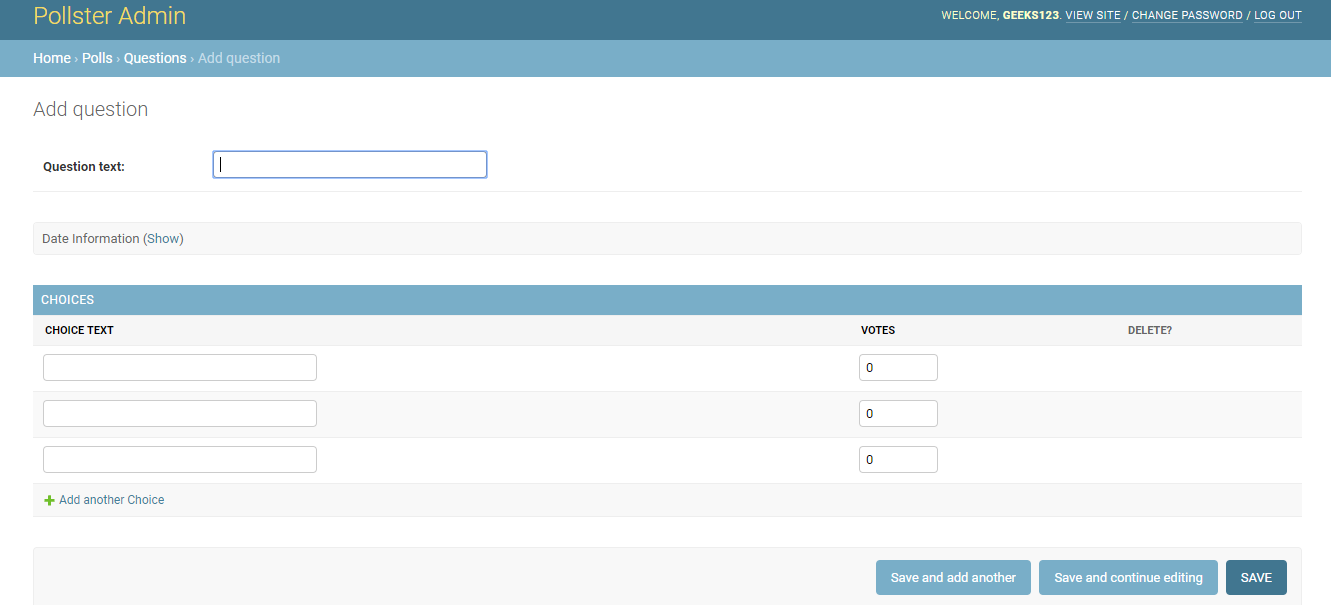
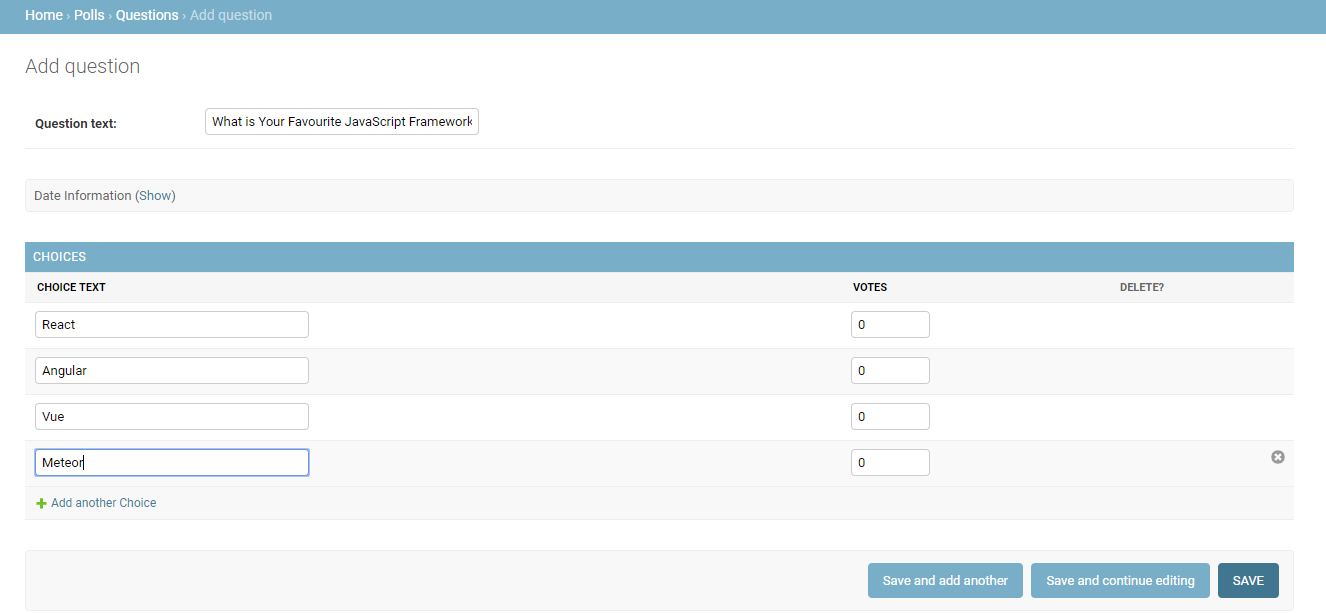
第 2 步单击“问题”旁边的“添加”按钮。
第 2 步现在为这些问题添加问题和选项。此外,提及日期和时间,然后单击“保存”按钮。您可以根据需要添加任意数量的问题。您将看到数据库中添加的问题列表。
用户前端
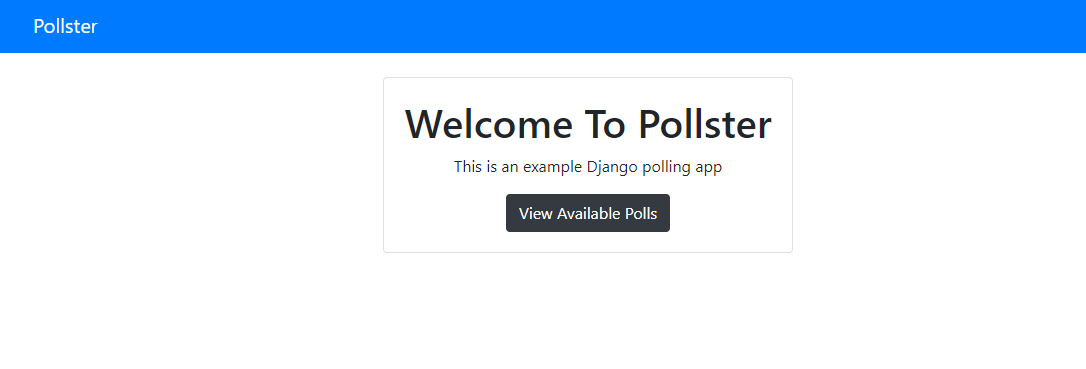
Step-1:浏览网址http://127.0.0.1:8000/ ,您将看到应用程序的登陆页面。点击“查看可用的民意调查”
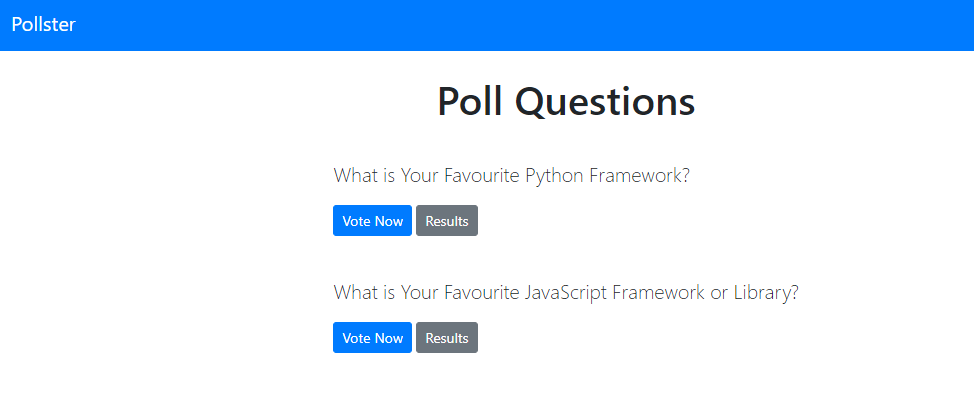
第 2 步:您将看到带有“立即投票”和“结果”两个选项的问题列表。从这里您需要选择一个问题,然后单击“立即投票”按钮。
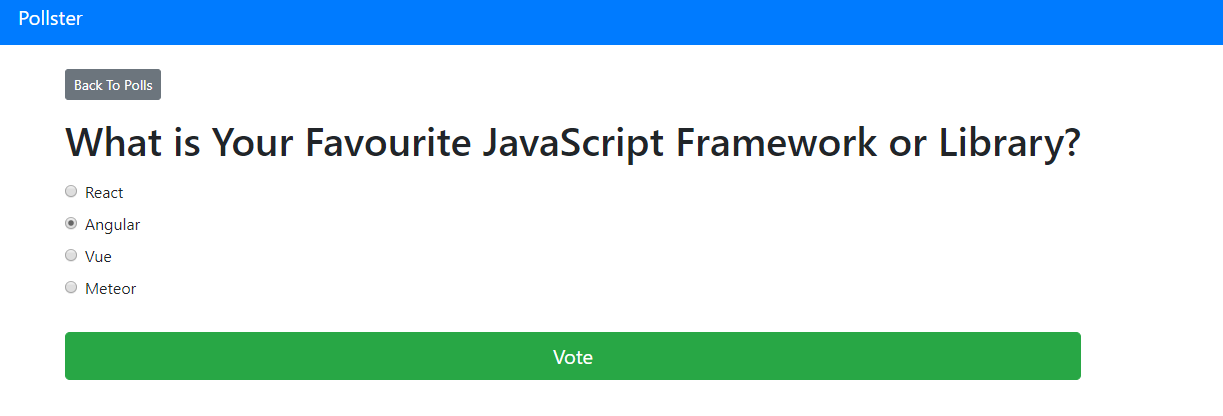
步骤 3:一旦完成,选择任何一个选项,然后单击“投票”按钮。您还可以使用顶部的“返回投票”按钮转到上一个菜单。
您将看到所选问题的总投票结果。
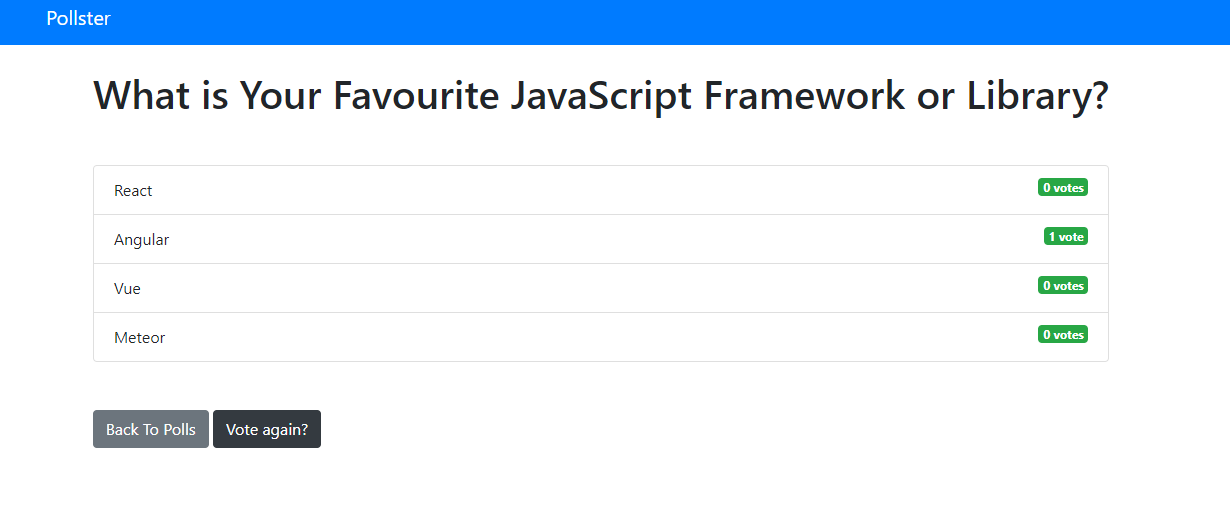
您还可以使用“投票问题”页面中的“结果”选项查看任何问题的总票数。
未来范围
该项目可用于在任何领域或行业进行在线投票系统。该项目可以扩展,还可以根据需要包含其他几个功能。人们可以分享意见,他们还可以查看许多用户给出的总投票。
项目存储库链接
https://github.com/anuupadhyay/pollster-django-crash