Spring Data JPA是一种实现JPA存储库的方法,可轻松在应用程序中添加数据访问层。 CRUD代表创建,检索,更新,删除,它们是可以在数据库中执行的可能操作。在本文中,我们将看到一个示例,该示例说明如何使用spring data JPA在spring boot应用程序中从数据库(本文中为MySQL)访问数据。
为了学习如何创建spring boot项目,请参考本文。
数据库是相互关联的数据的集合,有助于有效地从数据库中检索,插入和删除数据,并以表,视图,模式,报告等形式组织数据。因此,对于任何应用程序来说,数据库都是其中之一最重要的模块,并且需要一种与之通信的方法。因此,为了使用Spring Data JPA访问数据库,请遵循以下步骤:
- 转到spring initializr并创建一个具有以下依赖项的新项目:
- 春季网
- Spring Data JPA
- MySQL驱动
- 下载入门项目并将其导入IDE中。
- 项目同步后,我们将创建带有注解@Entity的模型类Company ,这表示该类已映射到数据库中的表。添加数据类型与数据库中列相同的数据成员,并生成构造函数和获取方法。将注释@Id添加到将在表中充当主键属性的数据成员和@Generatedvalue(strategy = generationtype.auto) ,以便自动增加主键属性。以下是此类的实现:
@Entity public class Company { // Primary ID which increments // automatically when new entry // is added into the database @Id @GeneratedValue(strategy = GenerationType.AUTO) int id; String name; // In months int duration; String profile; // Can be 0 int stipend; boolean workFromHome; public Company() { } // Parameterized constructor public Company(String name, int duration, String profile, int stipend, boolean workFromHome) { this.name = name; this.duration = duration; this.profile = profile; this.stipend = stipend; this.workFromHome = workFromHome; } // Getters and setters of // the variables public int getId() { return id; } public String getName() { return name; } public int getDuration() { return duration; } public String getProfile() { return profile; } public int getStipend() { return stipend; } public void setId(int id) { this.id = id; } public boolean isWorkFromHome() { return workFromHome; } - 现在,创建与注释@Repository将实现CrudRepository接口CompanyRepository。将在界面中定义执行CRUD操作的功能,如下所示:
@Repository public interface CompanyRepository extends CrudRepositoryfindAll(); void deleteById(int id); } 注意:由于已在CrudRepository中实现,因此不会实现这些功能。
- 现在,我们将创建REST API(GET,POST,PUT,DELETE),如下所示:
@RestController public class CompanyController { @Autowired private CompanyRepository repo; // Home Page @GetMapping("/") public String welcome() { return "" + "WELCOME
" + ""; } // Get All Notes @GetMapping("/company") public ListgetAllNotes() { return repo.findAll(); } // Get the company details by // ID @GetMapping("/company/{id}") public Company getCompanyById( @PathVariable(value = "id") int id) { return repo.findById(id); } @PostMapping("/company") @ResponseStatus(HttpStatus.CREATED) public Company addCompany( @RequestBody Company company) { return repo.save(company); } @DeleteMapping("/delete/{id}") public void deleteStudent( @PathVariable(value = "id") int id) { repo.deleteById(id); } @PutMapping("/company/{id}") public ResponseEntity - 现在,打开application.properties文件并添加以下代码。替换用含有表公司,用户名与MySQL服务器的用户名(默认为root)和密码与MySQL密码数据库中的数据库名称。
spring.datasource.url=jdbc:mysql://localhost:3306/database_name
spring.datasource.username=username
spring.datasource.password=password
spring.jpa.hibernate.ddl-auto=update - 这样就完成了与数据库建立连接的过程。现在,我们构建并运行该项目,并调用不同的API。
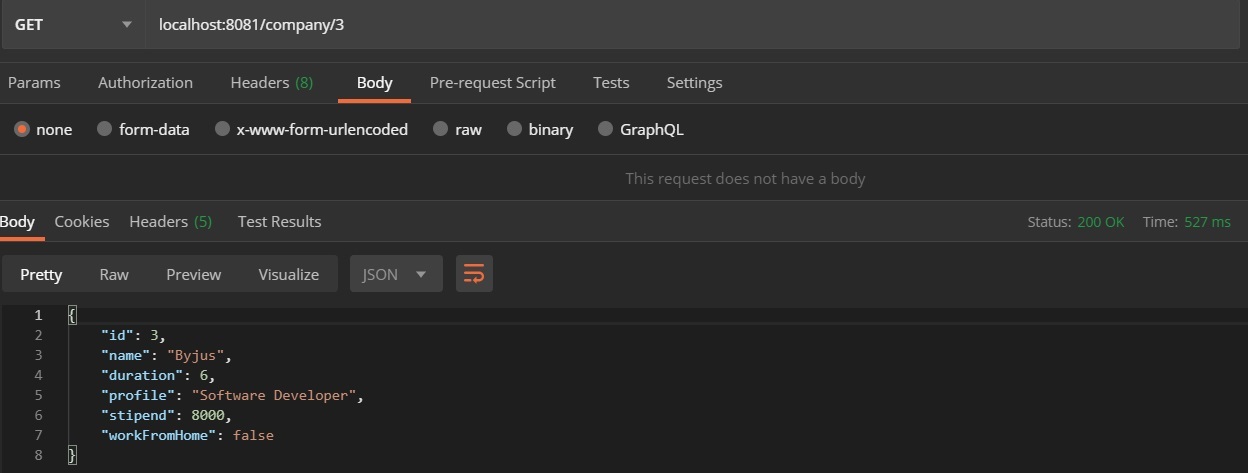
注意:通常使用Postman来测试调用API,因此我们使用了postman工具来测试项目。
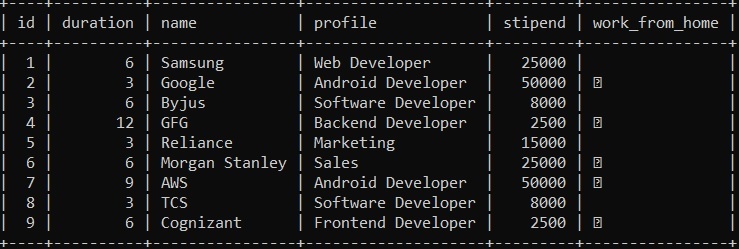
输出:
- 数据库:
- 使用POSTMAN集合进行测试: