当我们创建行或列的任何子项时,我们根据屏幕尺寸提供小部件的大小,但有时当我们提供比屏幕尺寸更大的子项时,我们会收到警告,并且我们的小部件会退出屏幕以解决问题我们将行或列的子项放在扩展小部件中,以便子项仅占用沿主轴的可用空间。当我们创建多个孩子时,孩子之间的可用空间将根据弹性系数进行划分。扩展小部件仅包含有状态小部件或无状态小部件,而不包含另一种小部件,如RenderObjectWidgets 。
Syntax:
Expanded(
         {
          Key key,
          int flex: 1,
          @required Widget child,
         }
)
扩展类的属性:
- child:这是存在于扩展类下方的小部件
- 弹性因子:弹性因子是可用空间在子级之间划分以在主轴上占据的比率。如果弹性因子为零或 NULL,子项将自行分配其大小。
- Key:它管理一个小部件如何被另一个小部件替换
- FlexFit:它定义了一个小部件获取可用空间的灵活性。
例子:
Dart
import 'package:flutter/material.dart';
void main() {
 return runApp(
   MaterialApp(
     home: Scaffold(
       backgroundColor: Colors.green,

       // App Bar is used to create
       // a bar to give a title for our app
       appBar: AppBar(
         centerTitle: true,
         title: Text('GeeksforGeeks',

         // TextStyle is a class
         // where we can modify our text
         style: TextStyle(

           //To assign the color to our text
             color: Colors.green,
          ),    //Text Style
         ),     //Text

         // backgroundColor is used to change
         // the color of our app bar background
         backgroundColor: Colors.white,
       ),      //AppBar

       // Calling the funtion DicePage()
       body: DicePage(),
     ),      //Scafflod
   ),        //Material App
 );
}

class DicePage extends StatefulWidget {
 @override
 _DicePageState createState() => _DicePageState();
}

class _DicePageState extends State {
 @override
 Widget build(BuildContext context) {
  return Center(

    //Here we are using the row.
    // Instead of row we can also use
    // column only the alignment of icon
    // will change and other function remains same
     child: Row(
       children: [
         Expanded(

           // FlatButton is used to make
           // are image as a button which we can press.
          child: FlatButton(

             //Image.asset is used to import the image
            // from our project files only in brackets
            // we are providing the name of our image.
             child: Image.asset('images/dice1.png'),
           ),  //flat button
         ),   //Expanded
       ],     //
     ),       //Row
   );         //center
 }
}
Dart
import 'package:flutter/material.dart';
void main() {
 return runApp(
   MaterialApp(
     home: Scaffold(
       backgroundColor: Colors.green,

       // App Bar is used to create
       // a bar to give a title for our app
       appBar: AppBar(
         centerTitle: true,
         title: Text('GeeksforGeeks',

            // TextStyle is a class
            // where we can modify our text
         style: TextStyle(

           //To assign the color to our text
             color: Colors.green,
          ),    //Text Style
         ),     //Text

         // backgroundColor is used to
         // change the color of our
         // app bar background
         backgroundColor: Colors.white,
       ),      //AppBar

       //Calling the funtion DicePage()
       body: DicePage(),
     ),      //Scafflod
   ),        //Material App
 );
}

class DicePage extends StatefulWidget {
 @override
 _DicePageState createState() => _DicePageState();
}

class _DicePageState extends State {
 @override
 Widget build(BuildContext context) {
  return Center(

    // Here we are using the row.
    // Instead of row we can also use column only
    // the alignment of icon will change and other
    // function remains same
     child: Row(
       children: [

         // For Image 1
         Expanded(

           // Flex is used to allocate
           // available space in the ratio
           // of one child to another child
           // it can be any value.
           flex: 2,

           // FlatButton is used to make
           // are image as a button which we can press.
          child: FlatButton(

            // Image.asset is used to import
            // the image from our project files only
            // in brackets we are providing the name of our image.
             child: Image.asset('images/dice1.png'),
           ),  //flat button
         ),
         // For image 2.
         Expanded(
           child: FlatButton(
             child: Image.asset('images/dice2.png'),
           ),  //flat button
         ),   //Expanded
       ],     //
     ),       //Row
   );         //center
 }
}
输出:
在下图中,骰子的图像超出了屏幕,因为图像所需的尺寸大于屏幕尺寸。
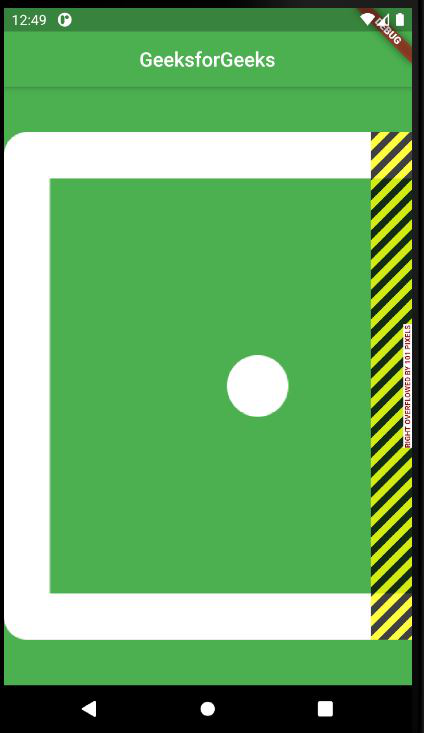
不使用扩展类
我们使用 Expanded 类使我们的图像更加灵活,以便它可以适应屏幕尺寸。
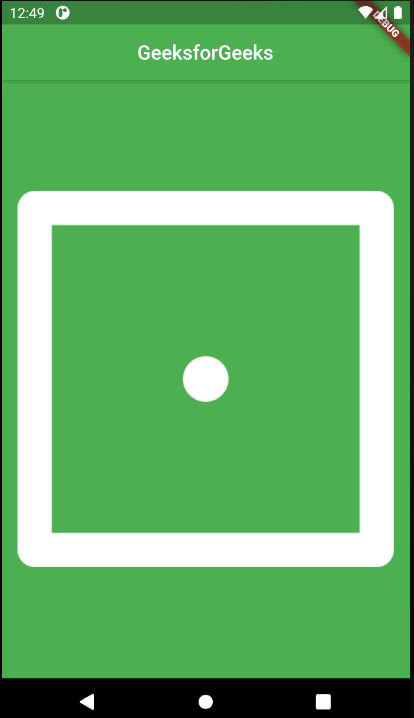
使用 Expanded 类后的图像
通过使用 Expanded 类,我们的图像仅适合可用空间。
示例:用于插入多个图像
Dart
import 'package:flutter/material.dart';
void main() {
 return runApp(
   MaterialApp(
     home: Scaffold(
       backgroundColor: Colors.green,

       // App Bar is used to create
       // a bar to give a title for our app
       appBar: AppBar(
         centerTitle: true,
         title: Text('GeeksforGeeks',

            // TextStyle is a class
            // where we can modify our text
         style: TextStyle(

           //To assign the color to our text
             color: Colors.green,
          ),    //Text Style
         ),     //Text

         // backgroundColor is used to
         // change the color of our
         // app bar background
         backgroundColor: Colors.white,
       ),      //AppBar

       //Calling the funtion DicePage()
       body: DicePage(),
     ),      //Scafflod
   ),        //Material App
 );
}

class DicePage extends StatefulWidget {
 @override
 _DicePageState createState() => _DicePageState();
}

class _DicePageState extends State {
 @override
 Widget build(BuildContext context) {
  return Center(

    // Here we are using the row.
    // Instead of row we can also use column only
    // the alignment of icon will change and other
    // function remains same
     child: Row(
       children: [

         // For Image 1
         Expanded(

           // Flex is used to allocate
           // available space in the ratio
           // of one child to another child
           // it can be any value.
           flex: 2,

           // FlatButton is used to make
           // are image as a button which we can press.
          child: FlatButton(

            // Image.asset is used to import
            // the image from our project files only
            // in brackets we are providing the name of our image.
             child: Image.asset('images/dice1.png'),
           ),  //flat button
         ),
         // For image 2.
         Expanded(
           child: FlatButton(
             child: Image.asset('images/dice2.png'),
           ),  //flat button
         ),   //Expanded
       ],     //
     ),       //Row
   );         //center
 }
}
输出:
在此,我们插入了骰子的多重图像。默认情况下,flex size 为 1,但我们可以将其更改为我们的要求。
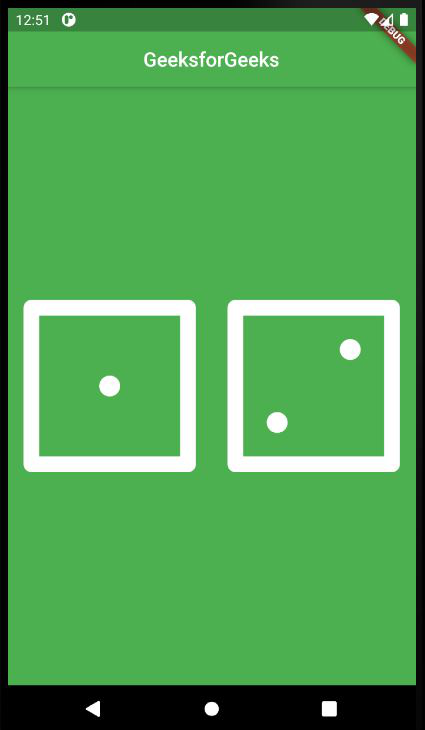
多个图像
此 Flex 系数设置为 2,图像 1 的大小是图像 2 的两倍。
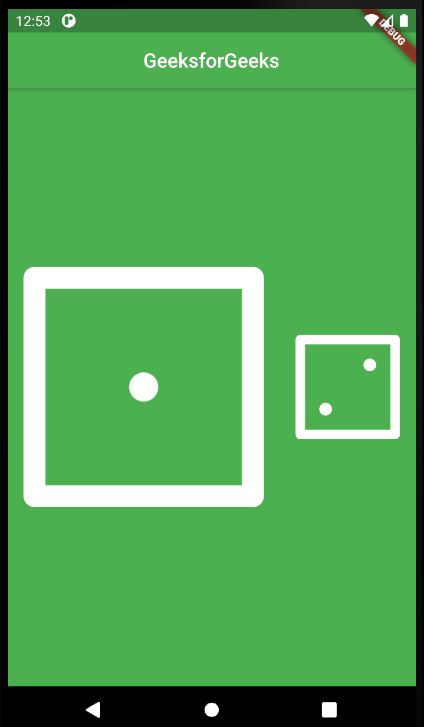
具有 Flex 因子的多个图像
想要一个更快节奏和更具竞争力的环境来学习 Android 的基础知识吗?
单击此处前往由我们的专家精心策划的指南,旨在让您立即做好行业准备!