GitHub 是一个基于云的软件开发网站,使用 Git 作为版本控制。 Github 是开源软件开发的品牌大使,使开发人员能够在软件开发方面进行协作并托管源代码。代码作为存储库的内容托管。随着 Github 范围的扩大,Github 应用程序有助于降低软件开发、维护和管理的复杂性。
Probot 是一个允许构建 Github 应用程序的框架。它有丰富的方法库,可以实现任何github事件响应。 Typeform 有助于构建引人入胜的表单。 Typeform 也有一个 API 平台,用于程序化的表单创建、删除和操作。
在本文中,我们将使用 Probot 构建一个 Github 应用程序并将其与一个 typeform 集成。
要使用的可选软件:Postman(试验和使用 Typeform API)
使用的框架:Probot
我们还将使用 probot-commands 并请求 npm 模块输入命令。
Github 应用程序的初始设置
要设置 github 应用程序,可以查看 probot 的文档。由于设置不是本文的重点,我们将在 Glitch 上重新混合 Probot 应用程序。可以在此处找到此设置的链接。
Glitch remix 中的 README.md 有关于设置应用程序的精彩指南。
要检查正确的应用程序设置,请通过在 repo 上发出问题来运行随应用程序安装提供的默认代码(假设应用程序已安装在 repo 上)。 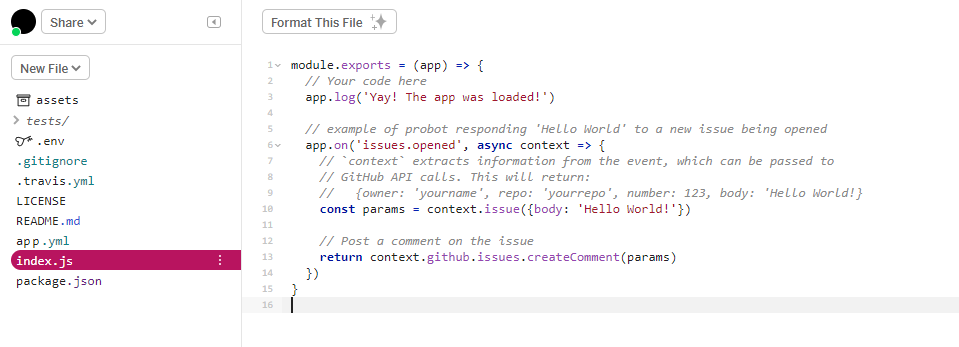
输出:机器人(github 应用程序)应该写如下评论。 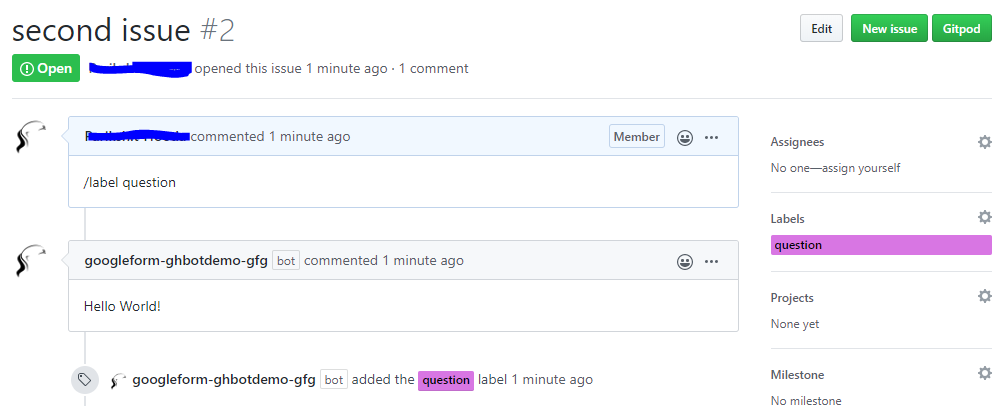
如果这不是输出,则表示应用程序未正确安装,应在此处查阅文档。
在应用程序设置完成并完成初始测试后(以确保应用程序配置正确并正常工作),是时候安装我们需要的 npm 模块了。
安装依赖项/模块
我们需要这个应用程序的 probot-commands 和 request 模块。要安装它们,请从左侧导航窗格中转到“package.json”文件。在编辑器的左上角,找到一个标记为“ Add Package ”的按钮。使用此按钮,将“ probot-commands ”和“ request ”添加到应用程序。
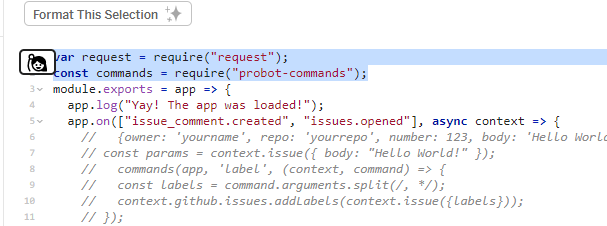
添加这两个模块后,转到’index.js’文件(使用左侧的导航窗格)并添加
var request = require("request");
const commands = require("probot-commands");
在 index.js 文件之上。
设置字体
我们将为此应用程序使用 Typeform。我们需要一个“个人访问令牌”才能在我们的应用程序中使用 Typeform。
- 首先,转到 Typeform 并注册/登录。
- 现在,转到“设置”,然后转到“个人资料”部分下的“个人访问令牌”。
- 或者,直接单击此处并设置令牌。
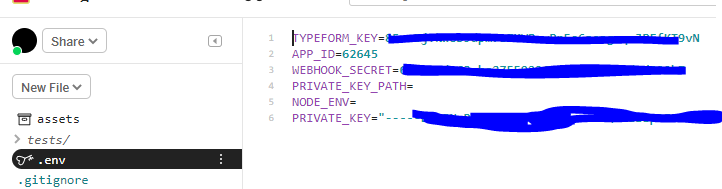
- 您生成的令牌应该被复制并存储在某个地方以保持持久性。使用此令牌并将其添加到 Glitch 应用程序中的“.env”文件中
现在该应用程序正在运行,probot-commands 和 request 模块已设置,并且 typeform 已正确集成,我们将查看代码。
代码:
在这里找到 index.js 文件(请注意,这些是代码片段,完全复制粘贴此代码可能不起作用)。
对于此演示,要设置“请求”(需要向 Typeform 服务器发出以创建表单),使用 Postman(软件)。除此之外,此引用用于创建表单。
查看代码(从这里查阅 index.js) :
// These two lines 'require' the modules to the app.
var request = require("request");
const commands = require("probot-commands");
module.exports = app => {
// all the future code goes here
};
// this acts as a kind of wrapper
// in which all the code that runs the
// function(adding labels, creating forms) of
// the app goes.
app.on(["issue_comment.created", "issues.opened"], async context =>
{
// all the future code goes here
// this block comes inside the 'module.exports'
// block described above
// app.on executes code in response to events on github.
// these events are connected to webhooks which trigger these
// app.on functions
// this code executes in response to when a 'issue comment
// is created' or when a 'new issue is opened'. They can be
// listened to individually as well, by using two
// separate 'app.on' listeners.
// the 'context' contains all the details related to
// the event that fired on github
});
if (context.payload.comment.user.type === "Bot")
{
context.log("comment user type is bot, returning..");
return;
}
// this code block checks to see if the comment is
// made by a Bot or not. If the comment is made by a bot, the
// function returns(to prevent bot from running on its own
// comments, and going into some kind of a
//(potentially)loop)
var createform;
if ((context.payload.issue.author_association === "OWNER") ||
(context.payload.issue.author_association === "COLLABORATOR"))
{
// stuff related to the form goes here
}
// we check for the appropriate credentials here. If the user
// is the 'OWNER'(of the repo/org) or the 'COLLABORATOR', then
// only proceed towards making a form..
// inside the 'stuff related to the form goes here'
commands(app, "createform", (context, command) =>
{
context.log("entered createform commands");
createform = command.arguments.split(/[\s] */);
var createformlength = createform.length;
context.log(createform);
// ...more code here
}
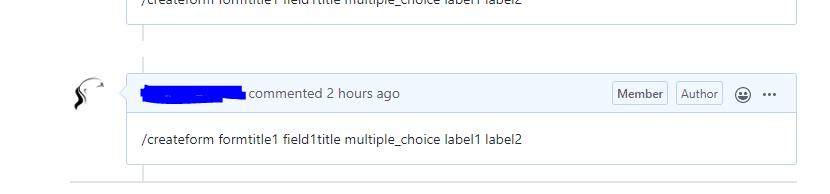
// in this code snippet, we listen for a createform
// 'slash command', as it is called. check the below
// image to see what a command like this looks.
// to process this 'slash command', probot-commands module is used.
// explanation: context.log() //acts as a logging tactic
// command.arguments.split split the 'slash command'
// into individual values and put them in an array.
// [\s] helps to // split the command on a 'space'.
// For example, in the image above, we obtain as output of
// context.log(createform): ['formtitle1', 'field1title',
// 'multiple_choice', 'label1', 'label2']
// the form code block. Find the explanation for
// each snippet as the corresponding comment.
// This bit of code is derived from the Postman.
{
    var options = {
        method: "POST",

        // POST method to create
        // the form, according to typeform api
        url: "https://api.typeform.com/forms", //url
        headers: {
            Accept: "application/json",
            "Content-Type": [
                "application/x-www-form-urlencoded",
                "application/json"
            ],
            Host: "api.typeform.com",
            Authorization: `${process.env.TYPEFORM_KEY}`,

            // here is the personal access token generated earlier
            Cookie: "device_view=full"
        },
        // to know more details about below code field,
        // go to "https://developer.typeform.com/create/reference/create-form/"
        body: JSON.stringify({
            title: createform[0],

            // value = "formtitle" (consult the image
            // above of github comment)
            settings: {
                language: "en", // language of form
                is_public: true, // so that everyone can see and respond
                progress_bar: "percentage",
                show_progress_bar: true
            },
            welcome_screens: [{
                ref: "nice-readable-welcome-ref",

                // used to uniquely refer
                // the welcome_screens field
                title: "Welcome", // title of welcome screen
                properties: {
                    description: 'description ' + context.
                    payload.comment.url,

                    // links back to github issue
                    // comment to get more knowledge about
                    // the reason to create this form. link to the
                    // comment that created this form
                    show_button: true,
                    button_text: "start"
                }
            }],
            thankyou_screens: [{
                ref: "nice-readable-thank-you-ref",
                title: "Thank you", // final screen
                properties: {
                    show_button: true,
                    button_text: "start",
                    button_mode: "redirect",
                    redirect_url: "https://www.typeform.com",
                    share_icons: false
                }
            }],
            fields: [

            // actual field that will record response.
            // is an array of objects, each obj represents 1 field
                {
                ref: "field1",

                // to uniquely identify
                // first field(for programmatically manipulation)
                title: createform[1],

                // value = "field1title"
                // (consult the image above of github comment)
                type: createform[2],

                // value = multiple-choice.
                // sets the type of question
                properties: {
                    description: "field1 desc",

                    // to provide more info about field
                    randomize: true,
                    allow_multiple_selection: true,
                    allow_other_choice: true,
                    vertical_alignment: false,
                    choices: [
                        { label: createform[3], ref: "field1_label1_ref" },
                        // label1, value = label1

                        { label: createform[4], ref: "field1_label2_ref" }
                        // label2, value = label2
                    ]
                }
            }, ]
        })
    };
    request(options, function(error, response)
    {
        // send the request to typeform servers to create form
        if (error)
        {
            const params1 = context.issue({
            body: 'form not made. error processing command'
            }

)           // if error, comment
            return context.github.issues.createComment(params1);

            // if error, comment
        };
        console.log(response.body);
        const params2 = context.issue(
        {
            body: response.body._links.value });

            // if success, comment the link to form
        return context.github.issues.createComment(params2);
        // if success, comment the link to form
    });
}
表单被构建。 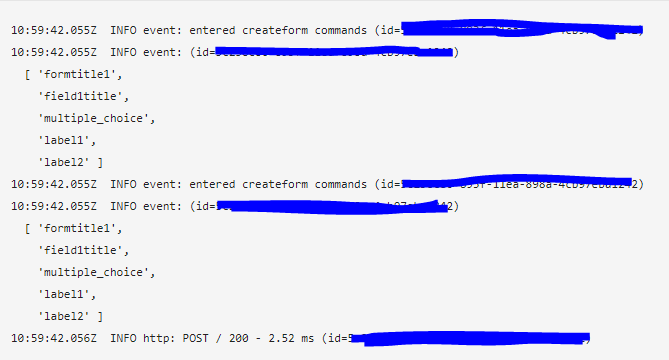
您未来的范围/活动:
- 添加代码以使用“probot-scheduler”停止接受对表单的响应
- 想一种更直观的方式来使用 typeform api