- 在春季列出所有托管 bean (1)
- Java Bean(1)
- Java Bean
- 云托管
- 云托管(1)
- 云托管 (1)
- 在春季列出所有托管 bean - 任何代码示例
- 讨论JSF
- JSF-概述
- JSF-概述(1)
- .NET中的托管代码和非托管代码(1)
- .NET中的托管代码和非托管代码
- .NET 中托管和非托管代码的区别(1)
- .NET 中托管和非托管代码的区别
- JSF-Ajax(1)
- JSF-Ajax
- 什么是托管网站托管?
- JSF-数据表(1)
- JSF-数据表
- 找不到bean (1)
- .NET中托管和非托管代码之间的区别
- .NET中托管和非托管代码之间的区别(1)
- 云托管 - 任何代码示例
- JSF-生命周期
- JSF-生命周期(1)
- JSF-环境设置(1)
- JSF-环境设置
- JSF-体系结构
- JSF-体系结构(1)
📅 最后修改于: 2020-10-23 06:43:38 🧑 作者: Mango
托管Bean是向JSF注册的常规Java Bean类。换句话说,Managed Beans是由JSF框架管理的Java Bean。托管bean包含getter和setter方法,业务逻辑,甚至支持bean(bean包含所有HTML表单值)。
托管bean充当UI组件的模型。可以从JSF页面访问Managed Bean。
在JSF 1.2中,托管bean必须在JSF配置文件(例如facesconfig.xml)中注册它。从JSF 2.0开始,可以使用注释轻松注册托管bean。这种方法将bean及其注册保留在一个位置,因此变得更易于管理。
使用XML配置
   helloWorld
   com.tutorialspoint.test.HelloWorld
   request


   message
   com.tutorialspoint.test.Message
   request
使用注释
@ManagedBean(name = "helloWorld", eager = true)
@RequestScoped
public class HelloWorld {
   @ManagedProperty(value = "#{message}")
   private Message message;
   ...
}
@ManagedBean注释
@ManagedBean使用name属性中指定的名称将bean标记为托管bean。如果未指定name属性,则托管bean名称将默认为完全限定类名称的类名称部分。在我们的情况下,它将是helloWorld。
另一个重要的属性是渴望。如果eager =“ true”,则在第一次请求托管bean之前创建它,否则使用“惰性”初始化,其中仅在请求bean时才创建它。
范围注释
范围注释设置了将托管bean放入的范围。如果未指定范围,则bean将默认为请求范围。下表简要讨论了每个范围。
| S.No | Scope & Description |
|---|---|
| 1 |
@RequestScoped Bean lives as long as the HTTP request-response lives. It gets created upon a HTTP request and gets destroyed when the HTTP response associated with the HTTP request is finished. |
| 2 |
@NoneScoped Bean lives as long as a single EL evaluation. It gets created upon an EL evaluation and gets destroyed immediately after the EL evaluation. |
| 3 |
@ViewScoped Bean lives as long as the user is interacting with the same JSF view in the browser window/tab. It gets created upon a HTTP request and gets destroyed once the user postbacks to a different view. |
| 4 |
@SessionScoped Bean lives as long as the HTTP session lives. It gets created upon the first HTTP request involving this bean in the session and gets destroyed when the HTTP session is invalidated. |
| 5 |
@ApplicationScoped Bean lives as long as the web application lives. It gets created upon the first HTTP request involving this bean in the application (or when the web application starts up and the eager=true attribute is set in @ManagedBean) and gets destroyed when the web application shuts down. |
| 6 |
@CustomScoped Bean lives as long as the bean’s entry in the custom Map, which is created for this scope lives. |
@ManagedProperty批注
JSF是一个简单的静态依赖注入(DI)框架。使用@ManagedProperty批注,可以将托管bean的属性注入另一个托管bean中。
应用范例
让我们创建一个测试JSF应用程序来测试上述针对托管bean的注释。
| Step | Description |
|---|---|
| 1 | Create a project with a name helloworld under a package com.tutorialspoint.test as explained in the JSF – Create Application chapter. |
| 2 | Modify HelloWorld.java as explained below. Keep the rest of the files unchanged. |
| 3 | Create Message.java under a package com.tutorialspoint.test as explained below. |
| 4 | Compile and run the application to make sure business logic is working as per the requirements. |
| 5 | Finally, build the application in the form of war file and deploy it in Apache Tomcat Webserver. |
| 6 | Launch your web application using appropriate URL as explained below in the last step. |
HelloWorld.java
package com.tutorialspoint.test;

import javax.faces.bean.ManagedBean;
import javax.faces.bean.ManagedProperty;
import javax.faces.bean.RequestScoped;

@ManagedBean(name = "helloWorld", eager = true)
@RequestScoped
public class HelloWorld {
   @ManagedProperty(value = "#{message}")
   private Message messageBean;
   private String message;

   public HelloWorld() {
      System.out.println("HelloWorld started!");
   }

   public String getMessage() {

      if(messageBean != null) {
         message = messageBean.getMessage();
      }
      return message;
   }

   public void setMessageBean(Message message) {
      this.messageBean = message;
   }
}
Message.java
package com.tutorialspoint.test;

import javax.faces.bean.ManagedBean;
import javax.faces.bean.RequestScoped;

@ManagedBean(name = "message", eager = true)
@RequestScoped
public class Message {
   private String message = "Hello World!";

   public String getMessage() {
      return message;
   }
   public void setMessage(String message) {
      this.message = message;
   }
}
home.xhtml
JSF Tutorial!


      #{helloWorld.message}
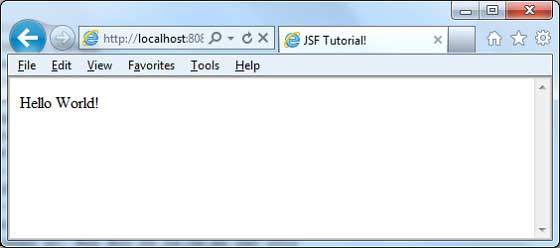
准备好所有更改后,让我们像在“ JSF-创建应用程序”一章中那样编译并运行该应用程序。如果您的应用程序一切正常,将产生以下结果。
