使用 Keras 的深度卷积 GAN
Deep Convolutional GAN (DCGAN) 是由麻省理工学院的研究员和 Facebook AI Research 提出的。它被广泛用于许多基于卷积的基于生成的技术中。本文的重点是使训练 GAN 稳定。因此,他们提出了计算机视觉问题的一些架构变化。在本文中,我们将在时尚 MNIST 数据集上使用 DCGAN 来生成与衣服相关的图像。
架构:

DCGAN 架构的生成器使用正态分布作为输入,采用 100 个均匀生成值。首先,它将尺寸更改为 4x4x1024,并以 1/2 的步幅执行 4 次小幅卷积(这意味着每次应用时,它都会将图像尺寸翻倍,同时减少输出通道的数量)。生成的输出具有 (64, 64, 3) 的维度。生成器中提出了一些架构更改,例如删除所有全连接层,使用有助于稳定训练的批量标准化。在本文中,作者在生成器的所有层中都使用了 ReLU 激活函数,除了输出层。我们将使用类似的指南实现生成器,但架构不完全相同。
这里判别器的作用是确定图像来自真实数据集还是生成器。鉴别器可以简单地设计成类似于执行图像分类任务的卷积神经网络。然而,本文的作者提出了鉴别器架构的一些变化。他们没有使用全连接层,而是仅使用带有 LeakyReLU 作为激活函数的跨步卷积,生成器的输入是来自数据集或生成图像的单个图像,输出是确定图像是真实的还是生成的分数。
执行:
在本节中,我们将讨论 DCGAN 在 keras 中的实现,因为我们的数据集在 Fashion MNIST 数据集中,该数据集包含大小为 (28, 28) 的 1 个颜色通道的图像,而不是 (64, 64) 的 3 个颜色通道的图像。因此,我们需要对架构进行一些更改,我们将在进行过程中讨论这些更改。
- 第一步,我们需要导入必要的类,如 TensorFlow、keras、matplotlib 等。我们将使用 TensorFlow 版本 2。此版本的 tensorflow 提供对 Keras 库的内置支持,作为其默认的高级 API。
python3
# code % matplotlib inline
import tensorflow as tf
from tensorflow import keras
import numpy as np
import matplotlib.pyplot as plt
from tqdm import tqdm
from IPython import display

# Check tensorflow version
print('Tensorflow version:', tf.__version__)
python3
(x_train, y_train), (x_test, y_test) = tf.keras.datasets.fashion_mnist.load_data()
x_train = x_train.astype(np.float32) / 255.0
x_test = x_test.astype(np.float32) / 255.0
x_train.shape, x_test.shape
python3
# We plot first 25 images of training dataset
plt.figure(figsize =(10, 10))
for i in range(25):
    plt.subplot(5, 5, i + 1)
    plt.xticks([])
    plt.yticks([])
    plt.grid(False)
    plt.imshow(x_train[i], cmap = plt.cm.binary)
plt.show()
python3
# code
batch_size = 32
# This dataset fills a buffer with buffer_size elements,
# then randomly samples elements from this buffer,
# replacing the selected elements with new elements.
def create_batch(x_train):
  dataset = tf.data.Dataset.from_tensor_slices(x_train).shuffle(1000)
  # Combines consecutive elements of this dataset into batches.

  dataset = dataset.batch(batch_size, drop_remainder = True).prefetch(1)
  # Creates a Dataset that prefetches elements from this dataset
  return dataset
python3
# code
num_features = 100

generator = keras.models.Sequential([
    keras.layers.Dense(7 * 7 * 128, input_shape =[num_features]),
    keras.layers.Reshape([7, 7, 128]),
    keras.layers.BatchNormalization(),
    keras.layers.Conv2DTranspose(
        64, (5, 5), (2, 2), padding ="same", activation ="selu"),
    keras.layers.BatchNormalization(),
    keras.layers.Conv2DTranspose(
        1, (5, 5), (2, 2), padding ="same", activation ="tanh"),
])
generator.summary()
python3
discriminator = keras.models.Sequential([
    keras.layers.Conv2D(64, (5, 5), (2, 2), padding ="same", input_shape =[28, 28, 1]),
    keras.layers.LeakyReLU(0.2),
    keras.layers.Dropout(0.3),
    keras.layers.Conv2D(128, (5, 5), (2, 2), padding ="same"),
    keras.layers.LeakyReLU(0.2),
    keras.layers.Dropout(0.3),
    keras.layers.Flatten(),
    keras.layers.Dense(1, activation ='sigmoid')
])
discriminator.summary()
python3
# compile discriminator using binary cross entropy loss and adam optimizer
discriminator.compile(loss ="binary_crossentropy", optimizer ="adam")
# make  discriminator no-trainable as of  now
discriminator.trainable = False
# Combine both generator and discriminator
gan = keras.models.Sequential([generator, discriminator])
# compile generator using binary cross entropy loss and adam optimizer

gan.compile(loss ="binary_crossentropy", optimizer ="adam")
python3
seed = tf.random.normal(shape =[batch_size, 100])

def train_dcgan(gan, dataset, batch_size, num_features, epochs = 5):
    generator, discriminator = gan.layers
    for epoch in tqdm(range(epochs)):
        print()
        print("Epoch {}/{}".format(epoch + 1, epochs))

        for X_batch in dataset:
            # create a random noise of sizebatch_size * 100
            # to passit into the generator
            noise = tf.random.normal(shape =[batch_size, num_features])
            generated_images = generator(noise)

            # take batch of generated image and real image and
            #  use them to train  the discriminator
            X_fake_and_real = tf.concat([generated_images, X_batch], axis = 0)
            y1 = tf.constant([[0.]] * batch_size + [[1.]] * batch_size)
            discriminator.trainable = True
            discriminator.train_on_batch(X_fake_and_real, y1)

            # Here we will be training our GAN model, in this step
            #  we pass noise that uses generatortogenerate the image
            #  and pass it with labels as [1] So, it can fool the discriminator
            noise = tf.random.normal(shape =[batch_size, num_features])
            y2 = tf.constant([[1.]] * batch_size)
            discriminator.trainable = False
            gan.train_on_batch(noise, y2)

            # generate images for the GIF as we go
            generate_and_save_images(generator, epoch + 1, seed)

    generate_and_save_images(generator, epochs, seed)
python3
# code
def generate_and_save_images(model, epoch, test_input):
  predictions = model(test_input, training = False)

  fig = plt.figure(figsize =(10, 10))

  for i in range(25):
      plt.subplot(5, 5, i + 1)
      plt.imshow(predictions[i, :, :, 0] * 127.5 + 127.5, cmap ='binary')
      plt.axis('off')

  plt.savefig('image_epoch_{:04d}.png'.format(epoch))
python3
# reshape to add a color map
x_train_dcgan = x_train.reshape(-1, 28, 28, 1) * 2. - 1.
# create batches
dataset = create_batch(x_train_dcgan)
# callthe training function with 10 epochs and record time %% time
train_dcgan(gan, dataset, batch_size, num_features, epochs = 10)
python3
import imageio
import glob

anim_file = 'dcgan_results.gif'

with imageio.get_writer(anim_file, mode ='I') as writer:
  filenames = glob.glob('image*.png')
  filenames = sorted(filenames)
  last = -1
  for i, filename in enumerate(filenames):
    frame = 2*(i)
    if round(frame) > round(last):
      last = frame
    else:
      continue
    image = imageio.imread(filename)
    writer.append_data(image)
  image = imageio.imread(filename)
  writer.append_data(image)
display.Image(filename = anim_file)- 现在我们加载 fashion-MNIST 数据集,好处是可以从 tf.keras.datasets API 导入数据集。因此,我们不需要通过复制文件来手动加载数据集。该数据集包含 60k 个训练图像和 10k 个测试图像,每个维度(28、28、1)。由于每个像素的值都在 (0, 255) 范围内,我们将这些值除以 255 以对其进行归一化。
蟒蛇3
(x_train, y_train), (x_test, y_test) = tf.keras.datasets.fashion_mnist.load_data()
x_train = x_train.astype(np.float32) / 255.0
x_test = x_test.astype(np.float32) / 255.0
x_train.shape, x_test.shape
((60000, 28, 28), (10000, 28, 28))- 现在在下一步中,我们将可视化来自 Fashion-MNIST 日期集的一些图像,我们为此使用 matplotlib 库。
蟒蛇3
# We plot first 25 images of training dataset
plt.figure(figsize =(10, 10))
for i in range(25):
    plt.subplot(5, 5, i + 1)
    plt.xticks([])
    plt.yticks([])
    plt.grid(False)
    plt.imshow(x_train[i], cmap = plt.cm.binary)
plt.show()
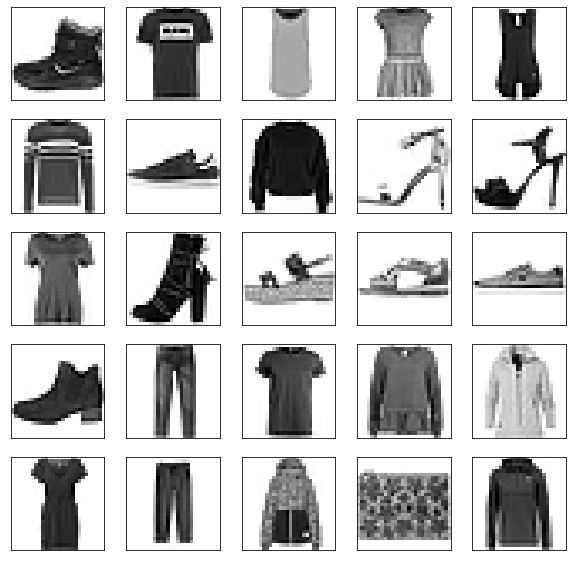
原创时尚 MNIST 图像
- 现在,我们定义了批量大小等训练参数,并将数据集划分为批量大小,并通过随机抽样训练数据来填充这些批量大小。
蟒蛇3
# code
batch_size = 32
# This dataset fills a buffer with buffer_size elements,
# then randomly samples elements from this buffer,
# replacing the selected elements with new elements.
def create_batch(x_train):
  dataset = tf.data.Dataset.from_tensor_slices(x_train).shuffle(1000)
  # Combines consecutive elements of this dataset into batches.

  dataset = dataset.batch(batch_size, drop_remainder = True).prefetch(1)
  # Creates a Dataset that prefetches elements from this dataset
  return dataset
- 现在,我们定义生成器架构,该生成器架构采用大小为 100 的向量,首先将其重塑为 (7, 7, 128) 向量,然后应用转置卷积和批量归一化。该生成器的输出是经过训练的尺寸为 (28, 28, 1) 的图像。
蟒蛇3
# code
num_features = 100

generator = keras.models.Sequential([
    keras.layers.Dense(7 * 7 * 128, input_shape =[num_features]),
    keras.layers.Reshape([7, 7, 128]),
    keras.layers.BatchNormalization(),
    keras.layers.Conv2DTranspose(
        64, (5, 5), (2, 2), padding ="same", activation ="selu"),
    keras.layers.BatchNormalization(),
    keras.layers.Conv2DTranspose(
        1, (5, 5), (2, 2), padding ="same", activation ="tanh"),
])
generator.summary()
Model: "sequential"
_________________________________________________________________
Layer (type)                 Output Shape              Param #
=================================================================
dense (Dense)                (None, 6272)              633472
_________________________________________________________________
reshape (Reshape)            (None, 7, 7, 128)         0
_________________________________________________________________
batch_normalization (BatchNo (None, 7, 7, 128)         512
_________________________________________________________________
conv2d_transpose (Conv2DTran (None, 14, 14, 64)        204864
_________________________________________________________________
batch_normalization_1 (Batch (None, 14, 14, 64)        256
_________________________________________________________________
conv2d_transpose_1 (Conv2DTr (None, 28, 28, 1)         1601
=================================================================
Total params: 840, 705
Trainable params: 840, 321
Non-trainable params: 384
_________________________________________________________________- 现在,我们定义了判别器架构,判别器采用 1 个颜色通道的大小为 28*28 的图像,并从数据集或生成的图像中输出一个表示图像的标量值。
蟒蛇3
discriminator = keras.models.Sequential([
    keras.layers.Conv2D(64, (5, 5), (2, 2), padding ="same", input_shape =[28, 28, 1]),
    keras.layers.LeakyReLU(0.2),
    keras.layers.Dropout(0.3),
    keras.layers.Conv2D(128, (5, 5), (2, 2), padding ="same"),
    keras.layers.LeakyReLU(0.2),
    keras.layers.Dropout(0.3),
    keras.layers.Flatten(),
    keras.layers.Dense(1, activation ='sigmoid')
])
discriminator.summary()
Model: "sequential_1"
_________________________________________________________________
Layer (type)                 Output Shape              Param #
=================================================================
conv2d (Conv2D)              (None, 14, 14, 64)        1664
_________________________________________________________________
leaky_re_lu (LeakyReLU)      (None, 14, 14, 64)        0
_________________________________________________________________
dropout (Dropout)            (None, 14, 14, 64)        0
_________________________________________________________________
conv2d_1 (Conv2D)            (None, 7, 7, 128)         204928
_________________________________________________________________
leaky_re_lu_1 (LeakyReLU)    (None, 7, 7, 128)         0
_________________________________________________________________
dropout_1 (Dropout)          (None, 7, 7, 128)         0
_________________________________________________________________
flatten (Flatten)            (None, 6272)              0
_________________________________________________________________
dense_1 (Dense)              (None, 1)                 6273
=================================================================
Total params: 212, 865
Trainable params: 212, 865
Non-trainable params: 0
_________________________________________________________________- 现在我们需要编译我们的 DCGAN 模型(生成器和判别器的组合),我们将首先编译判别器并将其训练设置为 False,因为我们首先要训练生成器。
蟒蛇3
# compile discriminator using binary cross entropy loss and adam optimizer
discriminator.compile(loss ="binary_crossentropy", optimizer ="adam")
# make  discriminator no-trainable as of  now
discriminator.trainable = False
# Combine both generator and discriminator
gan = keras.models.Sequential([generator, discriminator])
# compile generator using binary cross entropy loss and adam optimizer

gan.compile(loss ="binary_crossentropy", optimizer ="adam")
- 现在,我们定义了这个 GAN 模型的训练过程,我们将使用我们之前导入的 tqdm 包。这个包有助于可视化训练。
蟒蛇3
seed = tf.random.normal(shape =[batch_size, 100])

def train_dcgan(gan, dataset, batch_size, num_features, epochs = 5):
    generator, discriminator = gan.layers
    for epoch in tqdm(range(epochs)):
        print()
        print("Epoch {}/{}".format(epoch + 1, epochs))

        for X_batch in dataset:
            # create a random noise of sizebatch_size * 100
            # to passit into the generator
            noise = tf.random.normal(shape =[batch_size, num_features])
            generated_images = generator(noise)

            # take batch of generated image and real image and
            #  use them to train  the discriminator
            X_fake_and_real = tf.concat([generated_images, X_batch], axis = 0)
            y1 = tf.constant([[0.]] * batch_size + [[1.]] * batch_size)
            discriminator.trainable = True
            discriminator.train_on_batch(X_fake_and_real, y1)

            # Here we will be training our GAN model, in this step
            #  we pass noise that uses generatortogenerate the image
            #  and pass it with labels as [1] So, it can fool the discriminator
            noise = tf.random.normal(shape =[batch_size, num_features])
            y2 = tf.constant([[1.]] * batch_size)
            discriminator.trainable = False
            gan.train_on_batch(noise, y2)

            # generate images for the GIF as we go
            generate_and_save_images(generator, epoch + 1, seed)

    generate_and_save_images(generator, epochs, seed)
- 现在我们定义一个从生成器生成和保存图像的函数(在训练期间)。稍后我们将使用这些生成的图像来绘制 GIF。
蟒蛇3
# code
def generate_and_save_images(model, epoch, test_input):
  predictions = model(test_input, training = False)

  fig = plt.figure(figsize =(10, 10))

  for i in range(25):
      plt.subplot(5, 5, i + 1)
      plt.imshow(predictions[i, :, :, 0] * 127.5 + 127.5, cmap ='binary')
      plt.axis('off')

  plt.savefig('image_epoch_{:04d}.png'.format(epoch))
- 现在,我们需要训练模型,但在此之前,我们还需要创建批量训练数据并添加一个表示颜色图数量的维度。
蟒蛇3
# reshape to add a color map
x_train_dcgan = x_train.reshape(-1, 28, 28, 1) * 2. - 1.
# create batches
dataset = create_batch(x_train_dcgan)
# callthe training function with 10 epochs and record time %% time
train_dcgan(gan, dataset, batch_size, num_features, epochs = 10)
0%| | 0/10 [00:00- 现在我们将定义一个获取保存图像并转换为 GIF 的函数。我们从这里使用这个函数
蟒蛇3
import imageio
import glob

anim_file = 'dcgan_results.gif'

with imageio.get_writer(anim_file, mode ='I') as writer:
  filenames = glob.glob('image*.png')
  filenames = sorted(filenames)
  last = -1
  for i, filename in enumerate(filenames):
    frame = 2*(i)
    if round(frame) > round(last):
      last = frame
    else:
      continue
    image = imageio.imread(filename)
    writer.append_data(image)
  image = imageio.imread(filename)
  writer.append_data(image)
display.Image(filename = anim_file)
生成的图像结果
结果和结论:
- 为了评估 DCGAN 为监督任务学习的表示的质量,作者在 ImageNet-1k 上训练模型,然后使用来自所有层的鉴别器的卷积特征,最大池化每个层的表示以产生 4×4 的空间网格。然后将这些特征展平并连接起来形成一个 28672 维的向量,并在它们之上训练一个正则化的线性 L2-SVM 分类器。然后在 CIFAR-10 数据集上评估该模型,但未对其进行训练。该模型报告了 82% 的准确度,这也显示了模型的稳健性。

- 在 Street View Housing Number 数据集上,它实现了 22% 的验证损失,这是新的最先进的甚至是鉴别器架构,当监督训练为 CNN 模型时,验证损失比它更大。
参考:
- DCGAN 论文