Ember.js 模板
Ember.js是一个针对专业 Web 开发项目的 Web 开发框架。它默认在MVC架构中创建应用程序,这提高了维护应用程序结构的工作效率。 Ember.js 是一个高效的框架,它使应用程序的开发和原型设计更容易、更快。
Ember.js 模板:模板只是具有动态内容功能的简单 HTML。如果您曾经遇到过 Handlebar 视图引擎,您可能会发现语法几乎相同。我们可以在模板中使用 CSS。 Ember.js 的根模板是 application.hbs。所以 Ember.js 中的模板只是把手。所有 ember.js 模板都放在 app\templates 文件夹中。
模板 CSS:带有 CSS 的 HTML 是不完整的。 CSS 文件位于 app\styles\app.css。 CSS 自动适用于我们的组件和模板的所有模板。
传递数据:使用模型钩子传递的任何数据都包含在使用{{ data }}标签的模板中。以下是一些类似于车把助手标签的其他标签。
- {{data}}用于包含传递的数据。
- {{#each}} {{/each}}用作数据项列表的 for 循环。
- {{#if}} {{/if}}用作 if 块。
- {{else}}用作 else 块。
示例:在本示例中,我们将向根模板 app\templates\application.hbs 传递一些数据,然后相应地显示这些数据。我们还将使用位于 app\styles\app.css 的 CSS 文件在模板文件中设置我们的内容样式。
创建一个新项目:
第 1 步:输入以下命令创建一个新的Ember.js 应用程序项目。
ember new ember_templates_tutorial我们的应用程序的项目结构如下。

创建项目后,通过输入以下命令运行应用程序。
ember serve几分钟后,您应该在终端/命令提示符上收到以下输出。

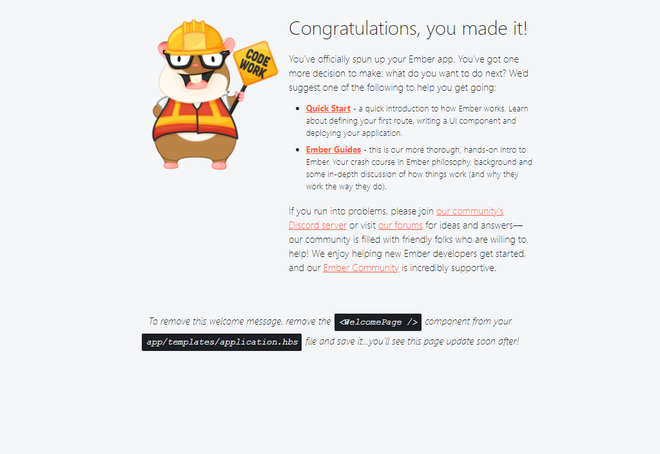
当您在终端上收到上述输出时,请转到链接 http://localhost:4200/,您应该会在浏览器上收到以下输出。

Model() function is a model hook. It is responsible for fetching or retrieving data and providing it to the templates file. Then the data is rendered accordingly. So we are going to provide a list of items to display.
第 2 步:在 app\routes 文件夹中创建一个名为 application.js 的新文件。该文件将为我们提供数据以在模板文件 application.hbs 文件中动态呈现它。在 application.js 文件中,我们将在其中扩展 Route 类。然后我们将数据导出为我们的 application.hbs 文件的模型()。
app\routes\application.js
Javascript
import Route from '@ember/routing/route';

export default class ApplicationRoute extends Route {
  async model() {
    return {
      items: [
        {
          name: 'Data Structures',
          link:
'https://www.geeksforgeeks.org/data-structures/',
        },
        {
          name: 'Algorithms',
          link:
'https://www.geeksforgeeks.org/fundamentals-of-algorithms/',
        },
        {
          name: 'Competitive Programming',
          link:
 'https://www.geeksforgeeks.org/competitive-programming-a-complete-guide/',
        },
      ],
    };
  }
}
HTML
{{page-title "EmberTemplatesTutorial"}}

  GeeksforGeeks
  {{#each @model.items as |item|}}


    {{item.name}}
    Click Here


  {{/each}}


{{outlet}}
CSS
#container {
  margin-left: auto;
  margin-right: auto;
  width: 200px;
}
.item {
  background-color: rgb(148, 255, 175);
  width: 200px;
  margin: 0.5rem;
  border-radius: 10px;
  text-align: center;
}
.item:hover {
  background-color: rgb(96, 163, 113);
  transform: scale(1.1);
}
.item a:hover {
  color: white;
}
第 3 步:现在在app\templates\application.hbs文件中,我们将运行类似于在车把中运行的{{ #each }} 循环。我们的 application.hbs 文件接收我们创建的 routes 文件夹中的 routes 文件发送的模型数据。所以运行循环来渲染我们想要显示的每个项目。
应用\模板\应用程序.hbs
HTML
{{page-title "EmberTemplatesTutorial"}}

  GeeksforGeeks
  {{#each @model.items as |item|}}


    {{item.name}}
    Click Here


  {{/each}}


{{outlet}}
第4步:这些物品也会有一些样式。它与我们用来设置 HTML 网站样式的CSS相同。样式是您自己的选择,但这里有一些基本样式的代码。
应用\样式\app.css
CSS
#container {
  margin-left: auto;
  margin-right: auto;
  width: 200px;
}
.item {
  background-color: rgb(148, 255, 175);
  width: 200px;
  margin: 0.5rem;
  border-radius: 10px;
  text-align: center;
}
.item:hover {
  background-color: rgb(96, 163, 113);
  transform: scale(1.1);
}
.item a:hover {
  color: white;
}
第五步:保存代码。 Ember 会在链接http://localhost:4200/ 处自动刷新网页。结果如下。
输出:
