- selenium webdriver python (1)
- selenium webdriver python 代码示例
- Selenium远程Webdriver和Selenium Webdriver之间的区别
- Selenium远程Webdriver和Selenium Webdriver之间的区别(1)
- Selenium Webdriver安装
- Selenium Webdriver安装(1)
- Selenium Remote Webdriver 和Selenium Webdriver 的区别
- Selenium Remote Webdriver 和Selenium Webdriver 的区别(1)
- Selenium Remote Webdriver 和Selenium Webdriver 的区别(1)
- Selenium Remote Webdriver 和Selenium Webdriver 的区别
- selenium 中的 webdriver 是什么 (1)
- Selenium WebDriver命令(1)
- Selenium WebDriver命令
- Selenium WebDriver教程(1)
- Selenium WebDriver教程
- Selenium WebDriver与Python教程
- Selenium WebDriver与Python教程(1)
- selenium webdriver 导入 - Python (1)
- selenium 中的 webdriver 是什么 - 无论代码示例
- Selenium WebDriver的应用和使用(1)
- Selenium WebDriver的应用和使用
- selenium webdriver 导入 - Python 代码示例
- Selenium Webdriver与Selenium-RC(1)
- Selenium Webdriver与Selenium-RC
- Selenium WebDriver-导航命令(1)
- Selenium WebDriver-导航命令
- selenium 远程 webdriver - 任何代码示例
- Selenium RC 和Selenium Webdriver 的区别(1)
- Selenium RC 和Selenium Webdriver 的区别
📅 最后修改于: 2020-12-04 04:51:32 🧑 作者: Mango
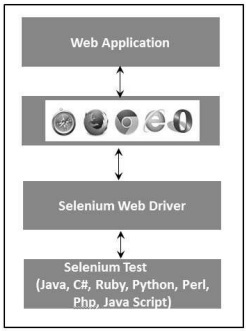
WebDriver是用于自动测试Web应用程序的工具。它被普遍称为Selenium 2.0。 WebDriver使用不同的底层框架,而Selenium RC使用嵌入在浏览器中的JavaScript Selenium-Core,这有一些限制。与依赖于服务器的Selenium RC不同,WebDriver无需任何中介即可直接与浏览器进行交互。在以下上下文中使用它-
-
多浏览器测试,包括针对Selenium RC(Selenium 1.0)未很好支持的浏览器功能的改进。
-
处理多个框架,多个浏览器窗口,弹出窗口和警报。
-
复杂的页面导航。
-
高级用户导航,例如拖放。
-
基于AJAX的UI元素。
建筑
WebDriver最好用一个简单的架构图来说明,如下所示。
Selenium RC与WebDriver
| Selenium RC | Selenium WebDriver |
|---|---|
| The architecture of Selenium RC is complicated, as the server needs to be up and running before starting a test. | WebDriver’s architecture is simpler than Selenium RC, as it controls the browser from the OS level. |
| Selenium server acts as a middleman between the browser and Selenese commands. | WebDriver interacts directly with the browser and uses the browser’s engine to control it. |
| Selenium RC script execution is slower, since it uses a Javascript to interact with RC. | WebDriver is faster, as it interacts directly with the browser. |
| Selenium RC cannot support headless execution as it needs a real browser to work with. | WebDriver can support the headless execution. |
| It’s a simple and small API. | Complex and a bit large API as compared to RC. |
| Less object-oriented API. | Purely object oriented API. |
| Cannot test mobile Applications. | Can test iPhone/Android applications. |
使用WebDriver编写脚本
让我们了解如何使用WebDriver。为了演示,我们将使用https://www.calculator.net/ 。我们将执行位于“数学计算器”下的“百分比计算器”。我们已经下载了所需的WebDriver JAR。有关详细信息,请参见“环境设置”一章。
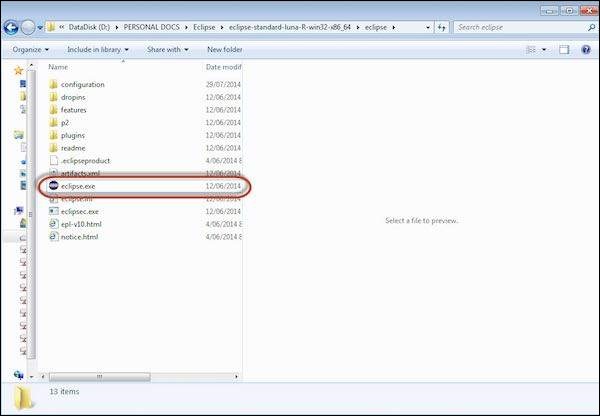
步骤1-从Extracted Eclipse文件夹中启动“ Eclipse”。
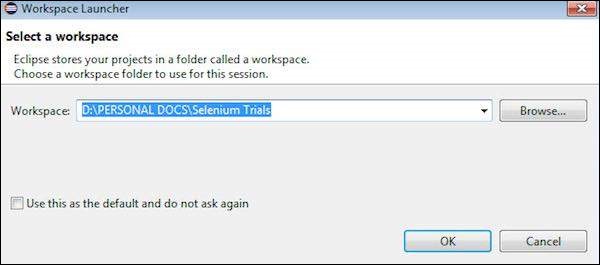
步骤2-通过单击“浏览”按钮选择工作区。
步骤3-现在从“文件”菜单创建“新项目”。

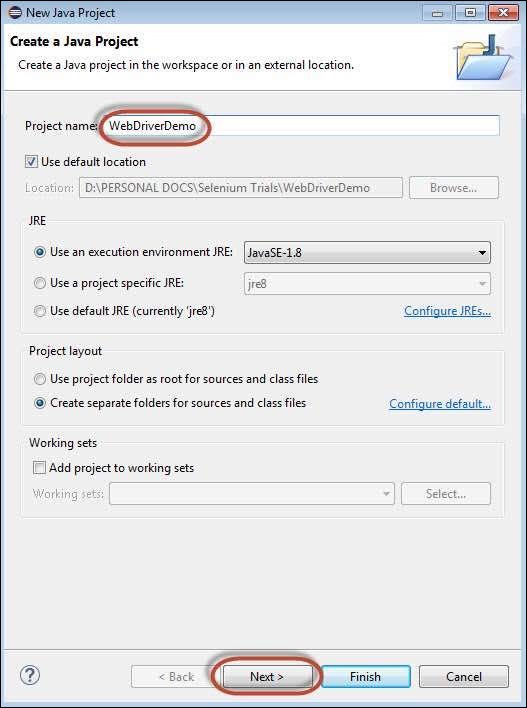
步骤4-输入项目名称,然后单击“下一步”。
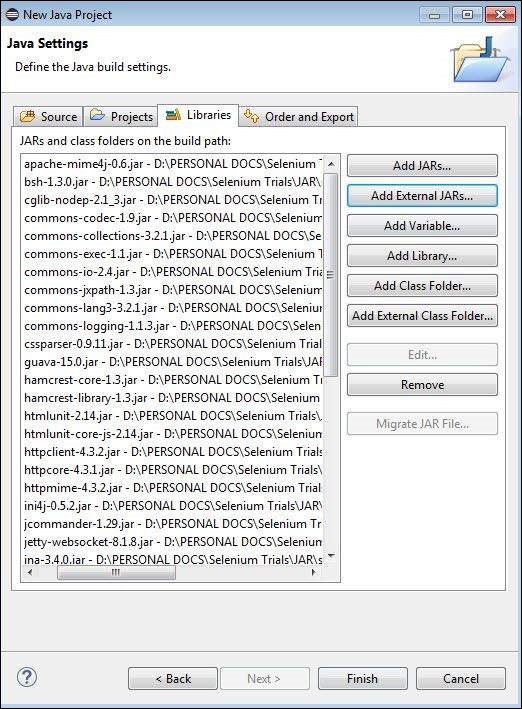
步骤5-转到Libraries选项卡,然后选择我们已下载的所有JAR。添加对Selenium WebDriver Library文件夹的所有JAR以及selenium-java-2.42.2.jar和selenium-java-2.42.2-srcs.jar的引用。
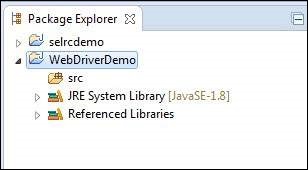
步骤6-如下所示创建包。
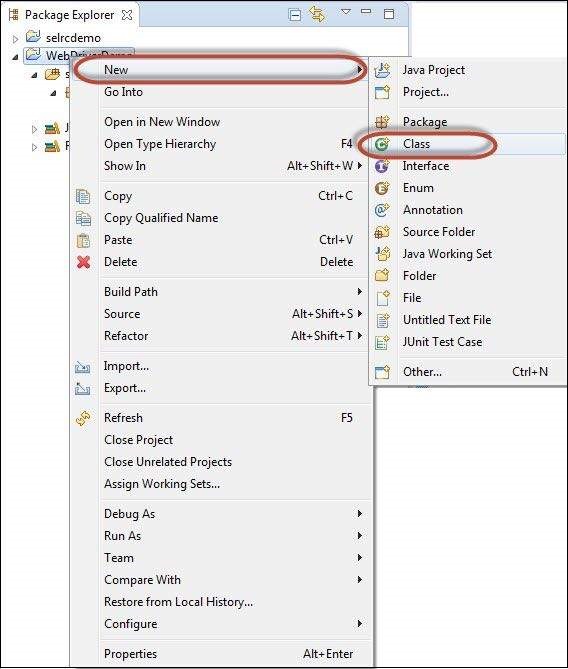
步骤7-现在,右键单击包,然后选择“新建” >>“类”以创建“类”。
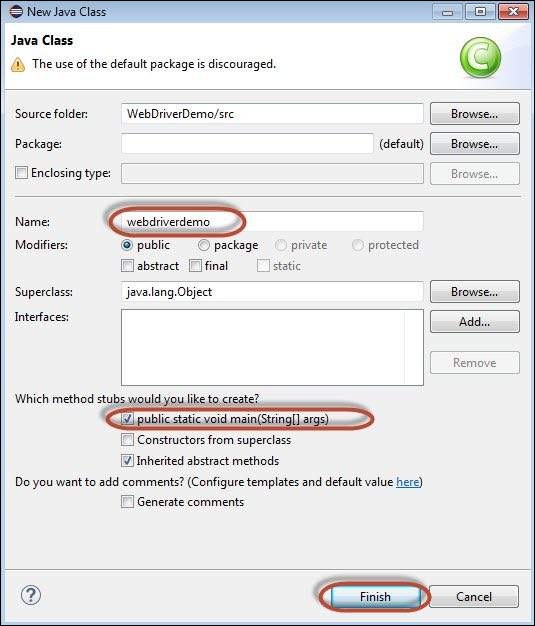
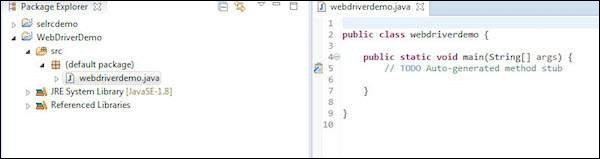
步骤8-现在命名该类并使其成为主要函数。
步骤9-类大纲如下所示。
步骤10-现在是时候编写代码了。以下脚本更易于理解,因为其中嵌入了注释,可以清楚地解释这些步骤。请查看“定位器”一章,以了解如何捕获对象属性。
import java.util.concurrent.TimeUnit;

import org.openqa.selenium.*;
import org.openqa.selenium.firefox.FirefoxDriver;

public class webdriverdemo {
   public static void main(String[] args) {

      WebDriver driver = new FirefoxDriver();
      //Puts an Implicit wait, Will wait for 10 seconds before throwing exception
      driver.manage().timeouts().implicitlyWait(10, TimeUnit.SECONDS);

      //Launch website
      driver.navigate().to("http://www.calculator.net/");

      //Maximize the browser
      driver.manage().window().maximize();

      // Click on Math Calculators
      driver.findElement(By.xpath(".//*[@id = 'menu']/div[3]/a")).click();

      // Click on Percent Calculators
      driver.findElement(By.xpath(".//*[@id = 'menu']/div[4]/div[3]/a")).click();

      // Enter value 10 in the first number of the percent Calculator
      driver.findElement(By.id("cpar1")).sendKeys("10");

      // Enter value 50 in the second number of the percent Calculator
      driver.findElement(By.id("cpar2")).sendKeys("50");

      // Click Calculate Button
      driver.findElement(By.xpath(".//*[@id = 'content']/table/tbody/tr[2]/td/input[2]")).click();


      // Get the Result Text based on its xpath
      String result =
         driver.findElement(By.xpath(".//*[@id = 'content']/p[2]/font/b")).getText();


      // Print a Log In message to the screen
      System.out.println(" The Result is " + result);

      //Close the Browser.
      driver.close();
   }
}
步骤11-以上脚本的输出将在控制台中打印。

最常用的命令
下表列出了WebDriver中一些最常用的命令及其语法。
| Sr.No. | Command & Description |
|---|---|
| 1 |
driver.get(“URL”) To navigate to an application. |
| 2 |
element.sendKeys(“inputtext”) Enter some text into an input box. |
| 3 |
element.clear() Clear the contents from the input box. |
| 4 |
select.deselectAll() Deselect all OPTIONs from the first SELECT on the page. |
| 5 |
select.selectByVisibleText(“some text”) Select the OPTION with the input specified by the user. |
| 6 |
driver.switchTo().window(“windowName”) Move the focus from one window to another. |
| 7 |
driver.switchTo().frame(“frameName”) Swing from frame to frame. |
| 8 |
driver.switchTo().alert() Helps in handling alerts. |
| 9 |
driver.navigate().to(“URL”) Navigate to the URL. |
| 10 |
driver.navigate().forward() To navigate forward. |
| 11 |
driver.navigate().back() To navigate back. |
| 12 |
driver.close() Closes the current browser associated with the driver. |
| 13 |
driver.quit() Quits the driver and closes all the associated window of that driver. |
| 14 |
driver.refresh() Refreshes the current page. |