如何在 Firebase 上使用机器学习套件创建人脸检测 Android 应用
先决条件:
- Firebase 机器学习套件
- 将 Firebase 添加到 Android 应用
Firebase ML KIT 旨在通过提供一系列可在 iOS 和 Android 应用程序中使用的预训练模型,使机器学习更易于访问。让我们使用 ML Kit 的人脸检测 API 来识别照片中的人脸。在本文结束时,我们将拥有一个可以识别图像中的人脸的应用程序,然后通过精美的 GUI 显示有关这些人脸的信息,例如该人是否在微笑,或者是否闭上了眼睛。
方法
第 1 步:创建一个新项目
- 在 android studio 中使用您想要的任何名称打开一个新项目。
- 我们将为特定项目处理空活动。
- 此特定项目所需的最低SDK为23 ,因此请选择 23 或更高版本的任何 API。
- 该项目使用的语言是Java 。
- 保留除上述选项之外的所有选项,保持不变。
- 点击完成。
第 2 步:在 Firebase 上连接 ML KIT。
- 在Firebase上登录或注册。
- 在 Firebase 控制台中,创建一个新项目,或者如果您想使用现有项目,然后打开它。
- 根据您的选择命名项目。
- 转到文档。
- 单击 Firebase ML,然后在左侧空间中,选择 Vision 下的“识别文本”。
- 完成上述步骤以更好地理解。
- 回到 Android Studio。
- 转到工具 -> Firebase -> Analytics -> 与 Firebase 连接 -> 从出现的对话框中选择您的项目 -> 单击连接。 (此步骤将您的 android 应用程序连接到 Firebase)
第 3 步:自定义资产和 Gradle
- 为了增强 GUI,可以选择 .png 格式的图像并将其添加到 res 文件夹中并将其设置为主 .xml 文件的背景,或者通过转到布局的设计视图并在已声明下自定义背景来设置背景颜色属性 如下所示:

- 要在应用程序中包含 ML KIT 依赖项,请转到Gradle Script -> build.gradle(Module:app)并添加下面提到的实现:
implementation ‘com.google.firebase:firebase-ml-vision:17.0.0’
- 现在复制下面提到的文本,并将其粘贴到应用程序级别 Gradle 的最后,在所有括号之外,如下图所示。
apply plugin: ‘com.google.gms.google-services’
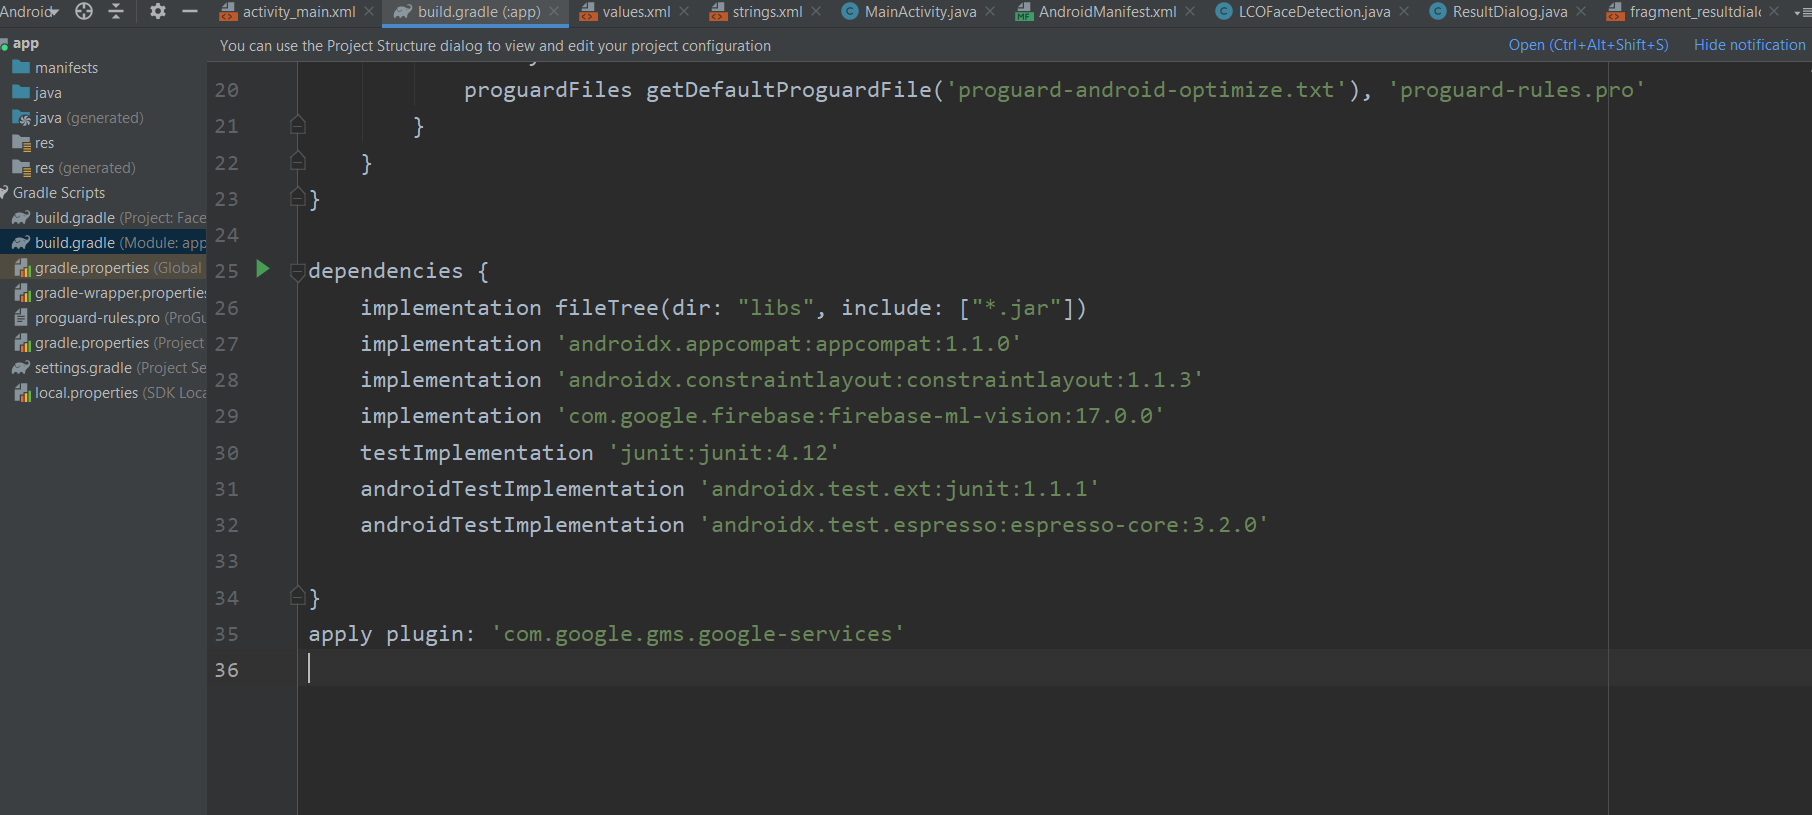
- 接下来,转到build.gradle(项目)并复制下面提到的文本,并将其粘贴到“依赖项”类路径中,如下图所示。
classpath ‘com.google.gms:google-services:4.2.0’

- 点击立即同步。
第 4 步:设计用户界面
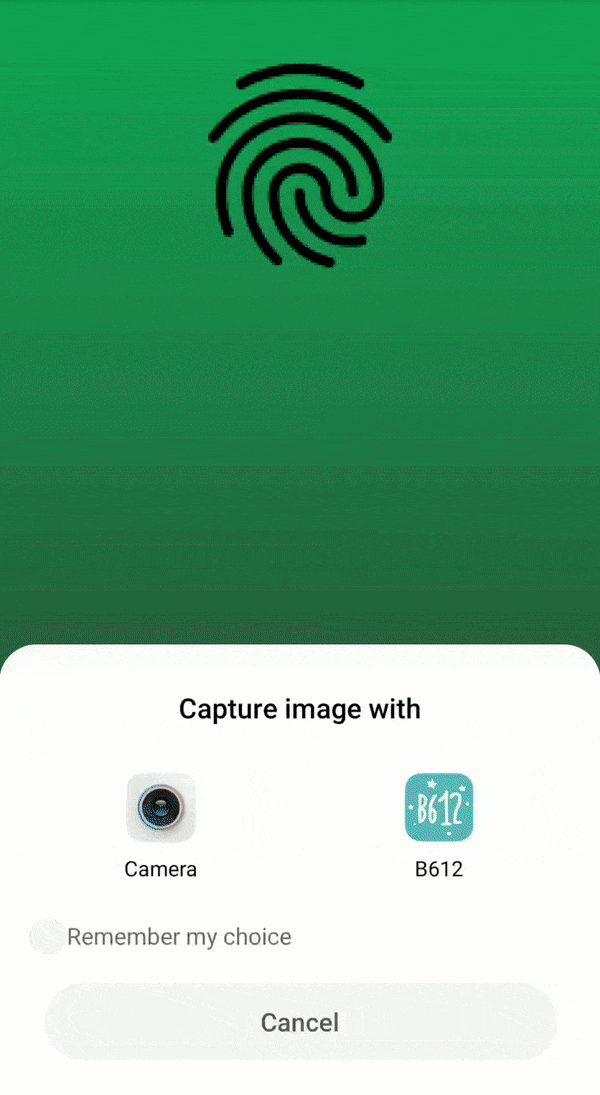
- 下面是基本 XML 文件的代码。添加一个按钮以打开相机选项。
XML
XML
Java
import android.app.Application;
import com.google.firebase.FirebaseApp;

public class LCOFaceDetection extends Application {
    public final static String RESULT_TEXT = "RESULT_TEXT";
    public final static String RESULT_DIALOG = "RESULT_DIALOG";

    // initializing our firebase
    @Override
    public void onCreate()
    {
        super.onCreate();
        FirebaseApp.initializeApp(this);
    }
}
Java
import android.os.Bundle;
import android.view.LayoutInflater;
import android.view.View;
import android.view.ViewGroup;
import android.widget.Button;
import android.widget.TextView;
import androidx.annotation.NonNull;
import androidx.annotation.Nullable;
import androidx.fragment.app.DialogFragment;

public class ResultDialog extends DialogFragment {
    Button okBtn;
    TextView resultTextView;

    @Nullable
    @Override
    public View
    onCreateView(@NonNull LayoutInflater inflater,
                 @Nullable ViewGroup container,
                 @Nullable Bundle savedInstanceState)
    {

        // importing View so as to inflate
        // the layout of our result dialog
        // using layout inflater.
        View view = inflater.inflate(
            R.layout.fragment_resultdialog, container,
            false);
        String resultText = "";

        // finding the elements by their id's.
        okBtn = view.findViewById(R.id.result_ok_button);
        resultTextView
            = view.findViewById(R.id.result_text_view);

        // To get the result text
        // after final face detection
        // and append it to the text view.
        Bundle bundle = getArguments();
        resultText = bundle.getString(
            LCOFaceDetection.RESULT_TEXT);
        resultTextView.setText(resultText);

        // Onclick listener so as
        // to make a dismissable button
        okBtn.setOnClickListener(
            new View.OnClickListener() {
                @Override
                public void onClick(View v)
                {
                    dismiss();
                }
            });
        return view;
    }
}
Java
/*package whatever do not write package name here*/

import androidx.annotation.NonNull;
import androidx.annotation.Nullable;
import androidx.appcompat.app.AppCompatActivity;
import androidx.fragment.app.DialogFragment;
import android.content.Intent;
import android.graphics.Bitmap;
import android.os.Bundle;
import android.provider.MediaStore;
import android.view.View;
import android.widget.Button;
import android.widget.Toast;
import com.google.android.gms.tasks.OnFailureListener;
import com.google.android.gms.tasks.OnSuccessListener;
import com.google.firebase.FirebaseApp;
import com.google.firebase.ml.vision.FirebaseVision;
import com.google.firebase.ml.vision.common.FirebaseVisionImage;
import com.google.firebase.ml.vision.common.FirebaseVisionPoint;
import com.google.firebase.ml.vision.face.FirebaseVisionFace;
import com.google.firebase.ml.vision.face.FirebaseVisionFaceDetector;
import com.google.firebase.ml.vision.face.FirebaseVisionFaceDetectorOptions;
import com.google.firebase.ml.vision.face.FirebaseVisionFaceLandmark;
import java.util.List;

public class MainActivity extends AppCompatActivity {
    Button cameraButton;

    // whenever we request for our customized permission, we
    // need to declare an integer and initialize it to some
    // value .
    private final static int REQUEST_IMAGE_CAPTURE = 124;
    FirebaseVisionImage image;
    FirebaseVisionFaceDetector detector;

    @Override
    protected void onCreate(Bundle savedInstanceState)
    {
        super.onCreate(savedInstanceState);
        setContentView(R.layout.activity_main);

        // initializing our firebase in main activity
        FirebaseApp.initializeApp(this);

        // finding the elements by their id's alloted.
        cameraButton = findViewById(R.id.camera_button);

        // setting an onclick listener to the button so as
        // to request image capture using camera
        cameraButton.setOnClickListener(
            new View.OnClickListener() {
                @Override
                public void onClick(View v)
                {

                    // makin a new intent for opening camera
                    Intent intent = new Intent(
                        MediaStore.ACTION_IMAGE_CAPTURE);
                    if (intent.resolveActivity(
                            getPackageManager())
                        != null) {
                        startActivityForResult(
                            intent, REQUEST_IMAGE_CAPTURE);
                    }
                    else {
                        // if the image is not captured, set
                        // a toast to display an error image.
                        Toast
                            .makeText(
                                MainActivity.this,
                                "Something went wrong",
                                Toast.LENGTH_SHORT)
                            .show();
                    }
                }
            });
    }

    @Override
    protected void onActivityResult(int requestCode,
                                    int resultCode,
                                    @Nullable Intent data)
    {
        // after the image is captured, ML Kit provides an
        // easy way to detect faces from variety of image
        // types like Bitmap

        super.onActivityResult(requestCode, resultCode,
                               data);
        if (requestCode == REQUEST_IMAGE_CAPTURE
            && resultCode == RESULT_OK) {
            Bundle extra = data.getExtras();
            Bitmap bitmap = (Bitmap)extra.get("data");
            detectFace(bitmap);
        }
    }

    // If you want to configure your face detection model
    // according to your needs, you can do that with a
    // FirebaseVisionFaceDetectorOptions object.
    private void detectFace(Bitmap bitmap)
    {
        FirebaseVisionFaceDetectorOptions options
            = new FirebaseVisionFaceDetectorOptions
                  .Builder()
                  .setModeType(
                      FirebaseVisionFaceDetectorOptions
                          .ACCURATE_MODE)
                  .setLandmarkType(
                      FirebaseVisionFaceDetectorOptions
                          .ALL_LANDMARKS)
                  .setClassificationType(
                      FirebaseVisionFaceDetectorOptions
                          .ALL_CLASSIFICATIONS)
                  .build();

        // we need to create a FirebaseVisionImage object
        // from the above mentioned image types(bitmap in
        // this case) and pass it to the model.
        try {
            image = FirebaseVisionImage.fromBitmap(bitmap);
            detector = FirebaseVision.getInstance()
                           .getVisionFaceDetector(options);
        }
        catch (Exception e) {
            e.printStackTrace();
        }

        // It’s time to prepare our Face Detection model.
        detector.detectInImage(image)
            .addOnSuccessListener(new OnSuccessListener >() {
                @Override
                // adding an onSuccess Listener, i.e, in case
                // our image is successfully detected, it will
                // append it's attribute to the result
                // textview in result dialog box.
                public void onSuccess(
                    List
                        firebaseVisionFaces)
                {
                    String resultText = "";
                    int i = 1;
                    for (FirebaseVisionFace face :
                         firebaseVisionFaces) {
                        resultText
                            = resultText
                                  .concat("\nFACE NUMBER. "
                                          + i + ": ")
                                  .concat(
                                      "\nSmile: "
                                      + face.getSmilingProbability()
                                            * 100
                                      + "%")
                                  .concat(
                                      "\nleft eye open: "
                                      + face.getLeftEyeOpenProbability()
                                            * 100
                                      + "%")
                                  .concat(
                                      "\nright eye open "
                                      + face.getRightEyeOpenProbability()
                                            * 100
                                      + "%");
                        i++;
                    }

                    // if no face is detected, give a toast
                    // message.
                    if (firebaseVisionFaces.size() == 0) {
                        Toast
                            .makeText(MainActivity.this,
                                      "NO FACE DETECT",
                                      Toast.LENGTH_SHORT)
                            .show();
                    }
                    else {
                        Bundle bundle = new Bundle();
                        bundle.putString(
                            LCOFaceDetection.RESULT_TEXT,
                            resultText);
                        DialogFragment resultDialog
                            = new ResultDialog();
                        resultDialog.setArguments(bundle);
                        resultDialog.setCancelable(true);
                        resultDialog.show(
                            getSupportFragmentManager(),
                            LCOFaceDetection.RESULT_DIALOG);
                    }
                }
            }) // adding an onfailure listener as well if
            // something goes wrong.
            .addOnFailureListener(new OnFailureListener() {
                @Override
                public void onFailure(@NonNull Exception e)
                {
                    Toast
                        .makeText(
                            MainActivity.this,
                            "Oops, Something went wrong",
                            Toast.LENGTH_SHORT)
                        .show();
                }
            });
    }
} - 现在 UI 将如下所示。

- 现在转到布局 -> 新建 -> 布局资源文件 -> 名称:fragment_resultdialog.xml。已创建此文件以自定义输出屏幕,该屏幕将显示一个名为“结果对话框”的对话框,其中包含一个名为“结果文本”的文本视图,其中包含检测到的图像的所有属性。下面是创建的 XML 文件的 XML 文件。
XML
第 5 步:Firebase 应用初始化程序
- 通过Java -> new -> class -> Name: LCOFaceDetection创建一个新的Java类。 Java -> 超类:应用程序(android.app.Application)。下面是Java类的示例源代码。
Java
import android.app.Application;
import com.google.firebase.FirebaseApp;

public class LCOFaceDetection extends Application {
    public final static String RESULT_TEXT = "RESULT_TEXT";
    public final static String RESULT_DIALOG = "RESULT_DIALOG";

    // initializing our firebase
    @Override
    public void onCreate()
    {
        super.onCreate();
        FirebaseApp.initializeApp(this);
    }
}
第 6 步:膨胀结果对话框
- 创建一个新的Java类,即ResultDialog。 Java和超类 DialogFragment ,它是fragment_resultdialog.xml的Java文件。下面是Java文件的示例代码。
Java
import android.os.Bundle;
import android.view.LayoutInflater;
import android.view.View;
import android.view.ViewGroup;
import android.widget.Button;
import android.widget.TextView;
import androidx.annotation.NonNull;
import androidx.annotation.Nullable;
import androidx.fragment.app.DialogFragment;

public class ResultDialog extends DialogFragment {
    Button okBtn;
    TextView resultTextView;

    @Nullable
    @Override
    public View
    onCreateView(@NonNull LayoutInflater inflater,
                 @Nullable ViewGroup container,
                 @Nullable Bundle savedInstanceState)
    {

        // importing View so as to inflate
        // the layout of our result dialog
        // using layout inflater.
        View view = inflater.inflate(
            R.layout.fragment_resultdialog, container,
            false);
        String resultText = "";

        // finding the elements by their id's.
        okBtn = view.findViewById(R.id.result_ok_button);
        resultTextView
            = view.findViewById(R.id.result_text_view);

        // To get the result text
        // after final face detection
        // and append it to the text view.
        Bundle bundle = getArguments();
        resultText = bundle.getString(
            LCOFaceDetection.RESULT_TEXT);
        resultTextView.setText(resultText);

        // Onclick listener so as
        // to make a dismissable button
        okBtn.setOnClickListener(
            new View.OnClickListener() {
                @Override
                public void onClick(View v)
                {
                    dismiss();
                }
            });
        return view;
    }
}
第 7 步:在真实设备上打开相机并启用人脸检测
- 下面是主Java文件的示例代码。
- 为此需要FirebaseVision和FirebaseVisionFaceDetector类。
- 这是您可以在人脸检测模型中配置的所有设置的列表。
| Setting | Description |
|---|---|
| Performance mode | FAST (default) | ACCURATE Favor speed or accuracy when detecting faces. |
| Detect landmarks | NO_LANDMARKS (default) | ALL_LANDMARKS Whether to attempt to identify facial “landmarks”: eyes, ears, nose, cheeks, mouth, and so on. |
| Detect contours | NO_CONTOURS (default) | ALL_CONTOURS Whether to detect the contours of facial features. Contours are detected for only the most prominent face in an image. |
| Classify faces | NO_CLASSIFICATIONS (default) | ALL_CLASSIFICATIONS Whether or not to classify faces into categories such as “smiling”, and “eyes open”. |
| Minimum face size | float (default: 0.1f ) The minimum size, relative to the image, of faces to detect. |
| Enable face tracking | false (default) | true Whether or not to assign faces an ID, which can be used to track faces across images. Note that when contour detection is enabled, only one face is detected, so face tracking doesn’t produce useful results. For this reason, and to improve detection speed, don’t enable both contour detection and face tracking. |
- 建议阅读这些类的详细分析,并在 Firebase ML 文档中处理代码以进行文本识别。
Java
/*package whatever do not write package name here*/

import androidx.annotation.NonNull;
import androidx.annotation.Nullable;
import androidx.appcompat.app.AppCompatActivity;
import androidx.fragment.app.DialogFragment;
import android.content.Intent;
import android.graphics.Bitmap;
import android.os.Bundle;
import android.provider.MediaStore;
import android.view.View;
import android.widget.Button;
import android.widget.Toast;
import com.google.android.gms.tasks.OnFailureListener;
import com.google.android.gms.tasks.OnSuccessListener;
import com.google.firebase.FirebaseApp;
import com.google.firebase.ml.vision.FirebaseVision;
import com.google.firebase.ml.vision.common.FirebaseVisionImage;
import com.google.firebase.ml.vision.common.FirebaseVisionPoint;
import com.google.firebase.ml.vision.face.FirebaseVisionFace;
import com.google.firebase.ml.vision.face.FirebaseVisionFaceDetector;
import com.google.firebase.ml.vision.face.FirebaseVisionFaceDetectorOptions;
import com.google.firebase.ml.vision.face.FirebaseVisionFaceLandmark;
import java.util.List;

public class MainActivity extends AppCompatActivity {
    Button cameraButton;

    // whenever we request for our customized permission, we
    // need to declare an integer and initialize it to some
    // value .
    private final static int REQUEST_IMAGE_CAPTURE = 124;
    FirebaseVisionImage image;
    FirebaseVisionFaceDetector detector;

    @Override
    protected void onCreate(Bundle savedInstanceState)
    {
        super.onCreate(savedInstanceState);
        setContentView(R.layout.activity_main);

        // initializing our firebase in main activity
        FirebaseApp.initializeApp(this);

        // finding the elements by their id's alloted.
        cameraButton = findViewById(R.id.camera_button);

        // setting an onclick listener to the button so as
        // to request image capture using camera
        cameraButton.setOnClickListener(
            new View.OnClickListener() {
                @Override
                public void onClick(View v)
                {

                    // makin a new intent for opening camera
                    Intent intent = new Intent(
                        MediaStore.ACTION_IMAGE_CAPTURE);
                    if (intent.resolveActivity(
                            getPackageManager())
                        != null) {
                        startActivityForResult(
                            intent, REQUEST_IMAGE_CAPTURE);
                    }
                    else {
                        // if the image is not captured, set
                        // a toast to display an error image.
                        Toast
                            .makeText(
                                MainActivity.this,
                                "Something went wrong",
                                Toast.LENGTH_SHORT)
                            .show();
                    }
                }
            });
    }

    @Override
    protected void onActivityResult(int requestCode,
                                    int resultCode,
                                    @Nullable Intent data)
    {
        // after the image is captured, ML Kit provides an
        // easy way to detect faces from variety of image
        // types like Bitmap

        super.onActivityResult(requestCode, resultCode,
                               data);
        if (requestCode == REQUEST_IMAGE_CAPTURE
            && resultCode == RESULT_OK) {
            Bundle extra = data.getExtras();
            Bitmap bitmap = (Bitmap)extra.get("data");
            detectFace(bitmap);
        }
    }

    // If you want to configure your face detection model
    // according to your needs, you can do that with a
    // FirebaseVisionFaceDetectorOptions object.
    private void detectFace(Bitmap bitmap)
    {
        FirebaseVisionFaceDetectorOptions options
            = new FirebaseVisionFaceDetectorOptions
                  .Builder()
                  .setModeType(
                      FirebaseVisionFaceDetectorOptions
                          .ACCURATE_MODE)
                  .setLandmarkType(
                      FirebaseVisionFaceDetectorOptions
                          .ALL_LANDMARKS)
                  .setClassificationType(
                      FirebaseVisionFaceDetectorOptions
                          .ALL_CLASSIFICATIONS)
                  .build();

        // we need to create a FirebaseVisionImage object
        // from the above mentioned image types(bitmap in
        // this case) and pass it to the model.
        try {
            image = FirebaseVisionImage.fromBitmap(bitmap);
            detector = FirebaseVision.getInstance()
                           .getVisionFaceDetector(options);
        }
        catch (Exception e) {
            e.printStackTrace();
        }

        // It’s time to prepare our Face Detection model.
        detector.detectInImage(image)
            .addOnSuccessListener(new OnSuccessListener >() {
                @Override
                // adding an onSuccess Listener, i.e, in case
                // our image is successfully detected, it will
                // append it's attribute to the result
                // textview in result dialog box.
                public void onSuccess(
                    List
                        firebaseVisionFaces)
                {
                    String resultText = "";
                    int i = 1;
                    for (FirebaseVisionFace face :
                         firebaseVisionFaces) {
                        resultText
                            = resultText
                                  .concat("\nFACE NUMBER. "
                                          + i + ": ")
                                  .concat(
                                      "\nSmile: "
                                      + face.getSmilingProbability()
                                            * 100
                                      + "%")
                                  .concat(
                                      "\nleft eye open: "
                                      + face.getLeftEyeOpenProbability()
                                            * 100
                                      + "%")
                                  .concat(
                                      "\nright eye open "
                                      + face.getRightEyeOpenProbability()
                                            * 100
                                      + "%");
                        i++;
                    }

                    // if no face is detected, give a toast
                    // message.
                    if (firebaseVisionFaces.size() == 0) {
                        Toast
                            .makeText(MainActivity.this,
                                      "NO FACE DETECT",
                                      Toast.LENGTH_SHORT)
                            .show();
                    }
                    else {
                        Bundle bundle = new Bundle();
                        bundle.putString(
                            LCOFaceDetection.RESULT_TEXT,
                            resultText);
                        DialogFragment resultDialog
                            = new ResultDialog();
                        resultDialog.setArguments(bundle);
                        resultDialog.setCancelable(true);
                        resultDialog.show(
                            getSupportFragmentManager(),
                            LCOFaceDetection.RESULT_DIALOG);
                    }
                }
            }) // adding an onfailure listener as well if
            // something goes wrong.
            .addOnFailureListener(new OnFailureListener() {
                @Override
                public void onFailure(@NonNull Exception e)
                {
                    Toast
                        .makeText(
                            MainActivity.this,
                            "Oops, Something went wrong",
                            Toast.LENGTH_SHORT)
                        .show();
                }
            });
    }
}