详细解释 React 组件生命周期技术
React 组件是可重用且独立的代码,有助于构建网页的用户界面。这些组件中的每一个都有不同的生命周期方法,这些方法在其生命周期的不同阶段被调用。它们主要用于释放多个组件占用的资源,帮助网页无缝呈现,为用户提供良好的体验。 React 组件的生命周期有 4 个阶段。
先决条件:要理解这些概念,您必须了解 React 的基础知识。
- React.js(介绍和工作)
1. 初始化:它是 React 组件生命周期的第一阶段。在这个阶段,组件在组件的构造函数中使用默认的 props 及其初始状态进行定义。此阶段在组件的创建或来自父级的任何 props 传递到它之前的生命周期中仅发生一次,并由以下按相同顺序调用的方法组成。
- constructor():该方法在组件挂载前被调用。这仅用于两个目的:通过将对象分配给“ this.state”来初始化本地状态并将事件处理程序方法绑定到实例。以下代码片段是其用法的一个很好的示例。
注意:以下方法仅适用于“create-react-class”模块,并且会在 ES6 类中抛出错误。
- getDefaultProps():这个方法可以用来定义“ this.props ”的默认值。此外,我们需要在编写任何其他内容以使用这些方法之前初始化 createReactClass。我们可以在下面看到它的用法示例。
Javascript
var createReactClass = require('create-react-class');
var Meeting = createReactClass({
  getDefaultProps: function() {
    return {
      dialogue: 'Good Afternoon!'
    };
  },
});
Javascript
var createReactClass = require('create-react-class');
var Greeting = createReactClass({
getInitialState: function() {
return {message: 'Hello!'};
},
handleClick: function() {
alert(this.state.message);
},
render: function() {
return (
);
}
});Javascript
componentWillMount() {
    this.setState({ name: "Component will mount." });
}
Javascript
componentWillUpdate() {
    this.setState({ name: "Component will update." });
}
Javascript
componentWillReceiveProps(nextProps) {
    console.log('componentWillReceiveProps', nextProps);
    this.setState(nextProps);
}
Javascript
import React from 'react';
import ReactDOM from 'react-dom';
class LifecycleStages extends React.Component {
// Initialization stage
constructor(props) {
super(props);
this.state = { name: "GeeksForGeeks" };
}
// Mounting stage
static getDerivedStateFromProps(props, state) {
console.log("getDerivedStateFromProps()");
}
changeState() {
this.setState({ name: "Geek!" });
}
render() {
return (
React components' lifecycle methods
Hello {this.state.name}
);
}
componentDidMount() {
console.log("componentDidMount()");
}
componentWillMount() {
console.log("componentDidMount()");
}
// Updating stage
shouldComponentUpdate(newProps, newState) {
console.log("shouldComponentUpdate()");
return true;
}
getSnapshotBeforeUpdate(prevProps, prevState) {
console.log("getSnapshotBeforeUpdate()");
}
componentDidUpdate(prevProps, prevState) {
console.log("componentDidUpdate()");
}
// Unmounting stage
componentWillUnmount() {
console.log("Component will unmount.");
}
}
export default LifecycleStages;- getInitialState():该方法可用于定义“ this.state ”的默认值。下面的代码片段将显示一条问候消息“Hello!”当我们单击输出网页上的按钮时。
Javascript
var createReactClass = require('create-react-class');
var Greeting = createReactClass({
getInitialState: function() {
return {message: 'Hello!'};
},
handleClick: function() {
alert(this.state.message);
},
render: function() {
return (
);
}
});
2. 挂载:这是 React 组件生命周期的第二个阶段。在这个阶段,组件被挂载到 DOM 上,并在组件初始化后第一次呈现在网页上。它由以下按相同顺序调用的方法组成。
- getDerivedStateFromProps():在调用render()方法之前,在初始挂载和任何后续更新时调用此方法。要更新状态,它返回一个对象,不更新任何内容,它返回 null。
- render():此方法负责返回每个组件中定义的单个根 HTML 节点元素。调用时,此方法检查“ this.props”和“ this.state”并返回以下类型之一:
- 反应元素
- 数组和片段
- 门户网站
- 字符串和数字
- 布尔值或空值
- componentDidMount():该方法在render()方法之后立即调用。现在,我们可以使用 DOM 执行任何查询操作。
Note: The method below is considered legacy and should be avoided in new code.- componentWillMount():此方法在render()方法之前调用。如果在此方法中调用setState() ,组件将不会重新渲染。
Javascript
componentWillMount() {
    this.setState({ name: "Component will mount." });
}
3. 更新:这是 React 组件生命周期的第三阶段。在这个阶段,状态和道具会随着各种用户事件(例如单击按钮、按下某个键等)进行更新。我们可以与组件的层次结构进行通信并处理网页上的用户交互。它允许我们确保组件根据需要呈现其最新版本,因此,它被多次调用。它由以下方法组成。
- shouldComponentUpdate():当接收到新的 props 或 state 时,在render()方法之前调用此方法 并且DOM由组件决定更新。它可以用作性能优化并帮助控制组件更新的行为。如果此方法返回 true,则组件将更新,如果返回 false,则跳过更新。
- render():再次调用该方法来检查“ this.props”和“ this.state”。如果 shouldComponentUpdate() 返回 false,将再次调用render()方法中的代码,以便正确显示组件。
- getSnapshotBeforeUpdate():在 DOM 更新为最新渲染输出之前调用此方法。它有助于在可能从 DOM 更改(如滚动位置)之前捕获信息。它返回一个快照值或 null。
- componentDidUpdate():该方法在组件更新后立即调用。我们可以使用这种方法在渲染后执行一次代码块。初始渲染不调用它。
Note: The methods below are considered legacy and should be avoided in new code.- componentWillUpdate() – 在渲染组件之前收到新的道具或状态时调用此方法。它可用于在更新发生之前进行准备。如果 shouldComponentUpdate() 返回 false,则不会调用它。初始渲染不调用此方法。
Javascript
componentWillUpdate() {
    this.setState({ name: "Component will update." });
}
- componentWillRecieveProps() - 在已安装的组件接收到新道具之前调用此方法。要使用“ this.setState()”方法执行状态转换,如果我们想要更新状态以响应 prop 更改,我们应该比较“ this.props”和 nextProps。 React 仅在某些组件的 props 更新时才调用此方法。在安装阶段,它不会使用初始道具调用此方法。
Javascript
componentWillReceiveProps(nextProps) {
    console.log('componentWillReceiveProps', nextProps);
    this.setState(nextProps);
}
4. 卸载:这是 React 组件生命周期的第四个也是最后一个阶段。当组件的实例从 DOM 中卸载和销毁时调用它。此阶段仅包含一个方法。
- componentWillUnmount():在永久卸载和销毁组件之前立即调用此方法。它执行必要的清理任务,例如事件侦听器、清理 DOM 元素、使计时器无效或取消网络请求。卸载实例后,我们无法再次安装组件。
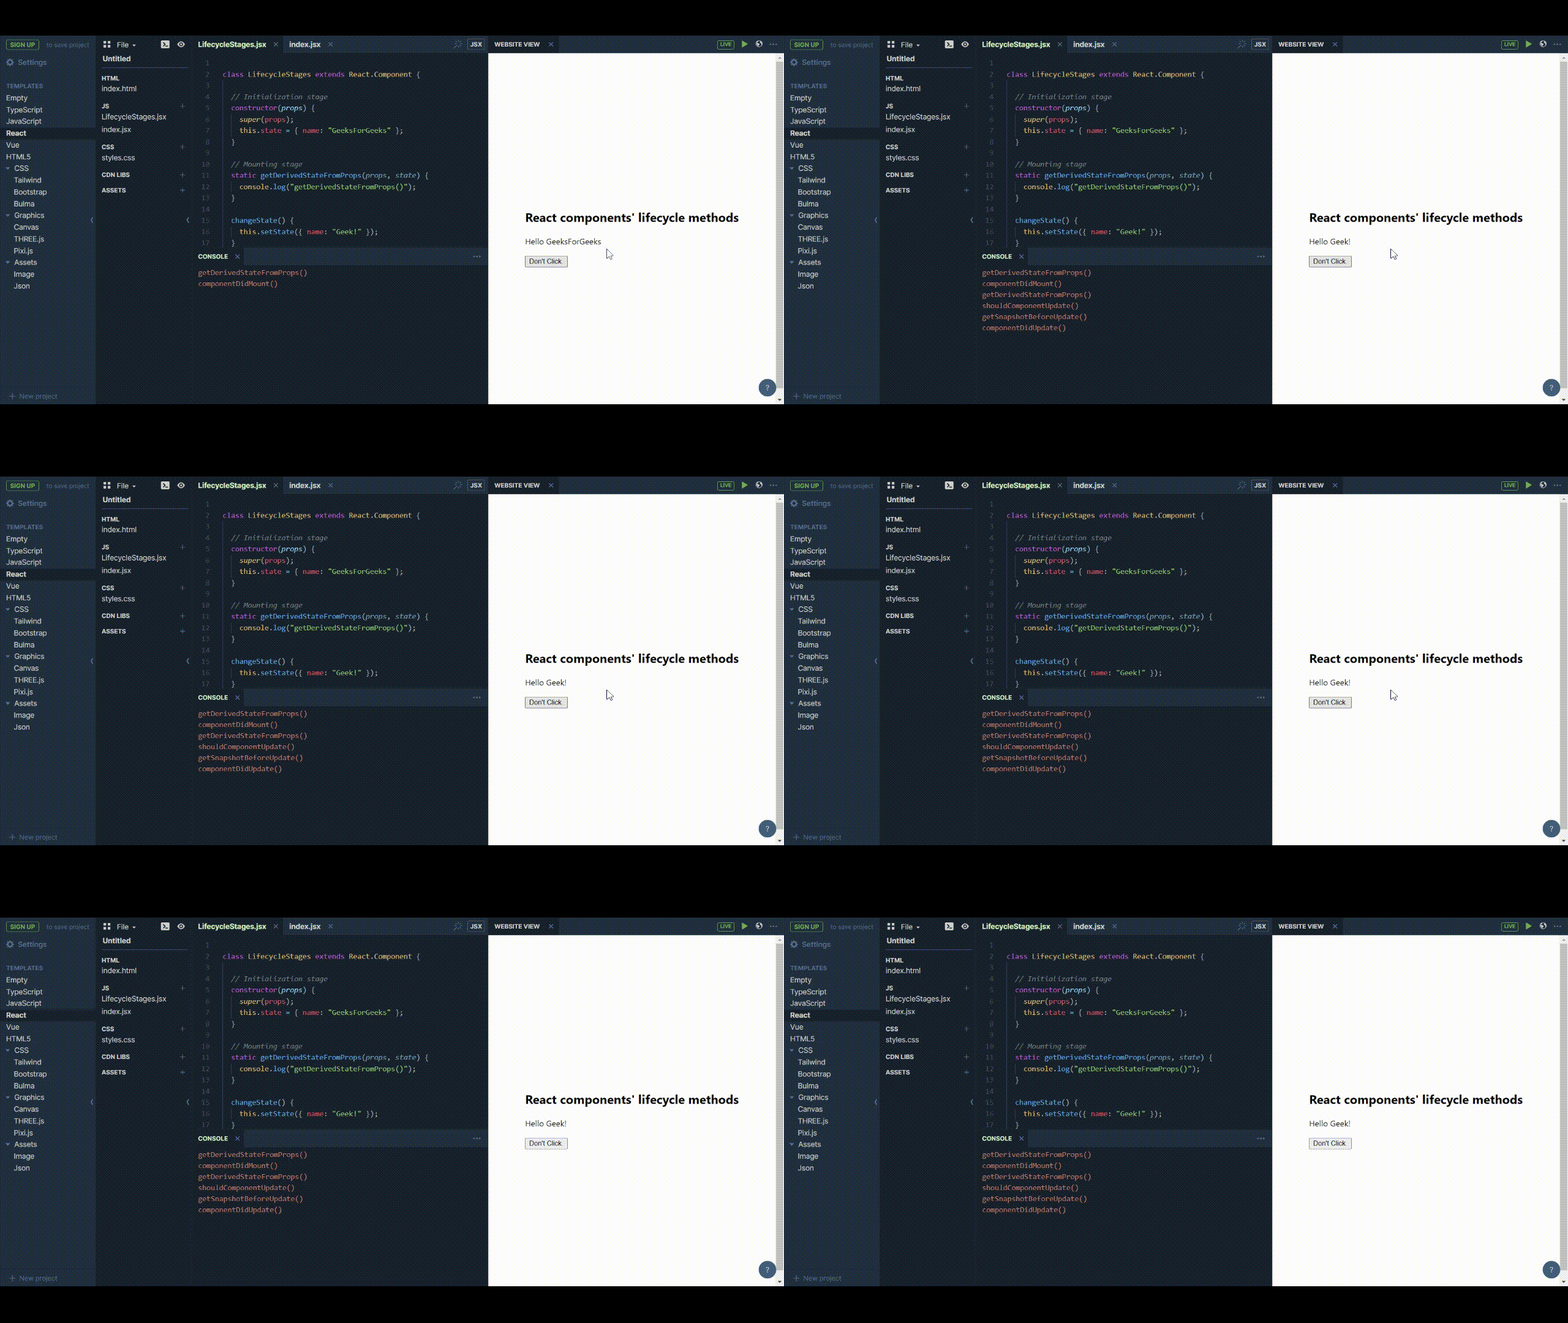
示例:让我们看一下下面的代码片段,它展示了我们迄今为止阅读的大多数生命周期方法的演示。
首先,创建一个 react 应用程序并从 src 文件夹中打开 index.js 文件。
src/index.js
Javascript
import React from 'react';
import ReactDOM from 'react-dom';
class LifecycleStages extends React.Component {
// Initialization stage
constructor(props) {
super(props);
this.state = { name: "GeeksForGeeks" };
}
// Mounting stage
static getDerivedStateFromProps(props, state) {
console.log("getDerivedStateFromProps()");
}
changeState() {
this.setState({ name: "Geek!" });
}
render() {
return (
React components' lifecycle methods
Hello {this.state.name}
);
}
componentDidMount() {
console.log("componentDidMount()");
}
componentWillMount() {
console.log("componentDidMount()");
}
// Updating stage
shouldComponentUpdate(newProps, newState) {
console.log("shouldComponentUpdate()");
return true;
}
getSnapshotBeforeUpdate(prevProps, prevState) {
console.log("getSnapshotBeforeUpdate()");
}
componentDidUpdate(prevProps, prevState) {
console.log("componentDidUpdate()");
}
// Unmounting stage
componentWillUnmount() {
console.log("Component will unmount.");
}
}
export default LifecycleStages;
运行应用程序的步骤:打开终端并键入以下命令。
npm start输出:
