Angular10 状态动画
在本文中,我们将了解 Angular 10 中的状态是什么以及如何使用它。
Angular10 中的State用于创建包含动画状态和过渡的动画触发器。
句法:
State(name, style, options)NgModule: State 使用的模块是:
- 动画
方法:
- 创建一个需要使用的 Angular 应用程序。
- 在 app.module.ts 中,导入 BrowserAnimationsModule。
- 在 app.component.html 中,创建一个包含动画元素的 div。
- 在 app.component.ts 中,导入要使用的触发器、状态、样式、过渡、动画。
- 使状态包含动画的名称和样式。
- 使用 ng serve 为 Angular 应用程序提供服务以查看输出。
参数:
- 名称:设置一个识别字符串。
- 样式:一组与状态相关的 CSS 样式。
- options:调用状态时可以传递给状态的参数。
返回值:
- AnimationStateMetadata:封装新状态数据的对象。
例子:
app.module.ts
import { LOCALE_ID, NgModule }
from '@angular/core';
import { BrowserModule }
from '@angular/platform-browser';
import {BrowserAnimationsModule}
from '@angular/platform-browser/animations';
import { AppRoutingModule }
from './app-routing.module';
import { AppComponent }
from './app.component';

@NgModule({
  declarations: [
    AppComponent
  ],
  imports: [
    BrowserModule,
    AppRoutingModule,
    BrowserAnimationsModule
  ],
  providers: [
      { provide: LOCALE_ID, useValue: 'en-GB' },
  ],
  bootstrap: [AppComponent]
})
export class AppModule { }
app.component.ts
import {
  // State is imported here
  trigger,
  state,
  style,
  transition,
  animate } from '@angular/animations';
import { Component } from '@angular/core';

@Component({
  selector: 'app-root',
  templateUrl: './app.component.html',
  styleUrls: [ './app.component.css' ],
  animations: [

    trigger('geek',[

      // State is used here
      state('clr', style({
        'background-color': '#91fff4',
        transform: 'translateX(0)'
      })),

      // State is used here
      state('clr1', style({
        'background-color': '#7356a8',
        transform: 'translateX(100px)'
      })),
      transition('clr => clr1',animate(1200)),
      transition('clr1 => clr',animate(1000))
    ])
  ]
})
export class AppComponent  {
  state = 'clr';
  anim(){
    this.state == 'clr' ?
    this.state = 'clr1' : this.state = 'clr';
  }
}
app.component.html
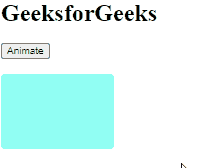
GeeksforGeeks
app.component.ts
import {
  // State is imported here
  trigger,
  state,
  style,
  transition,
  animate } from '@angular/animations';
import { Component } from '@angular/core';

@Component({
  selector: 'app-root',
  templateUrl: './app.component.html',
  styleUrls: [ './app.component.css' ],
  animations: [

    trigger('geek',[

      // State is used here
      state('clr', style({
        'background-color': '#91fff4',
        transform: 'translateX(0)'
      })),

      // State is used here
      state('clr1', style({
        'background-color': '#7356a8',
        transform: 'translateX(100px)'
      })),
      transition('clr => clr1',animate(1200)),
      transition('clr1 => clr',animate(1000))
    ])
  ]
})
export class AppComponent  {
  state = 'clr';
  anim(){
    this.state == 'clr' ?
    this.state = 'clr1' : this.state = 'clr';
  }
}
app.component.html
GeeksforGeeks