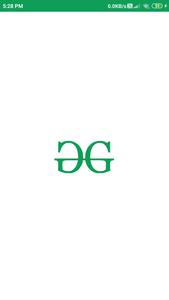
图像,图形和矢量以非常有用的方式告诉很多信息,因此吸引了众多用户。 Android中的ImageView用于显示可绘制或位图形式的不同类型的图像。在本文中,我们将介绍使用Jetpack Compose在Android中实现ImageView的方法。
ImageView小部件的属性
|
Attributes |
Description |
|---|---|
| imageVector | to add an image from Drawable resource inside our imageview |
| bitmap | to add a bitmap for your image inside imageview. |
| modifier | to add padding to imageview |
| contentScale | to add scaling to our image to fit our image inside imageview |
| alpha | to add alpha to our imageview. |
| colorFilter | to add colors to our imageview. |
| blendMode | to add color effects to our imageview. |
分步实施
步骤1:创建一个新项目
要在Android Studio Canary版本中创建新项目,请参阅如何使用Jetpack Compose在Android Studio Canary版本中创建新项目。
步骤2:将图像添加到可绘制的文件夹
创建新项目后,我们必须在可绘制文件夹中添加一个图像,以便在ImageView中显示该图像。从文件夹位置复制图像,然后进入我们的项目。在我们的项目中,导航到app> res> drawable>右键单击drawable文件夹,然后将图像粘贴到该文件夹中。
步骤3:使用MainActivity.kt文件
添加此图像后,导航至应用程序> Java > MainActivity.kt ,并向其添加以下代码。在代码内添加了注释,以进行详细说明。
Kotlin
package com.example.edittext

import android.os.Bundle
import androidx.appcompat.app.AppCompatActivity
import androidx.compose.foundation.Image
import androidx.compose.foundation.layout.*
import androidx.compose.material.MaterialTheme
import androidx.compose.material.Surface
import androidx.compose.runtime.Composable
import androidx.compose.ui.Alignment
import androidx.compose.ui.layout.ContentScale
import androidx.compose.ui.platform.setContent
import androidx.compose.ui.res.imageResource
import androidx.compose.ui.tooling.preview.Preview
import androidx.compose.ui.Modifier
import androidx.compose.ui.unit.Dp

import com.example.edittext.ui.EditTextTheme

class MainActivity : AppCompatActivity() {
    override fun onCreate(savedInstanceState: Bundle?) {
        super.onCreate(savedInstanceState)
        setContent {
            EditTextTheme {
                // A surface container using the
                // 'background' color from the theme
                Surface(
                        // to add background color for our screen.
                        color = MaterialTheme.colors.background,
                ) {
                    // at below line we are calling
                    // our function for image view.
                    Img();
                }
            }
        }
    }
}

@Composable
fun Img() {

    Column(
            // we are using column to align our
            // imageview to center of the screen.
            modifier = Modifier.fillMaxWidth().fillMaxHeight(),

            // below line is used for specifying
            // vertical arrangement.
            verticalArrangement = Arrangement.Center,

            // below line is used for specifying
            // horizontal arrangement.
            horizontalAlignment = Alignment.CenterHorizontally,
    ) {
        // below line is used for creating a variable
        // for our image resource file.
        val img = imageResource(id = R.drawable.gfgimage)

        // below line is used for creating a modifier for our image
        // which includes image width and image height
        val modifier = Modifier.preferredHeight(height = Dp(200F)).preferredWidth(width = Dp(200F))
        // below is the widget for image.
        Image(
                // first parameter of our Image widget
                // is our image path which we have created
                // above and name it as img.
                img,

                // below line is used to give
                // alignment to our image view.
                alignment = Alignment.Center,

                // below line is used to scale our image
                // we are using center crop for it.
                contentScale = ContentScale.Crop,

                // below line is used to add modifier
                // to our image. we are adding modifier
                // which we have created above and name
                // it as modifier.
                modifier = modifier
        )

    }
}


// @Preview function is use to see preview
// for our composable function in preview section.
@Preview
@Composable
fun DefaultPreview() {
    MaterialTheme {
        // we are passing our composable
        // function to display its preview.
        Img()
    }
}
输出:

想要一个节奏更快,更具竞争性的环境来学习Android的基础知识吗?
单击此处前往由我们的专家精心策划的指南,以使您立即做好行业准备!