Android – Jetpack Compose 中的互操作性
在 Jetpack compose 中创建 UI 很有趣,但如果我们想在我们的应用程序中编写一些 Jetpack compose 尚不支持的功能(如谷歌地图、admob)或一些尚未支持的第三方库,它可能会成为障碍迁移到 Compose。幸运的是,Jetpack Compose 支持各种互操作性 API ,以利用 Jetpack compose 中的传统视图,反之亦然。在本文中,我们将在我们的可组合中使用传统的 android视图。
先决条件:
- Jetpack Compose 的知识。
- Kotlin 知识
- 了解Android的View。
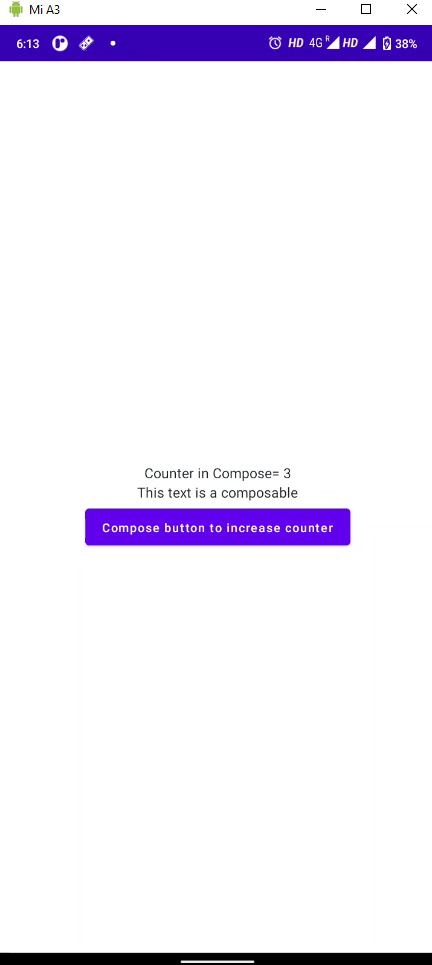
我们将首先编写一个增加计数器按钮的简单撰写应用程序。
分步实施
第 1 步:创建一个新项目
首先在 Android Studio 中创建一个新的 compose 项目。打开 Android Studio 并创建一个新的 compose 项目。
第 2 步:使用 MainActivity.kt 文件
创建一个可组合函数并编写以下代码来制作计数器。
Kotlin
@Composable
fun InteroperabilityExample() {
    // A count state variable
    var counter by remember {
        mutableStateOf(0)
    }

    // Column
    Column(
        Modifier.fillMaxSize(),
        // center the children
        horizontalAlignment = Alignment.CenterHorizontally,
        verticalArrangement = Arrangement.Center
    ) {

        // Text Composable showing current counter
        Text("Counter in Compose= $counter")
        Text(text = "This text is a composable")

        // Button to change the counter
        Button(onClick = { counter++ }) {
            Text(text = "Compose button to increase counter")
        }
    }
}
Kotlin
class MainActivity : ComponentActivity() {
    override fun onCreate(savedInstanceState: Bundle?) {
        super.onCreate(savedInstanceState)
        setContent {
            JetpackComposeInteropTheme(darkTheme = false) {
                Surface(
                    modifier = Modifier.fillMaxSize(),
                    color = MaterialTheme.colors.background
                ) {
                      // Out Composable function
                      InteroperabilityExample()
                }
            }
        }
    }
}
XML
Kotlin
AndroidView(
         actory = { context ->

                // Linear layout in view system
                LinearLayout(context).apply {

                    // setting orientation to vertical
                    orientation = LinearLayout.VERTICAL

                    // adding text view to layout
                    // using [addView] provided by [ViewGroup]
                    addView(

                        // TextView from View system
                        // creating text view and using apply
                        // scope function to add properties to text view
                        TextView(context).apply {
                            // setting text
                            text = "This is a Traditional text view "
                            // aligning text to center
                            textAlignment = TextView.TEXT_ALIGNMENT_CENTER
                            // setting text color
                            setTextColor(resources.getColor(R.color.black))

                        })

                    // adding text to display Counter
                    addView(
                        // Another textView from View System
                        TextView(context).apply {
                            // setting text
                            text = "Counter in view = $counter"
                            // assign Id to text view
                            id = R.id.counter1
                            // aligning text to center
                            textAlignment = TextView.TEXT_ALIGNMENT_CENTER
                            // setting text color
                            setTextColor(resources.getColor(R.color.black))

                        })

                    // Add another view to layout : Button
                    addView(

                        android.widget.Button(context).apply {
                            // setting text
                            text = "Traditional button to increase counter"
                            // setting text color
                            setTextColor(resources.getColor(R.color.white))
                            // set background color
                            setBackgroundColor(resources.getColor(R.color.purple_500))
                            // some padding to button
                            setPadding(20, 20, 20, 20)
                            // on click listener
                            setOnClickListener {
                                counter++
                            }

                        })
                }
            },
            // The callback to be invoked after the layout is inflated.
            update = {
                // update counter when count changes
                it.findViewById(R.id.counter1).text = "Counter is $counter"
            },
            // we can use modifier in AndroidView
            // setting green border
            modifier = Modifier.border(3.dp, Color.Green)
        )
并从设置的内容中调用这个可组合的
科特林
class MainActivity : ComponentActivity() {
    override fun onCreate(savedInstanceState: Bundle?) {
        super.onCreate(savedInstanceState)
        setContent {
            JetpackComposeInteropTheme(darkTheme = false) {
                Surface(
                    modifier = Modifier.fillMaxSize(),
                    color = MaterialTheme.colors.background
                ) {
                      // Out Composable function
                      InteroperabilityExample()
                }
            }
        }
    }
}
当我们运行这个应用程序时,我们会看到一个简单的计数器应用程序,当我们单击按钮时它会增加计数器

现在我们将在这个可组合函数中添加传统视图并增加相同的计数器。在此之前,我们需要创建ids.xml以使用 id 引用视图来更新 Textview 中的数据。展开 res > values 并右键单击它, new > Value Resource file并创建一个名为ids.xml的文件,然后将其写入即可。
XML
在 Button Composable 下方添加此代码以在 Composable 中添加 View
科特林
AndroidView(
         actory = { context ->

                // Linear layout in view system
                LinearLayout(context).apply {

                    // setting orientation to vertical
                    orientation = LinearLayout.VERTICAL

                    // adding text view to layout
                    // using [addView] provided by [ViewGroup]
                    addView(

                        // TextView from View system
                        // creating text view and using apply
                        // scope function to add properties to text view
                        TextView(context).apply {
                            // setting text
                            text = "This is a Traditional text view "
                            // aligning text to center
                            textAlignment = TextView.TEXT_ALIGNMENT_CENTER
                            // setting text color
                            setTextColor(resources.getColor(R.color.black))

                        })

                    // adding text to display Counter
                    addView(
                        // Another textView from View System
                        TextView(context).apply {
                            // setting text
                            text = "Counter in view = $counter"
                            // assign Id to text view
                            id = R.id.counter1
                            // aligning text to center
                            textAlignment = TextView.TEXT_ALIGNMENT_CENTER
                            // setting text color
                            setTextColor(resources.getColor(R.color.black))

                        })

                    // Add another view to layout : Button
                    addView(

                        android.widget.Button(context).apply {
                            // setting text
                            text = "Traditional button to increase counter"
                            // setting text color
                            setTextColor(resources.getColor(R.color.white))
                            // set background color
                            setBackgroundColor(resources.getColor(R.color.purple_500))
                            // some padding to button
                            setPadding(20, 20, 20, 20)
                            // on click listener
                            setOnClickListener {
                                counter++
                            }

                        })
                }
            },
            // The callback to be invoked after the layout is inflated.
            update = {
                // update counter when count changes
                it.findViewById(R.id.counter1).text = "Counter is $counter"
            },
            // we can use modifier in AndroidView
            // setting green border
            modifier = Modifier.border(3.dp, Color.Green)
        )
现在,当您运行此应用程序时,您将看到下面的 View System 中的 LinearLayout、TextView、Button 组成 Text 和 Button。

当您单击任何按钮时,它将增加相同的计数器并更新 Composable 和 TextView。

使用 AndroidView,我们还可以在我们的撰写应用程序中添加诸如谷歌地图、Admob 之类的库。