React Native Flexbox justifyContent 属性
在本文中,我们将看到 React Native 中 flexbox 的 justifyContent 属性。 Flexbox 具有三个主要属性。其中之一是 justifyContent。 justifyContent 属性用于确定子组件应如何在其容器的主轴内对齐。它可以在容器内水平或垂直对齐子项。如果 flexDirection 设置为 row,则对齐将是水平的,否则它将在容器内垂直对齐。
句法:
justify-content: flex-start|flex-end|center|space-between|
space-around|space-evenly;
属性值:
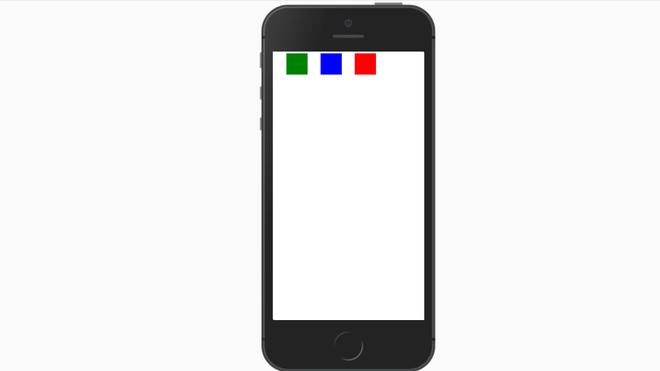
- flex-start: justifyContent 的默认值。它用于从容器的开头对齐弹性项目或子组件。
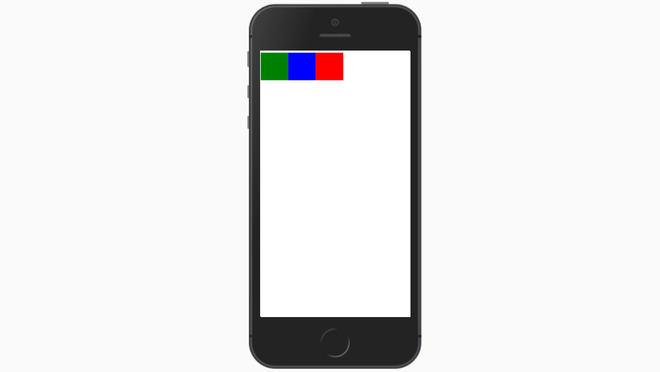
- flex-end:它的作用与flex-start相反。它用于对齐容器末端的子组件。
- center:将子组件对齐在容器的中心。
- space-between:子组件以相等的间距放置,其中项目被推入开始,最后一项被推至结束。
- space-around:子组件之间的空间和角落的空间是相同的。
- space-evenly:子组件以相等的间距定位,但与角落的间距不同。
现在让我们从实现开始:
第 1 步:打开终端并通过以下命令安装 expo-cli。
npm install -g expo-cli第2步:现在通过以下命令创建一个项目。
expo init myapp第 3 步:现在进入您的项目文件夹,即 myapp
cd myapp
项目结构:它将如下所示。
示例:在此示例中,flex 方向设置为 row,justifyContent 为 flex-start。
App.js
import React, { Component } from 'react'
import { View, StyleSheet } from 'react-native'

const App = (props) => {
   return (


   )
}
export default App;

const styles = StyleSheet.create ({
   container: {
      flexDirection: 'row',
      justifyContent: 'flex-start',
      marginTop:10,
      height: 600
   },
   item:{
     width:120,
     height:120
   }
})
使用以下命令启动服务器。
npm run android输出:如果你的模拟器没有自动打开,那么你需要手动打开。首先,去你的安卓工作室并运行模拟器。现在再次启动服务器。
现在我们将保持整个代码不变,只需更改 justifyContent 属性值即可查看更改,如下所示:
属性flex-end插图,使用如下语法:
justifyContent: 'flex-end',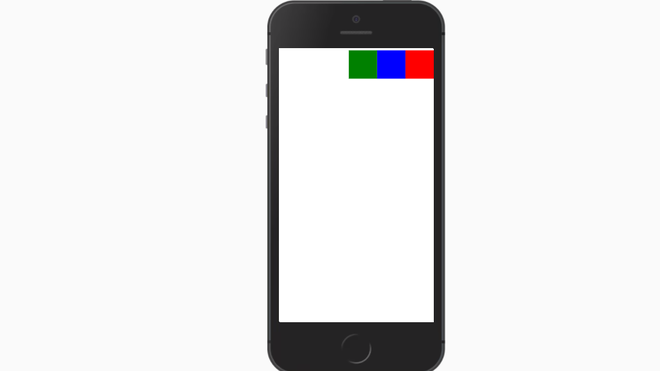
属性中心插图,使用以下语法:
justifyContent: 'center',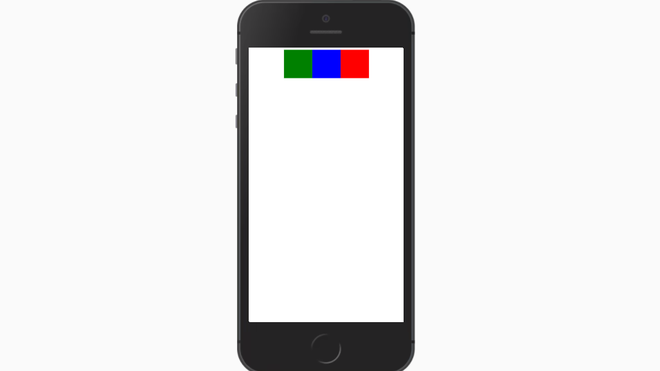
属性space-between插图,使用以下语法:
justifyContent: 'space-between',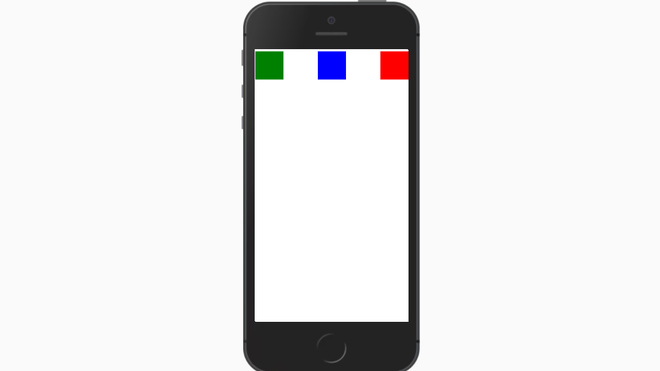
属性空间周围的插图,使用以下语法:
justifyContent: 'space-around',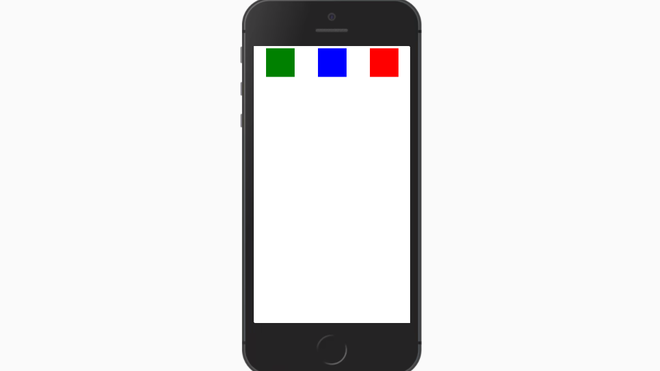
属性空间-均匀插图,使用以下语法:
justifyContent: 'space-evenly',