ElectronJS 中的桌面操作
ElectronJS是一个开源框架,用于使用能够在 Windows、macOS 和 Linux 操作系统上运行的 HTML、CSS 和 JavaScript 等 Web 技术构建跨平台原生桌面应用程序。它将 Chromium 引擎和 NodeJS 组合成一个单一的运行时。
Electron 可以与本地 OS 环境进行交互,例如文件系统、系统托盘等。 Electron 为我们提供了内置的Shell模块,它有助于使用它们的默认应用程序在本地 OS 环境中管理文件和 URL。该模块提供与桌面集成相关的功能,如打开外部链接、创建快捷方式、读取快捷方式等。Shell 模块可以直接在应用程序的主进程和渲染进程中使用。本教程将使用 Electron 中的 Shell 模块演示桌面集成。
我们假设您熟悉上述链接中涵盖的先决条件。为了使 Electron 正常工作,需要在系统中预先安装node和npm 。
- 项目结构:
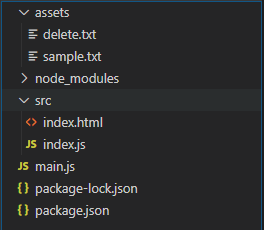
- 示例.txt:
This is a Sample Text file- 删除.txt:
Sample Text FIle to delete示例:我们将首先按照给定的步骤构建基本的电子应用程序。
- 第 1 步:导航到空目录以设置项目,然后运行以下命令,
npm init生成package.json文件。如果没有安装Electron ,请使用 npm 安装。
npm install electron --save-dev此命令还将创建package-lock.json文件并安装所需的node_modules依赖项。成功安装 Electron 后,打开package.json文件并在“scripts”键下执行必要的更改。
包.json:
{
  "name": "electron-DesktopOperation",
  "version": "1.0.0",
  "description": "Desktop Operations in Electron",
  "main": "main.js",
  "scripts": {
    "start": "electron"
  },
  "keywords": [
    "electron"
  ],
  "author": "Radhesh Khanna",
  "license": "ISC",
  "dependencies": {
    "electron": "^8.2.5"
  }
}- 第二步:根据项目结构创建一个main.js文件。该文件是主进程并充当应用程序的入口点。复制以下链接中给出的main.js文件的样板代码。我们将修改代码以满足我们的项目需求。
主.js:
Javascript
const { app, BrowserWindow } = require('electron')

function createWindow() {
  // Create the browser window.
  const win = new BrowserWindow({
    width: 800,
    height: 600,
    webPreferences: {
      nodeIntegration: true
    }
  })

  // Load the index.html of the app.
  win.loadFile('src/index.html')

  // Open the DevTools.
  win.webContents.openDevTools()
}

// This method will be called when Electron has finished
// initialization and is ready to create browser windows.
// Some APIs can only be used after this event occurs.
app.whenReady().then(createWindow)

// Quit when all windows are closed.
app.on('window-all-closed', () => {
  // On macOS it is common for applications and their menu bar
  // To stay active until the user quits explicitly with Cmd + Q
  if (process.platform !== 'darwin') {
    app.quit()
  }
})

app.on('activate', () => {
  // On macOS it's common to re-create a window in the app when the
  // dock icon is clicked and there are no other windows open.
  if (BrowserWindow.getAllWindows().length === 0) {
    createWindow()
  }
})

// In this file, you can include the rest of your app's specific
// main process code. You can also put them in separate files and
// require them here.
HTML
Hello World!
Hello World!
We are using node
, Chrome
, and Electron
.
HTML
Desktop Integrations in Electron using Shell Module
Javascript
const electron = require('electron');
const path = require('path');

// Importing the Shell Module from the electron
// in the Renderer Process
const shell = electron.shell;

var external = document.getElementById('external');
var externalOptions = {

    // Supported by macOS only
    activate: true,
}

external.addEventListener('click', (event) => {

    // Returns a Promise, Hence we can use
    // the .then( function() {} )
    shell.openExternal(
        'https://www.geeksforgeeks.org/', externalOptions)
        .then(() => {
            console.log('Link Opened Successfully');
        });
});

var mail = document.getElementById('mail');

mail.addEventListener('click', (event) => {

    // Resolving the External URL to the Default Mail Agent
    // Because we have specified 'mailto'
    shell.openExternal(
        'mailto: https://www.geeksforgeeks.org/', externalOptions)
        .then(() => {
        console.log('Link Opened Successfully');
    });
});
HTML
Javascript
var show = document.getElementById('show');

show.addEventListener('click', (event) => {
    // Providing a dynamic file path to the 'sample.txt'
    // file in the 'assets' Folder. Using the path Module.
    // '__dirname' automatically detects current working directory
    shell.showItemInFolder(path.join(__dirname, '../assets/sample.txt'));
});
HTML
Javascript
var open = document.getElementById('open');

open.addEventListener('click', (event) => {
    var success = shell.openItem(path.join(__dirname,
         '../assets/sample.txt'));

    console.log('File Opened Successfully - ', success);
});
HTML
Javascript
var deleteItem = document.getElementById('delete');

deleteItem.addEventListener('click', (event) => {
    // Play the Native OS Beep Sound
    shell.beep();

    // Returns a Boolean Value
    var success = shell.moveItemToTrash(path.join(__dirname,
             '../assets/delete.txt'), true);

    console.log('File Deleted Successfully - ', success);
});
HTML
Javascript
var create = document.getElementById('create');

var shortcutDetails = {
    // Defining the target File as the 'sample.txt' File
    target: path.join(__dirname, '../assets/sample.txt'),

    // Current Working Directory is 'assets' folder
    cwd: path.join(__dirname, '../assets/'),
    args: "Passing Arguments",
    // Shown as Tooltip
    description: "Shortcut for sample.txt file",

    // Defining the icon for shortcut as the
    // 'notepad.exe' file
    // Instead of the System Default icon
    icon: "C://Windows//System32//notepad.exe",

    // Keeping the default value of iconIndex for the
    // 'notepad.exe' file icon to take effect
    iconIndex: 0,
    appUserModelId: "",
}
create.addEventListener('click', (event) => {

    // Desktop - C:\\Users\\radhesh.khanna\\Desktop\\sample-shortcut.lnk
    // Specifying the name of the Shortcut while creation
    var success = shell.writeShortcutLink(path.join(__dirname,
     '../assets/sample-shortcut.lnk'), 'create', shortcutDetails);

    console.log('Shortcut Created Successfully - ', success);
});
HTML
Javascript
var read = document.getElementById('read');

// Defining a textarea to display the 'shortcutDetails' Object
var textArea = document.getElementById('textarea');

read.addEventListener(('click'), (event) => {
    var object = shell.readShortcutLink(path.join(__dirname,
             '../assets/sample-shortcut.lnk'));

    // Object Returned is in JSON format, using 'JSON.stringify()'
    // method to convert to String
    console.log(object);
    textArea.innerHTML = JSON.stringify(object);
});- 第 3 步:在src目录中创建index.html文件。我们还将从上述链接复制index.html文件的样板代码。我们将修改代码以满足我们的项目需求。
索引.html:
HTML
Hello World!
Hello World!
We are using node
, Chrome
, and Electron
.
- 输出:此时,我们的基本电子应用程序已设置完毕。要启动 Electron 应用程序,请运行以下命令:
npm start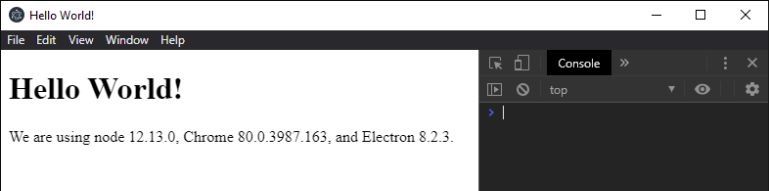
Electron 中的 Shell 模块:所有的 Shell 模块都通过以下示例进行说明:
1. shell.openExternal(url, options):以系统默认方式打开外部URL。我们可以传递外部链接或邮件 ID,它将根据提供的协议进行解析。
shell.OpenExternal(url, options)返回一个Promise 。它接受以下参数,
- url: String要解析的外部 URL。 Windows 中最多允许 2081 个字符。 URL 将根据系统默认行为进行解析。
- options: Object (可选)它是一个由以下参数组成的对象,
- activate: Boolean仅macOS支持。它用于将打开的应用程序带到前台。默认设置为true 。
index.html:在该文件中添加以下代码段。
HTML
Desktop Integrations in Electron using Shell Module
index.js:在该文件中添加以下代码段。
Javascript
const electron = require('electron');
const path = require('path');

// Importing the Shell Module from the electron
// in the Renderer Process
const shell = electron.shell;

var external = document.getElementById('external');
var externalOptions = {

    // Supported by macOS only
    activate: true,
}

external.addEventListener('click', (event) => {

    // Returns a Promise, Hence we can use
    // the .then( function() {} )
    shell.openExternal(
        'https://www.geeksforgeeks.org/', externalOptions)
        .then(() => {
            console.log('Link Opened Successfully');
        });
});

var mail = document.getElementById('mail');

mail.addEventListener('click', (event) => {

    // Resolving the External URL to the Default Mail Agent
    // Because we have specified 'mailto'
    shell.openExternal(
        'mailto: https://www.geeksforgeeks.org/', externalOptions)
        .then(() => {
        console.log('Link Opened Successfully');
    });
});
输出:
2. shell.showItemInFolder(path):解析给定的字符串文件路径并在Windows/文件资源管理器中显示文件。如果可能,请同时选择该文件。此方法没有任何返回类型。
index.html:在该文件中添加以下代码段。
HTML
index.js:在该文件中添加以下代码段。
Javascript
var show = document.getElementById('show');

show.addEventListener('click', (event) => {
    // Providing a dynamic file path to the 'sample.txt'
    // file in the 'assets' Folder. Using the path Module.
    // '__dirname' automatically detects current working directory
    shell.showItemInFolder(path.join(__dirname, '../assets/sample.txt'));
});
输出:

3. shell.openItem(path):解析给定的String文件路径,并以系统默认方式打开文件。它返回一个布尔值,说明文件是否成功打开。
index.html:在该文件中添加以下代码段。
HTML
index.js:在该文件中添加以下代码段。
Javascript
var open = document.getElementById('open');

open.addEventListener('click', (event) => {
    var success = shell.openItem(path.join(__dirname,
         '../assets/sample.txt'));

    console.log('File Opened Successfully - ', success);
});
输出:
4. shell.beep():播放Native OS Sound。此方法没有任何返回类型。在本教程中,它与shell.moveItemToTrash()方法结合使用。
5. shell.moveItemToTrash(path, deleteFailure):解析给定的String文件路径并将指定的文件移动到Trash/Bin。返回一个布尔值,说明文件是否成功移动到垃圾箱。
shell.moveItemToTrash(path, delete)返回一个布尔值。它接受以下参数,
- path: String要解析的文件路径。
- deleteFailure: Boolean (可选)仅macOS支持。它表示在系统禁用或不支持垃圾箱的情况下是否从系统中完全删除文件。
index.html:在该文件中添加以下代码段。
HTML
index.js:在该文件中添加以下代码段。
Javascript
var deleteItem = document.getElementById('delete');

deleteItem.addEventListener('click', (event) => {
    // Play the Native OS Beep Sound
    shell.beep();

    // Returns a Boolean Value
    var success = shell.moveItemToTrash(path.join(__dirname,
             '../assets/delete.txt'), true);

    console.log('File Deleted Successfully - ', success);
});
输出:
6. shell.writeShortcutLink(path, operation, options):此操作仅在Windows中支持。解析给定的字符串路径并在该路径创建/更新快捷方式链接。它返回一个布尔值,说明指定的操作是否成功执行。
shell.writeShortcutLink(path, operations, options)返回一个布尔值。它接受以下参数,
- path: String定义要执行的操作的快捷方式的路径。
- 操作:字符串(可选)指定要执行的操作。操作的默认值为create 。它可以具有以下任何值,
- create:创建一个新的快捷方式。必要时执行覆盖。
- 更新:更新现有快捷方式的指定属性。
- 替换:覆盖现有的快捷方式。如果快捷方式不存在,此操作将失败。
- Options:它是一个shortcutDetails对象,由以下参数组成,
- target: String应该从此快捷方式启动的目标文件。
- cwd:字符串(可选)指定当前工作目录。默认值为空。
- args: String (可选)从快捷方式启动时要传递并应用于目标文件的参数。默认值为空。
- description: String (可选)快捷方式的描述。默认值为空。将鼠标悬停在创建的快捷方式上时,值显示为工具提示。
- icon: String (可选)要使用的图标的路径。它可以是.dll或.exe文件。 icon属性和iconIndex属性必须一起指定。图标属性的默认值是空的,它反过来使用默认目标图标或系统中定义的应该使用的图标。在本教程中,我们为.txt文件创建了一个快捷方式。它具有系统预定义的图标,但我们通过指定系统中的notepad.exe路径将其更改为记事本文件的图标。
- iconIndex: Number (可选)图标属性为.dll或.exe文件时图标的资源 ID。 iconIndex属性的默认值为 0。在本教程中,我们将 iconIndex 属性保持为 0 以使notepad.exe文件图标生效。
- appUserModelId:字符串(可选)应用程序用户模型 ID。默认值为空。
index.html:在该文件中添加以下代码段。
HTML
index.js:在该文件中添加以下代码段。
Javascript
var create = document.getElementById('create');

var shortcutDetails = {
    // Defining the target File as the 'sample.txt' File
    target: path.join(__dirname, '../assets/sample.txt'),

    // Current Working Directory is 'assets' folder
    cwd: path.join(__dirname, '../assets/'),
    args: "Passing Arguments",
    // Shown as Tooltip
    description: "Shortcut for sample.txt file",

    // Defining the icon for shortcut as the
    // 'notepad.exe' file
    // Instead of the System Default icon
    icon: "C://Windows//System32//notepad.exe",

    // Keeping the default value of iconIndex for the
    // 'notepad.exe' file icon to take effect
    iconIndex: 0,
    appUserModelId: "",
}
create.addEventListener('click', (event) => {

    // Desktop - C:\\Users\\radhesh.khanna\\Desktop\\sample-shortcut.lnk
    // Specifying the name of the Shortcut while creation
    var success = shell.writeShortcutLink(path.join(__dirname,
     '../assets/sample-shortcut.lnk'), 'create', shortcutDetails);

    console.log('Shortcut Created Successfully - ', success);
});
输出:
7. shell.readShortcutLink(path):此操作仅在Windows中支持。解析给定的字符串路径并读取路径中指定的快捷方式。此方法返回shortcutDetails对象。上面在创建快捷方式时解释了此对象。如果发生错误,将抛出异常。在本教程中,我们将读取并显示我们在上面为sample.txt文件创建的相同快捷方式(sample-shortcut.lnk)的快捷方式详细信息对象。
index.html:在该文件中添加以下代码段。
HTML
index.js:在该文件中添加以下代码段。
Javascript
var read = document.getElementById('read');

// Defining a textarea to display the 'shortcutDetails' Object
var textArea = document.getElementById('textarea');

read.addEventListener(('click'), (event) => {
    var object = shell.readShortcutLink(path.join(__dirname,
             '../assets/sample-shortcut.lnk'));

    // Object Returned is in JSON format, using 'JSON.stringify()'
    // method to convert to String
    console.log(object);
    textArea.innerHTML = JSON.stringify(object);
});
输出:
