Python| Kivy 中的页面布局使用 .kv 文件
Kivy 是Python中一个独立于平台的 GUI 工具。因为它可以在Android、IOS、linux和Windows等平台上运行。它基本上是用来开发Android应用程序的,但这并不意味着它不能在桌面应用程序上使用。
Kivy Tutorial – Learn Kivy with Examples.
页面布局:
PageLayout 的工作方式与其他布局不同。它是一种动态布局,从某种意义上说,它允许使用其边框翻阅页面。这个想法是它的组件彼此堆叠在一起,我们可以看到最上面的那个。
PageLayout 类似于副本的页面,我们可以向右或向左移动/更改页面。
PageLayout 类用于创建简单的多页布局,允许使用边框轻松从一个页面翻转到另一个页面。
要使用 PageLayout,您必须通过以下命令导入它:
from kivy.uix.pagelayout import PageLayout笔记:
PageLayout 当前不支持 size_hint、size_hint_min、size_hint_max 或 pos_hint 属性。这意味着我们不能在页面布局中使用所有这些。
例子:
PageLayout:
    Button:
        text: 'page1'
    Button:
        text: 'page2'
    Button:
        text: 'page3'
从一页到下一页的转换是通过从右侧或左侧的边界区域向内滑动来实现的。如果您想在一个页面上使用多个小部件,请使用布局来执行此操作。理想情况下,每个页面都应包含一个布局小部件,该小部件包含该页面上的其余小部件。
页面布局包含许多可用于使其在 .kv 文件中更有效的内容。
- 边框:当前页面周围边框的宽度,用于在需要时显示上一页/下一页滑动区域。边框是 NumericProperty,默认为 50dp。
- page:当前显示的页面。 Page 是一个 NumericProperty,默认为 0。
- swipe_threshold:用于触发滑动的阈值占小部件大小的百分比。 swipe_threshold 是 NumericProperty,默认为 0.5。
使用 .kv 文件创建页面布局的基本方法
1) import kivy
2) import kivyApp
3) import Pagelayout
4) Set minimum version(optional)
5) create Layout class
6) create App class
      - create build() function
7) Set up .kv file(name same as the App class)
8) return Layout/widget/Class(according to requirement)
9) Run an instance of the class
以下是此代码中 .kv 文件的实现:
1). kv file is just Simply how to create pages in .kv file
2). kv file is how can yo add features like : color, text, image, canvas, swipe_threshold, button in the pages.
方法的实施——
main.py 文件
Python3
## Sample Python application demonstrating the
## working of PageLayout in Kivy using .kv file

##################################################
# import kivy module
import kivy

# base Class of your App inherits from the App class.
# app:always refers to the instance of your application
from kivy.app import App

# this restrict the kivy version i.e
# below this kivy version you cannot
# use the app or software
kivy.require('1.9.0')

# The PageLayout class is used to create
# a simple multi-page layout,
# in a way that allows easy flipping from
# one page to another using borders.
from kivy.uix.pagelayout import PageLayout

# creating the root widget used in .kv file
class PageLayout(PageLayout):
    pass

# creating the App class in which name
#.kv file is to be named PageLayout.kv
class PageLayoutApp(App):
    # defining build()
    def build(self):
        # returning the instance of root class
        return PageLayout()

# creating object of PageLayoutApp() class
plApp = PageLayoutApp()

# run the class
plApp.run()
Python3
# creating simple Pagelayout using.kv

:

    # creating Page 1
    Button:
        text: "Page 1"

    # creating Page 2
    Button:
        text: "Page 2"

    # creating Page 3
    Button:
        text: "Page 3"

    # creating Page 3
    Button:
        text: "Page 4"

    # create Page as may as you want
Python3
# creating simple Pagelayout using.kv

# creating page Layout
:

    # Creating Page 1

    # Using BoxLayout inside PageLayout
    BoxLayout:

        # creating Canvas
        canvas:
            Color:
                rgb: 0, .5, .95, 1
            Rectangle:
                pos: self.pos
                size: self.size

        # Providing orientation to the BoxLayout
        orientation: "vertical"

        # creating Button
        Button:
            text: "Page 1"
            size_hint_y: .4

        # Adding Label to Page 1

        Label:
            markup: True
            text: "GFG[b]:):):):)[/b]"
            color: 0, 0, 0, 1
            outline_color: 0, 0.5, 0.5, 1
            font_size: 30


    # Creating Page 2
    BoxLayout:
        orientation: "vertical"

        canvas:
            Color:
                rgba: 109 / 255., 8 / 255., 57 / 255., 1
            Rectangle:
                pos: self.pos
                size: self.size
        Label:
            markup: True
            text: " Kivy[b]PageLayout[/b]!!!!! "
            color: 0, 0, 0, 1
            outline_color: 0, 0.5, 0.5, 1
            font_size: 30


        Button:
            text: "Page 2"
            size_hint_y: .2


    # Creating Page 3
    BoxLayout:

        orientation: 'vertical'

        canvas:
            Color:
                rgba: 100 / 555., 9 / 155., 37 / 455., 1
            Rectangle:
                pos: self.pos
                size: self.size

        Label:
            text: 'page 3'

        # This Image is directly from the websource
        # By using AsyncImage you can use that
        AsyncImage:
            source: 'http://kivy.org / logos / kivy-logo-black-64.png'


    # Creating Page 4
    Button:
        # Adding image
        # image must be .png
        # and present at the same folder where
        # .kv and main file is saved
        Image:
            source: "download.png"
            center_x: self.parent.center_x
            center_y: self.parent.center_y
1) 简单页面的.kv 文件
Python3
# creating simple Pagelayout using.kv

:

    # creating Page 1
    Button:
        text: "Page 1"

    # creating Page 2
    Button:
        text: "Page 2"

    # creating Page 3
    Button:
        text: "Page 3"

    # creating Page 3
    Button:
        text: "Page 4"

    # create Page as may as you want
输出:
第 1 页图片

第 2 页图片

类似的是第 3 页和第 4 页。
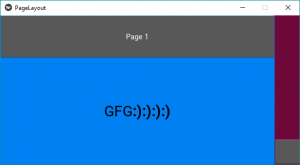
2) .kv 文件,页面上有一些功能
Python3
# creating simple Pagelayout using.kv
# creating page Layout
:
# Creating Page 1
# Using BoxLayout inside PageLayout
BoxLayout:
# creating Canvas
canvas:
Color:
rgb: 0, .5, .95, 1
Rectangle:
pos: self.pos
size: self.size
# Providing orientation to the BoxLayout
orientation: "vertical"
# creating Button
Button:
text: "Page 1"
size_hint_y: .4
# Adding Label to Page 1
Label:
markup: True
text: "GFG[b]:):):):)[/b]"
color: 0, 0, 0, 1
outline_color: 0, 0.5, 0.5, 1
font_size: 30
# Creating Page 2
BoxLayout:
orientation: "vertical"
canvas:
Color:
rgba: 109 / 255., 8 / 255., 57 / 255., 1
Rectangle:
pos: self.pos
size: self.size
Label:
markup: True
text: " Kivy[b]PageLayout[/b]!!!!! "
color: 0, 0, 0, 1
outline_color: 0, 0.5, 0.5, 1
font_size: 30
Button:
text: "Page 2"
size_hint_y: .2
# Creating Page 3
BoxLayout:
orientation: 'vertical'
canvas:
Color:
rgba: 100 / 555., 9 / 155., 37 / 455., 1
Rectangle:
pos: self.pos
size: self.size
Label:
text: 'page 3'
# This Image is directly from the websource
# By using AsyncImage you can use that
AsyncImage:
source: 'http://kivy.org / logos / kivy-logo-black-64.png'
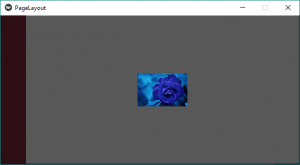
# Creating Page 4
Button:
# Adding image
# image must be .png
# and present at the same folder where
# .kv and main file is saved
Image:
source: "download.png"
center_x: self.parent.center_x
center_y: self.parent.center_y
输出:
第 1 页
第2页

第 3 页

第 4 页
视频输出: