Python|使用 .kv 文件在 Kivy 中使用按钮
Kivy 是Python中一个独立于平台的 GUI 工具。因为它可以在Android、IOS、linux和Windows等平台上运行。它基本上是用来开发Android应用程序的,但这并不意味着它不能在桌面应用程序上使用。
按钮:
Button 是一个具有相关操作的标签,当按钮被按下(或单击/触摸后释放)时触发。我们可以在按钮后面添加功能并设置按钮样式。
在本文中,我们将讨论如何使用.kv文件创建按钮。我们还做了一些按钮样式,还定义了如何将按钮绑定到回调。
要使用按钮,您必须导入:
import kivy.uix.button as ButtonBasic Approach:
1) import kivy
2) import kivyApp
3) import Widget
4) import Button
5) Set minimum version(optional)
6) Create widget class:
1) Arrange a callback
2) Define Callback function
7) create App class
8) create .kv file (name same as the app class):
1) create Widget
2) Create Button
3) Specify requirements
9) return Layout/widget/Class(according to requirement)
10) Run an instance of the class常见问题之一是如何向按钮添加功能。因此,要添加功能,我们使用bind()函数,它将函数绑定到按钮。 bind()创建一个发送到callback()的事件。
对于 Kivy 新用户来说,最常见的问题之一是误解了 bind 方法的工作原理,尤其是在尚未完全形成对函数调用的直觉的Python新用户中。
问题是 bind 方法不知道函数或其参数的存在,它只接收这个函数调用的结果。正如在给定代码中按下按钮时,它会在函数回调中打印“按下按钮”def。
使用按钮操作和样式实现上述方法的代码。
# import kivy module
import kivy

# this restrict the kivy version i.e
# below this kivy version you cannot
# use the app or software
kivy.require("1.9.1")

# base Class of your App inherits from the App class.
# app:always refers to the instance of your application
from kivy.app import App

# creates the button in kivy
# if not imported shows the error
from kivy.uix.button import Button

# Widgets are elements of a graphical user
# interface that form part of the User Experience.
from kivy.uix.widget import Widget


# Creating a widget class
# through this we add button
# the commands of the class is in .kv file
class Button_Widget(Widget):

    def __init__(self, **kwargs):

        # Python super() function allows us to
        # refer to the parent class explicitly.

        super(Button_Widget, self).__init__(**kwargs)

        # creating Button
        btn1 = Button(text ='Hello World 1', font_size ="15sp",
                   background_color =(1, 1, 1, 1),
                   color =(1, 1, 1, 1),
                   # size =(32, 32),
                   # size_hint =(.2, .2),
                   pos =(300, 250))

        # Arranging a callback to a button using
        # bind() function in kivy.
        btn1.bind(on_press = self.callback)
        self.add_widget(btn1)

    # callback function tells when button pressed
    # It tells the state and instance of button.
    def callback(self, instance):
        print("Button is pressed")
        print('The button % s state is <%s>' % (instance, instance.state))

# create App class
class ButtonApp(App):

    def build(self):
        # return the widget
        return Button_Widget()

# run the App
if __name__ == "__main__":
    ButtonApp().run()
.kv 文件实现方法
# .kv file of the main.py code
# Adding Button widget

:

    # defining Button size
    size: 100, 100

    # creating Canvas
    canvas.before:
        Color:
            rgba: 0.72, 0.62, 0.92, 1
        Rectangle:
            pos: self.pos
            size: self.size
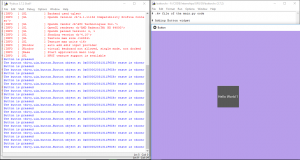
输出: 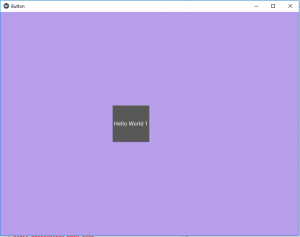
显示按钮动作图片:即单击按钮,您将获得此输出